
My fave button folks over at ButtonLovers.com have done it again!!! They came up with the smartest new kits- The Button Artist sets! I was SO excited to try these out, since it is right up my alley!
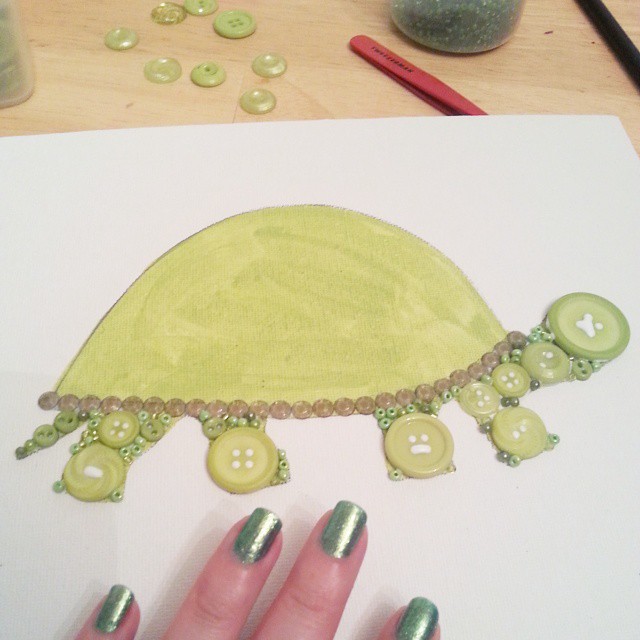
I was in a turtley kind of mood (you know how that happens), so this is what I created:
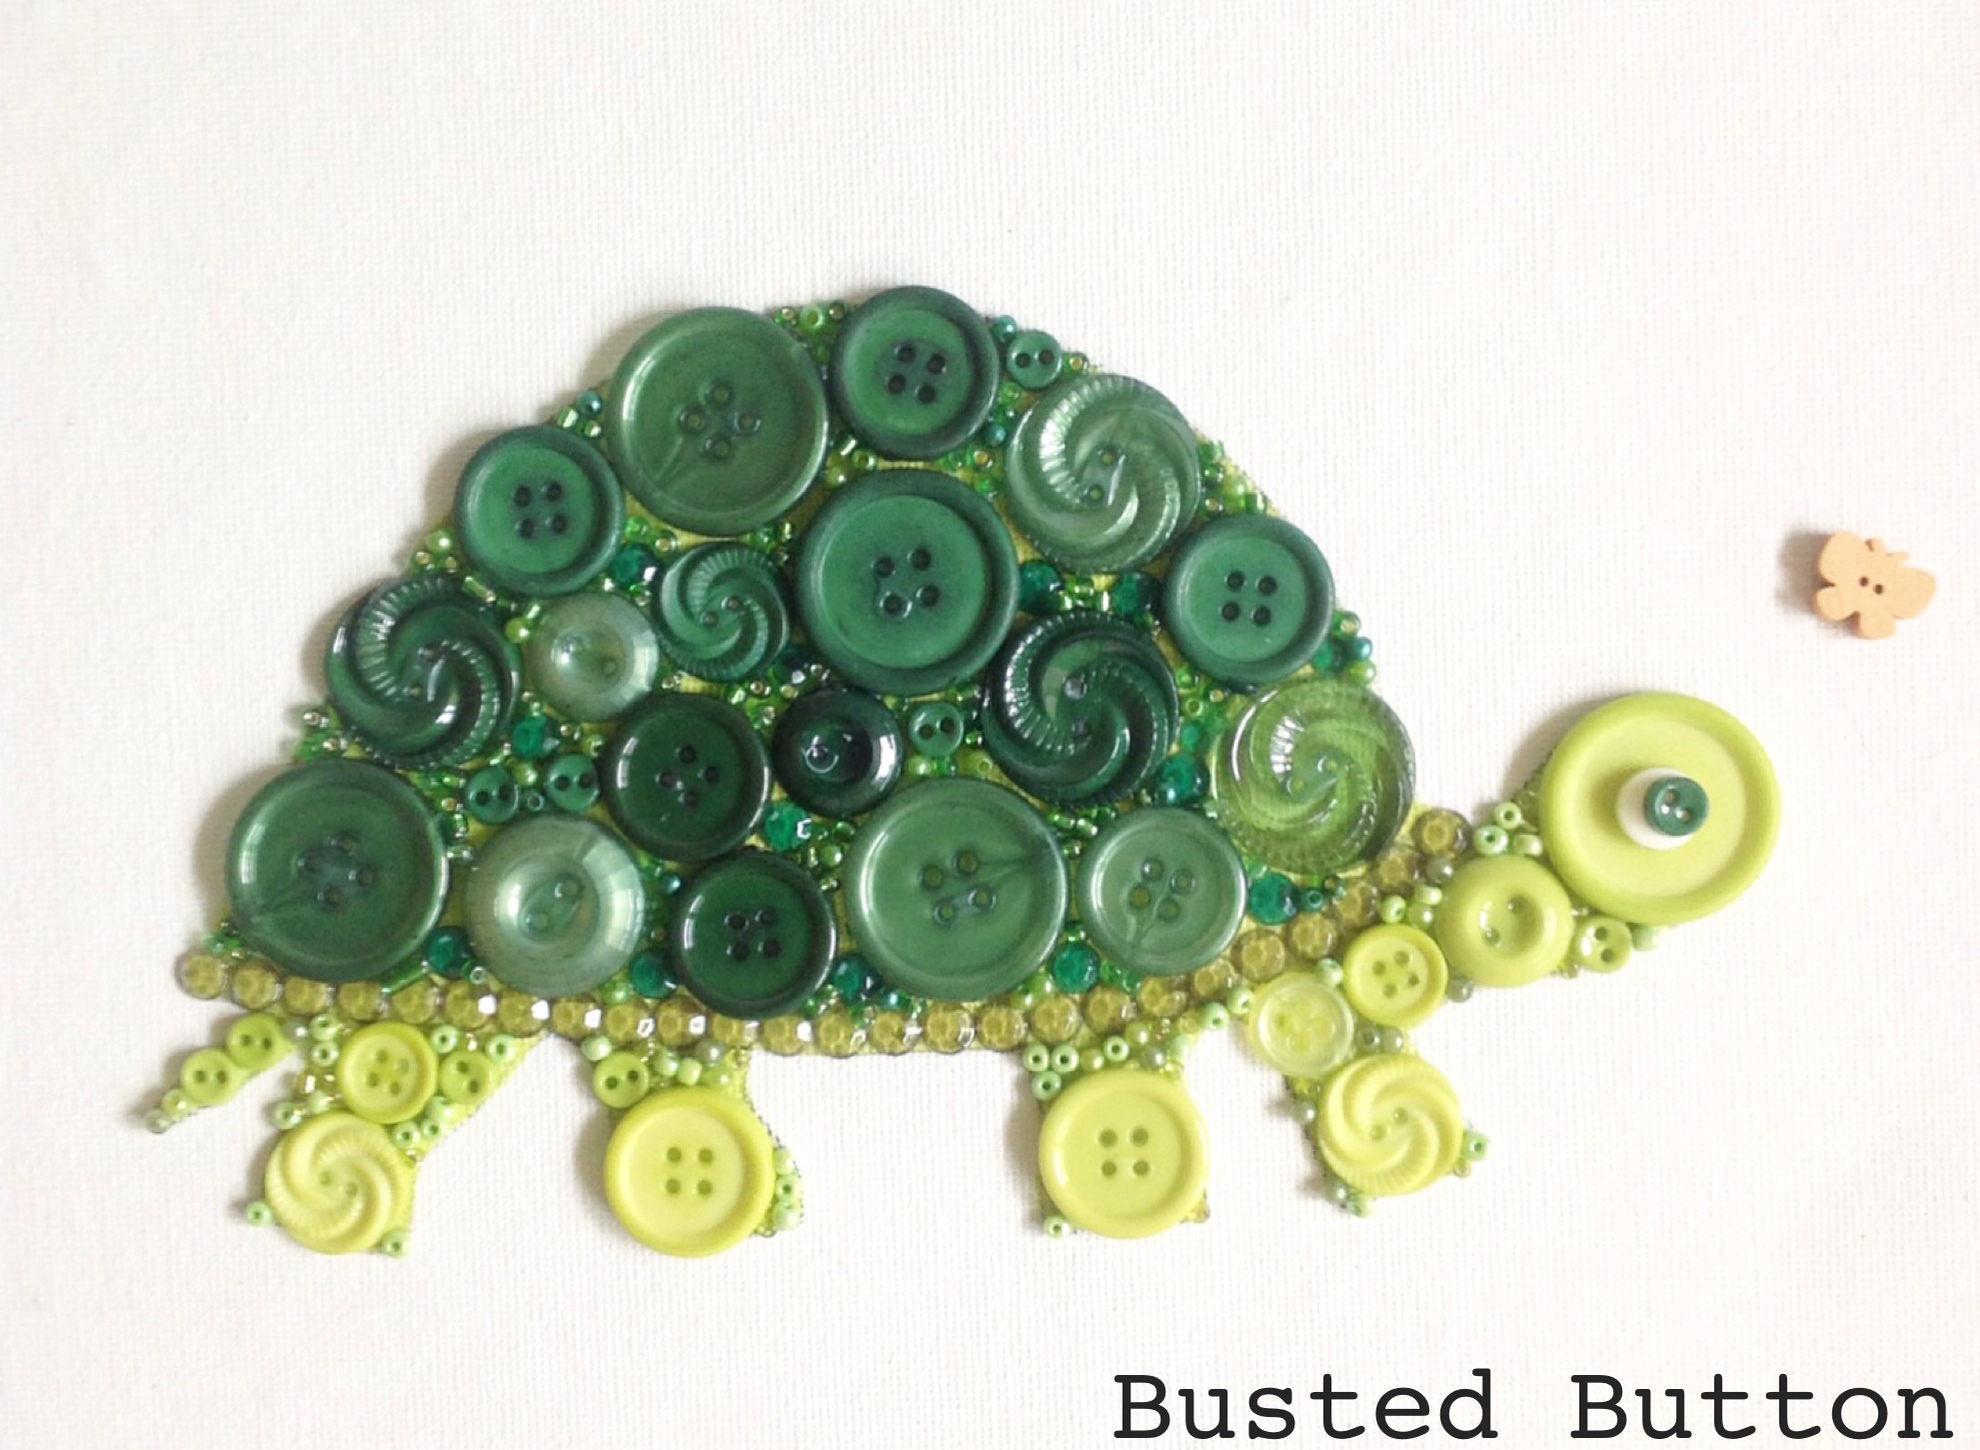 Nifty right? As you can see, it’s a bit different than my usual button critters, because instead of layering buttons to cover the design, I actually used the tiny buttons, beads and rhinestones that come with these kits to fill in all the spaces!
It was super fun to try something new, and I love how it turned out.
Here is how I did it:
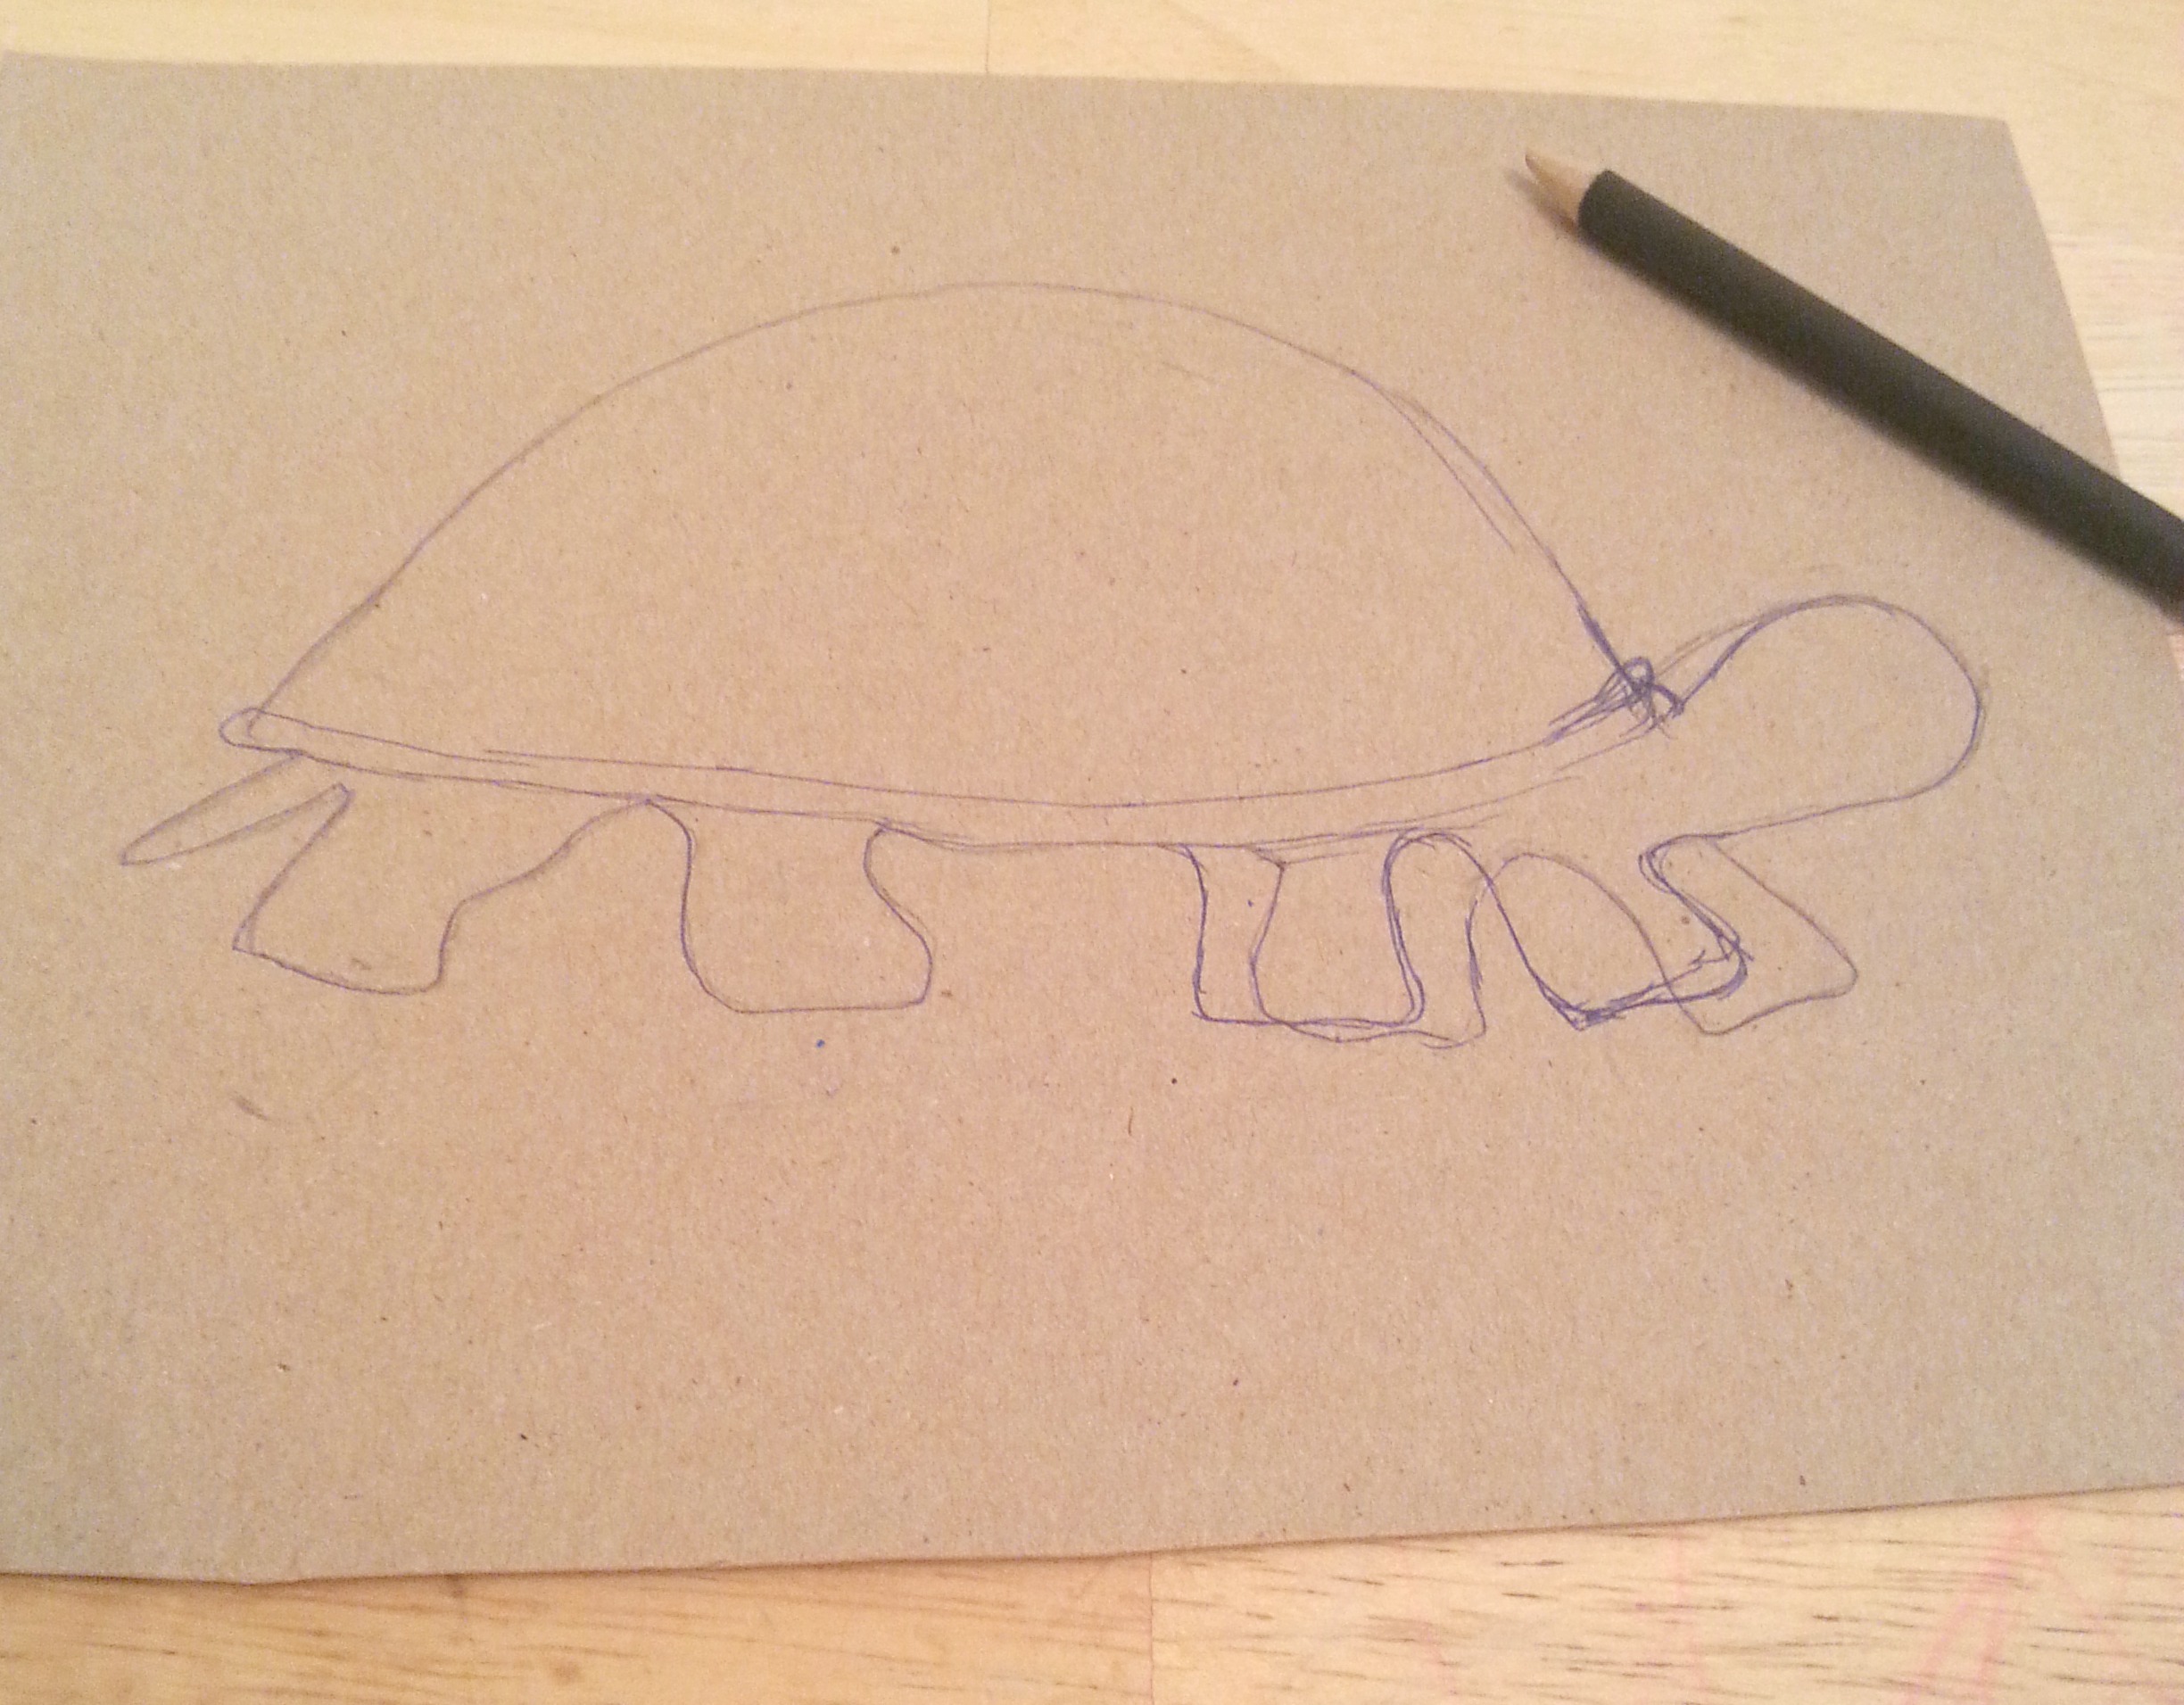
First I sketched a turtle on the back of some high-quality cereal box cardboard. All class and no sass around here, folks 😉

Next I cut out the template with a super sharp exacto knife. And listen to my tattoo!!! Danger! Get an adult to help you with this step!
You can also skip this step and just find a random image to transfer to your surface, but I wanted to make a template that I could use again and again!
I transferred my image onto an 8×10″ canvas board, but you could use heavy cardboard, wood, or anything sturdy.
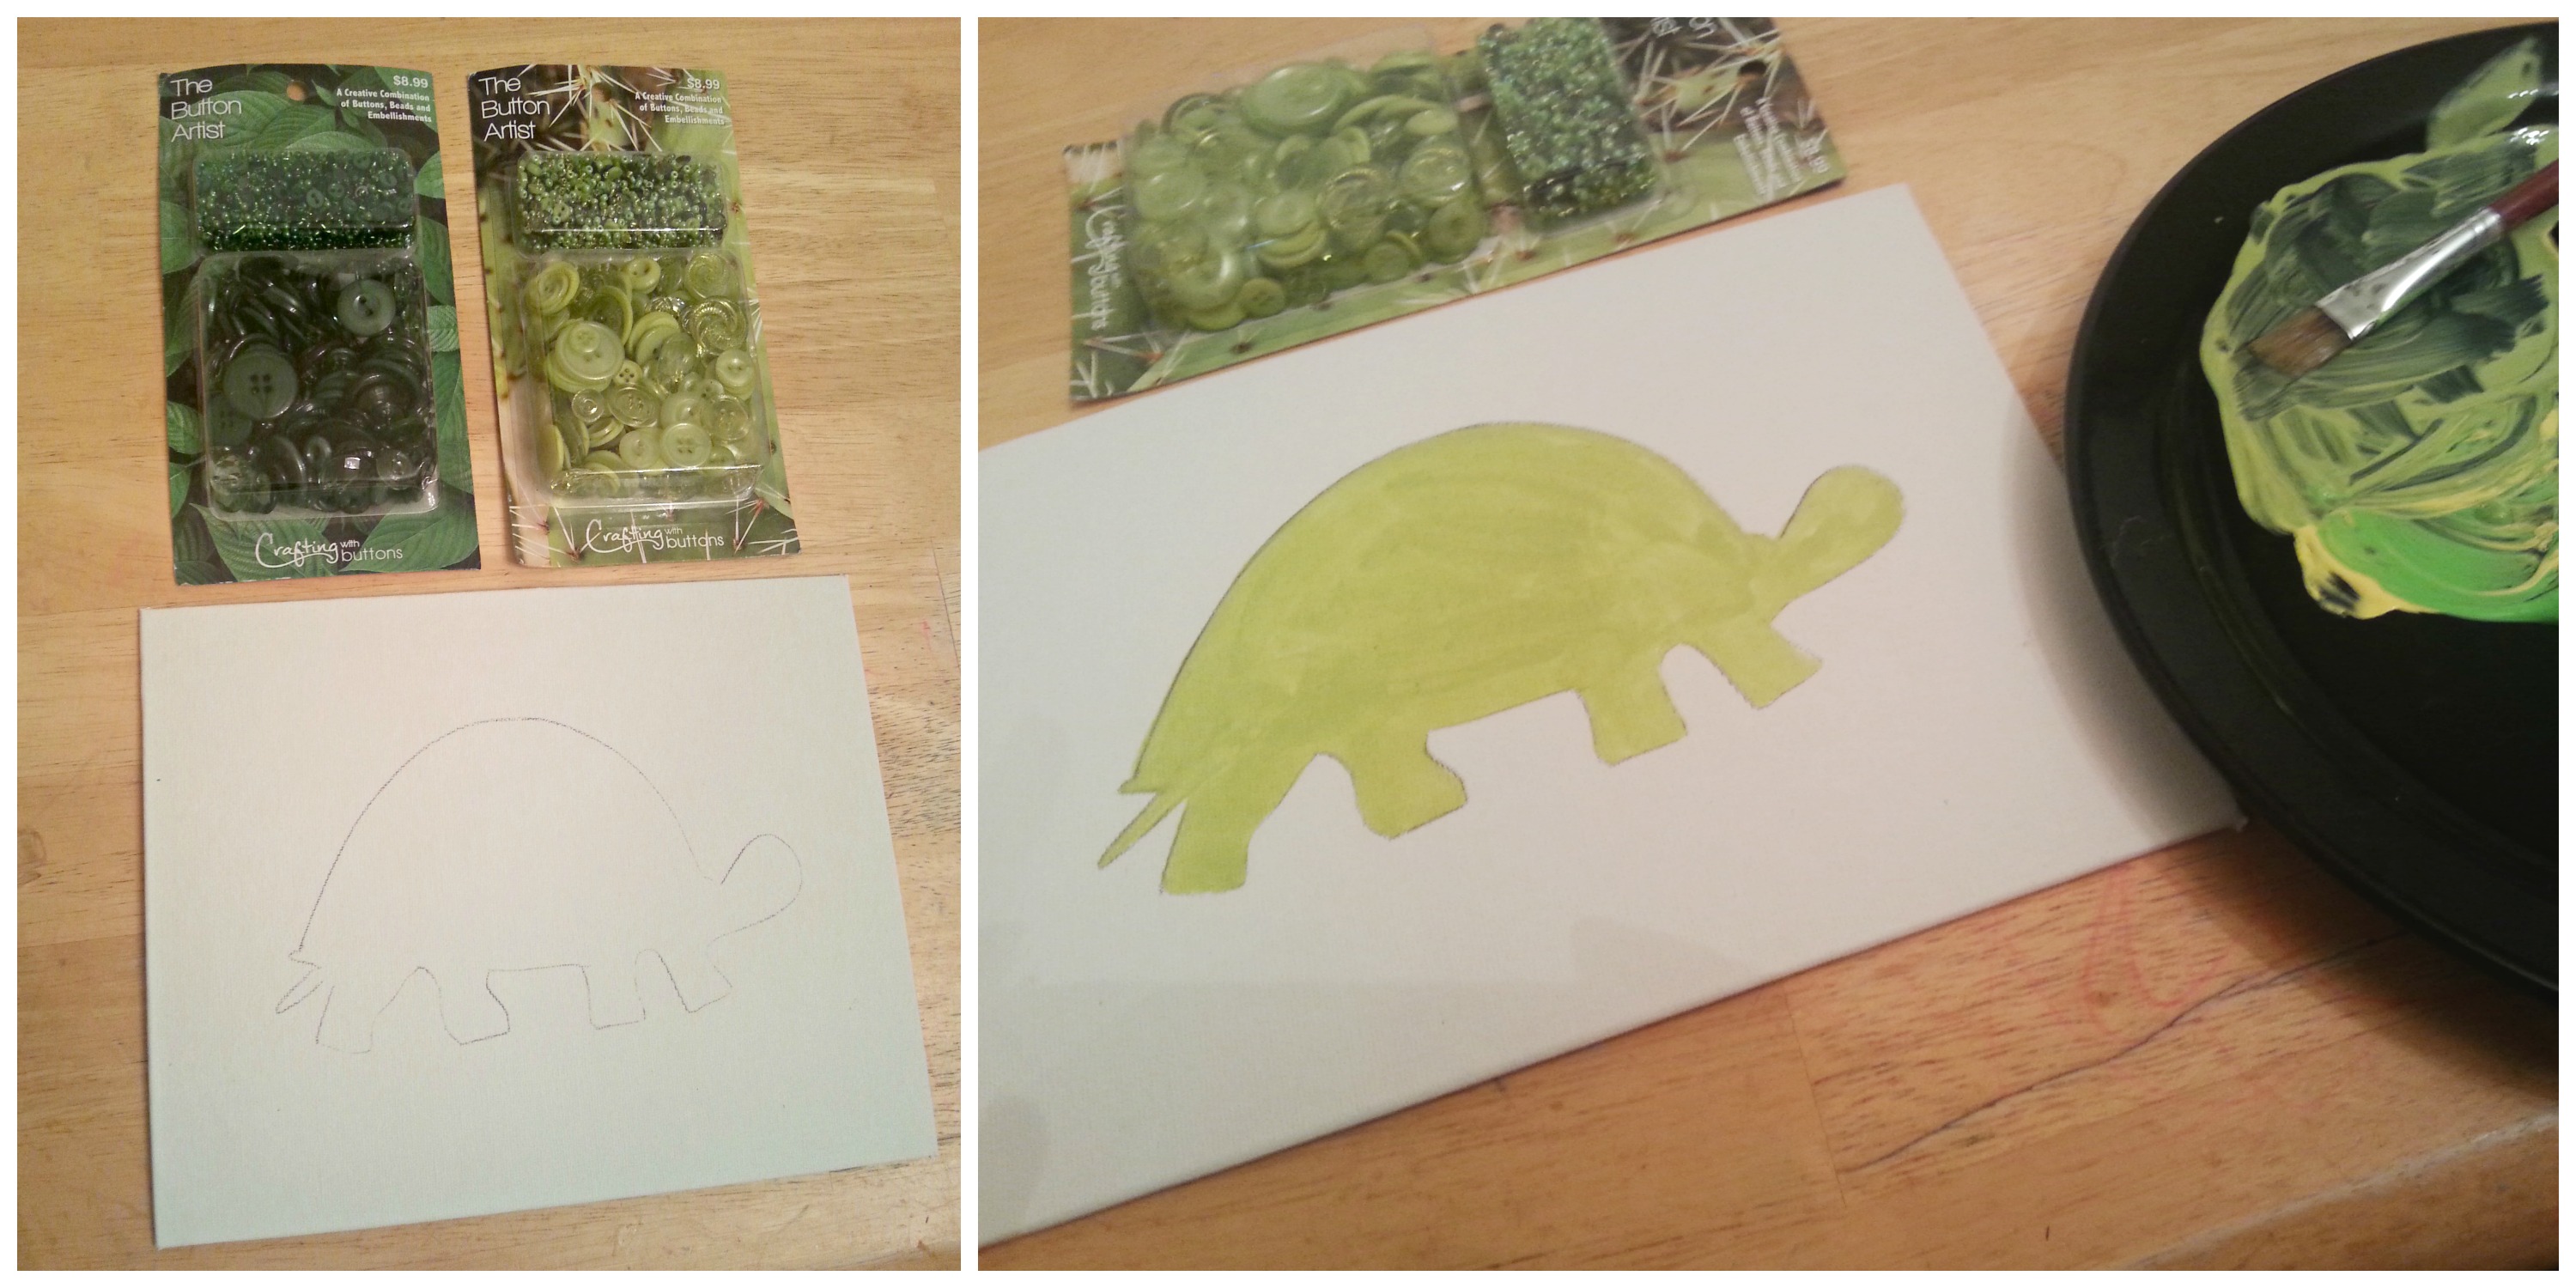 Before you fill in the turtle with some craft paint, grab your beautiful button/bead/bling sets so you can mix up a perfect colour! After your paint is dry, you are ready to get gluing! YAY! The fun part 😀
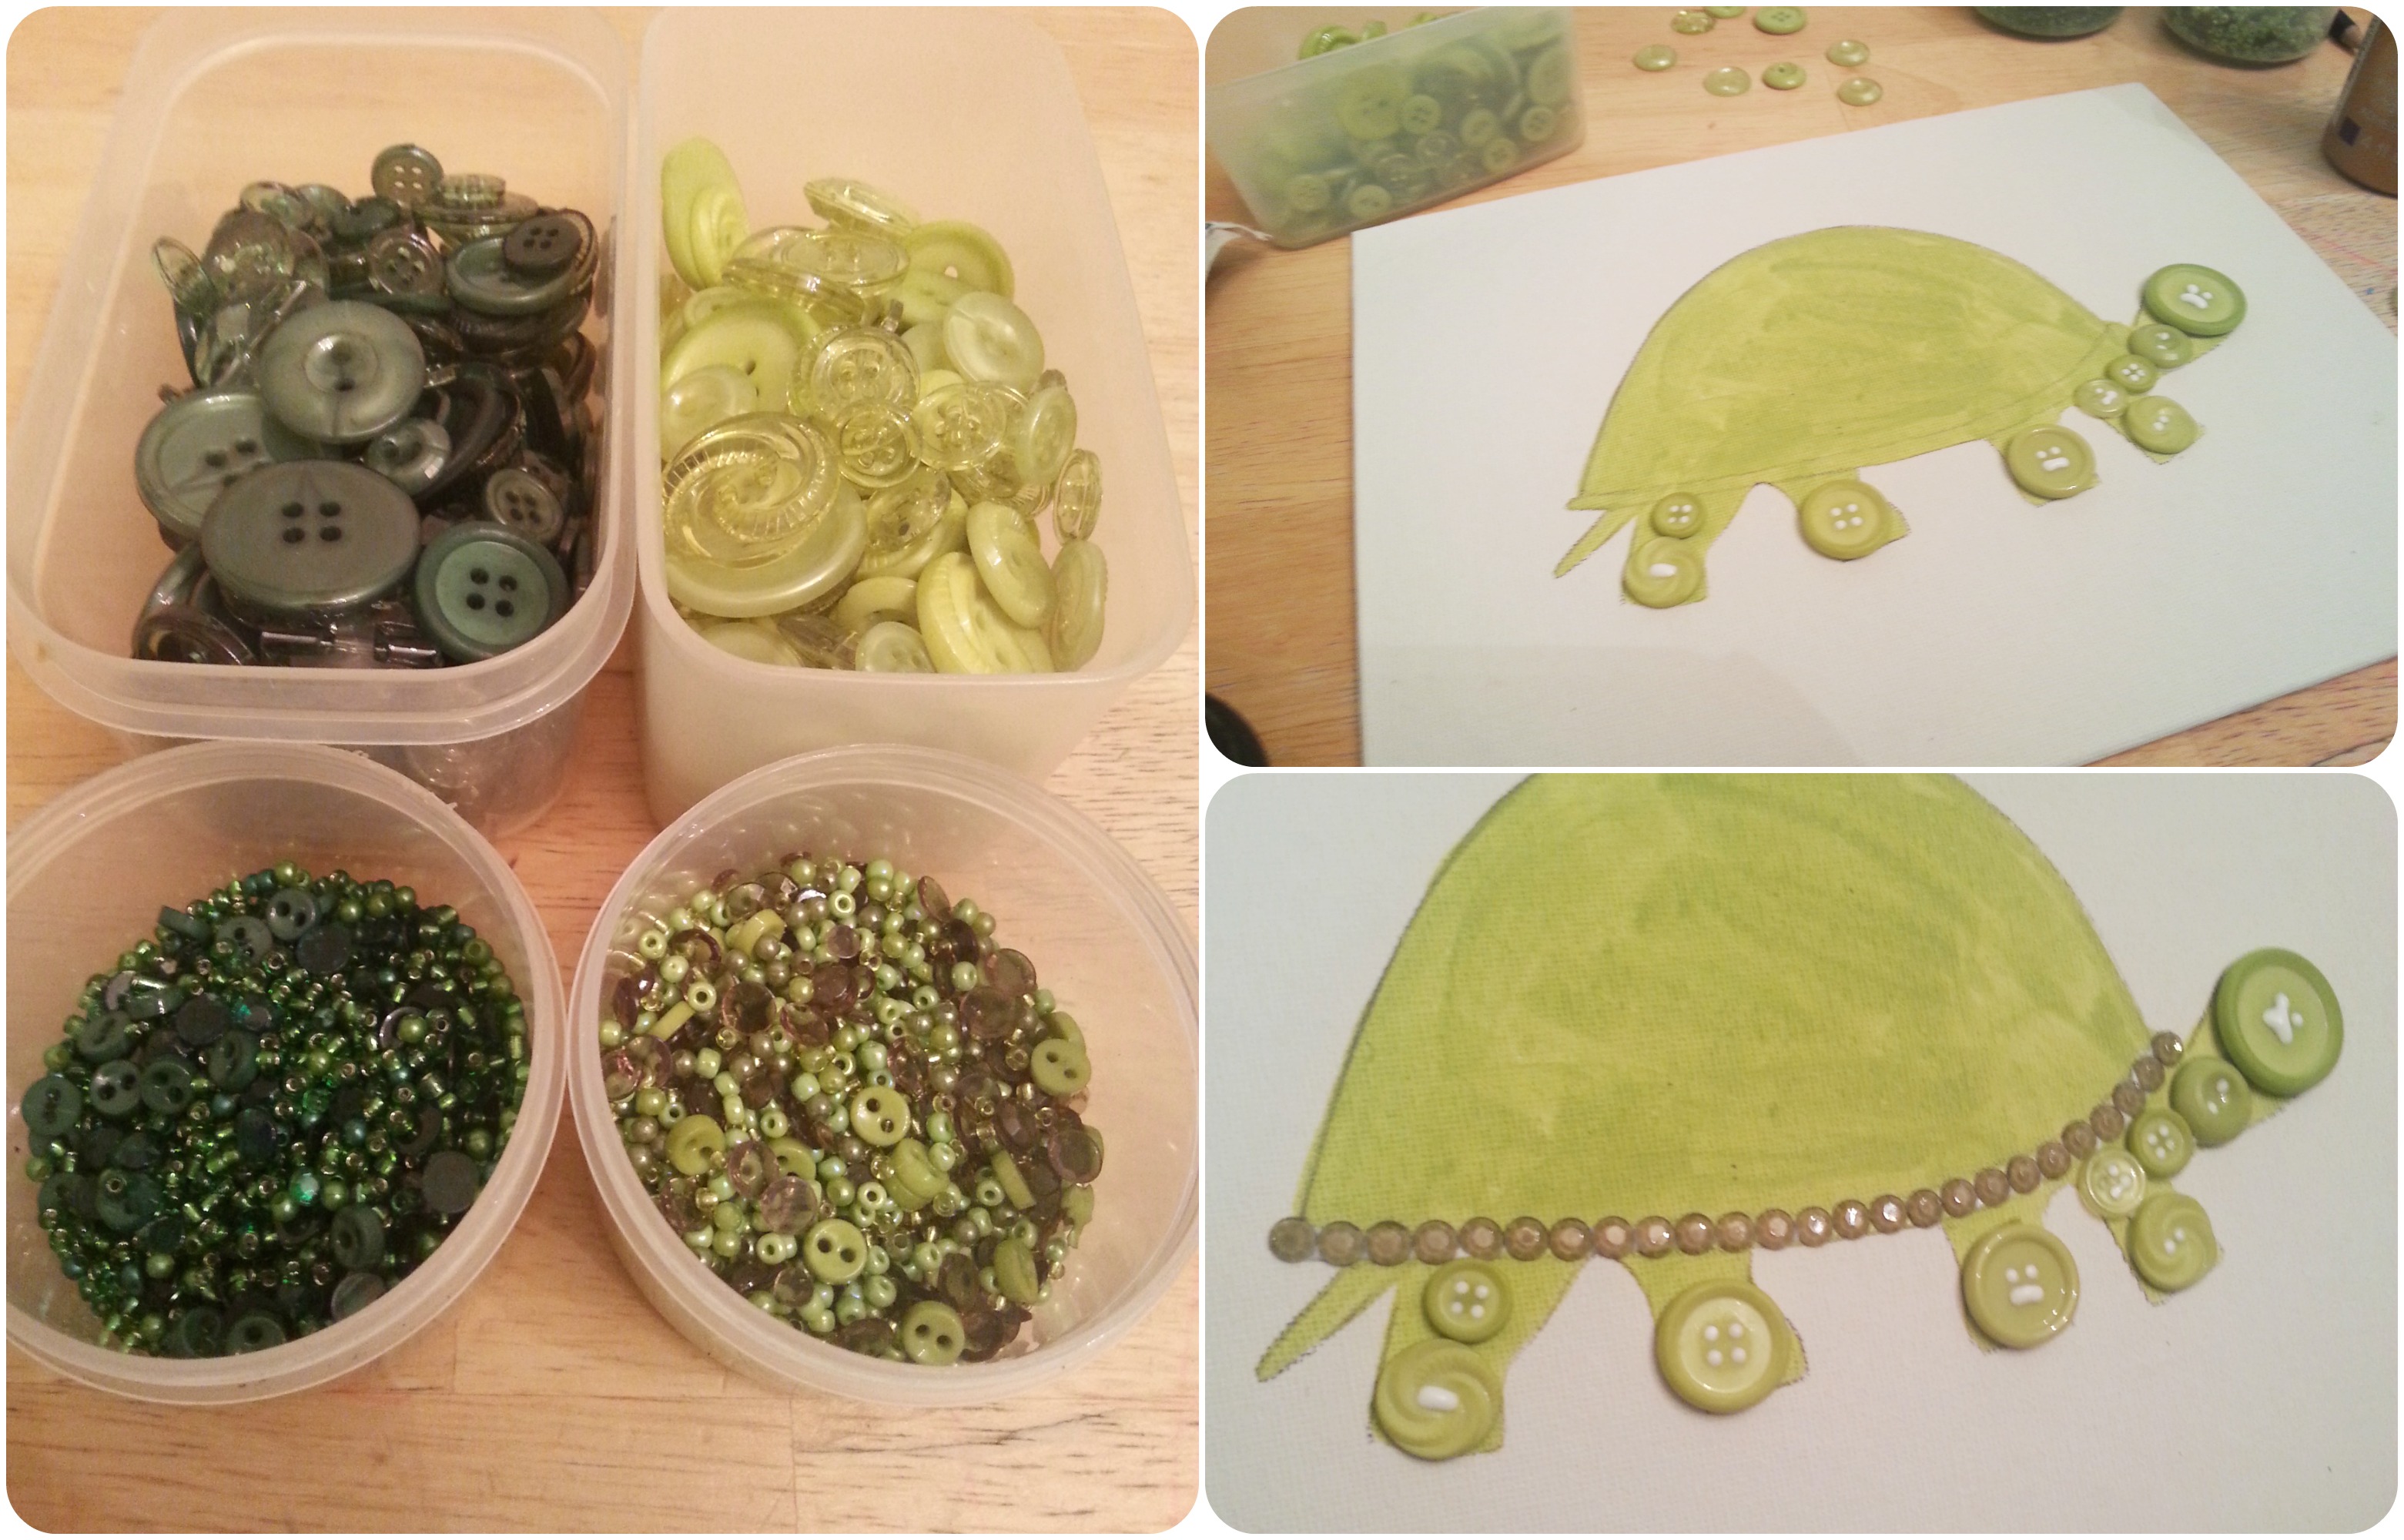 I dumped each button set into containers to keep everything organized.
Sorry about the bad photos- I feel like the colours and amounts of materials aren’t being properly represented here- I guess I should try harder to craft in the daylight versus my midnight craft sessions I am so inclined to indulge in haha! Seriously though, with 5 crazy kids running around in the day, what’s a button artist to do? At least I snapped a pic of the final product in good light 🙂
I used some white craft glue to put this together- normally I use hot glue, because it creates more of a permanent bond to the canvas board behind it, but since I was using some tiny beads and rhinestones here, I wanted to make sure I used clear-drying glue, to keep it looking clean. This glue still holds everything on fine, it’s just not going to win in an boxing match against the hot-glued piece 😉
OH MY GOODNESS I forgot to mention a vital step:
Turtle manicure!
After you paint your nails to match your buttons, grab your glue, and working in sections, start placing your buttons etc. Begin with the large buttons, then add the smaller buttons, and finally the beads and rhinestones to fill in the gaps.
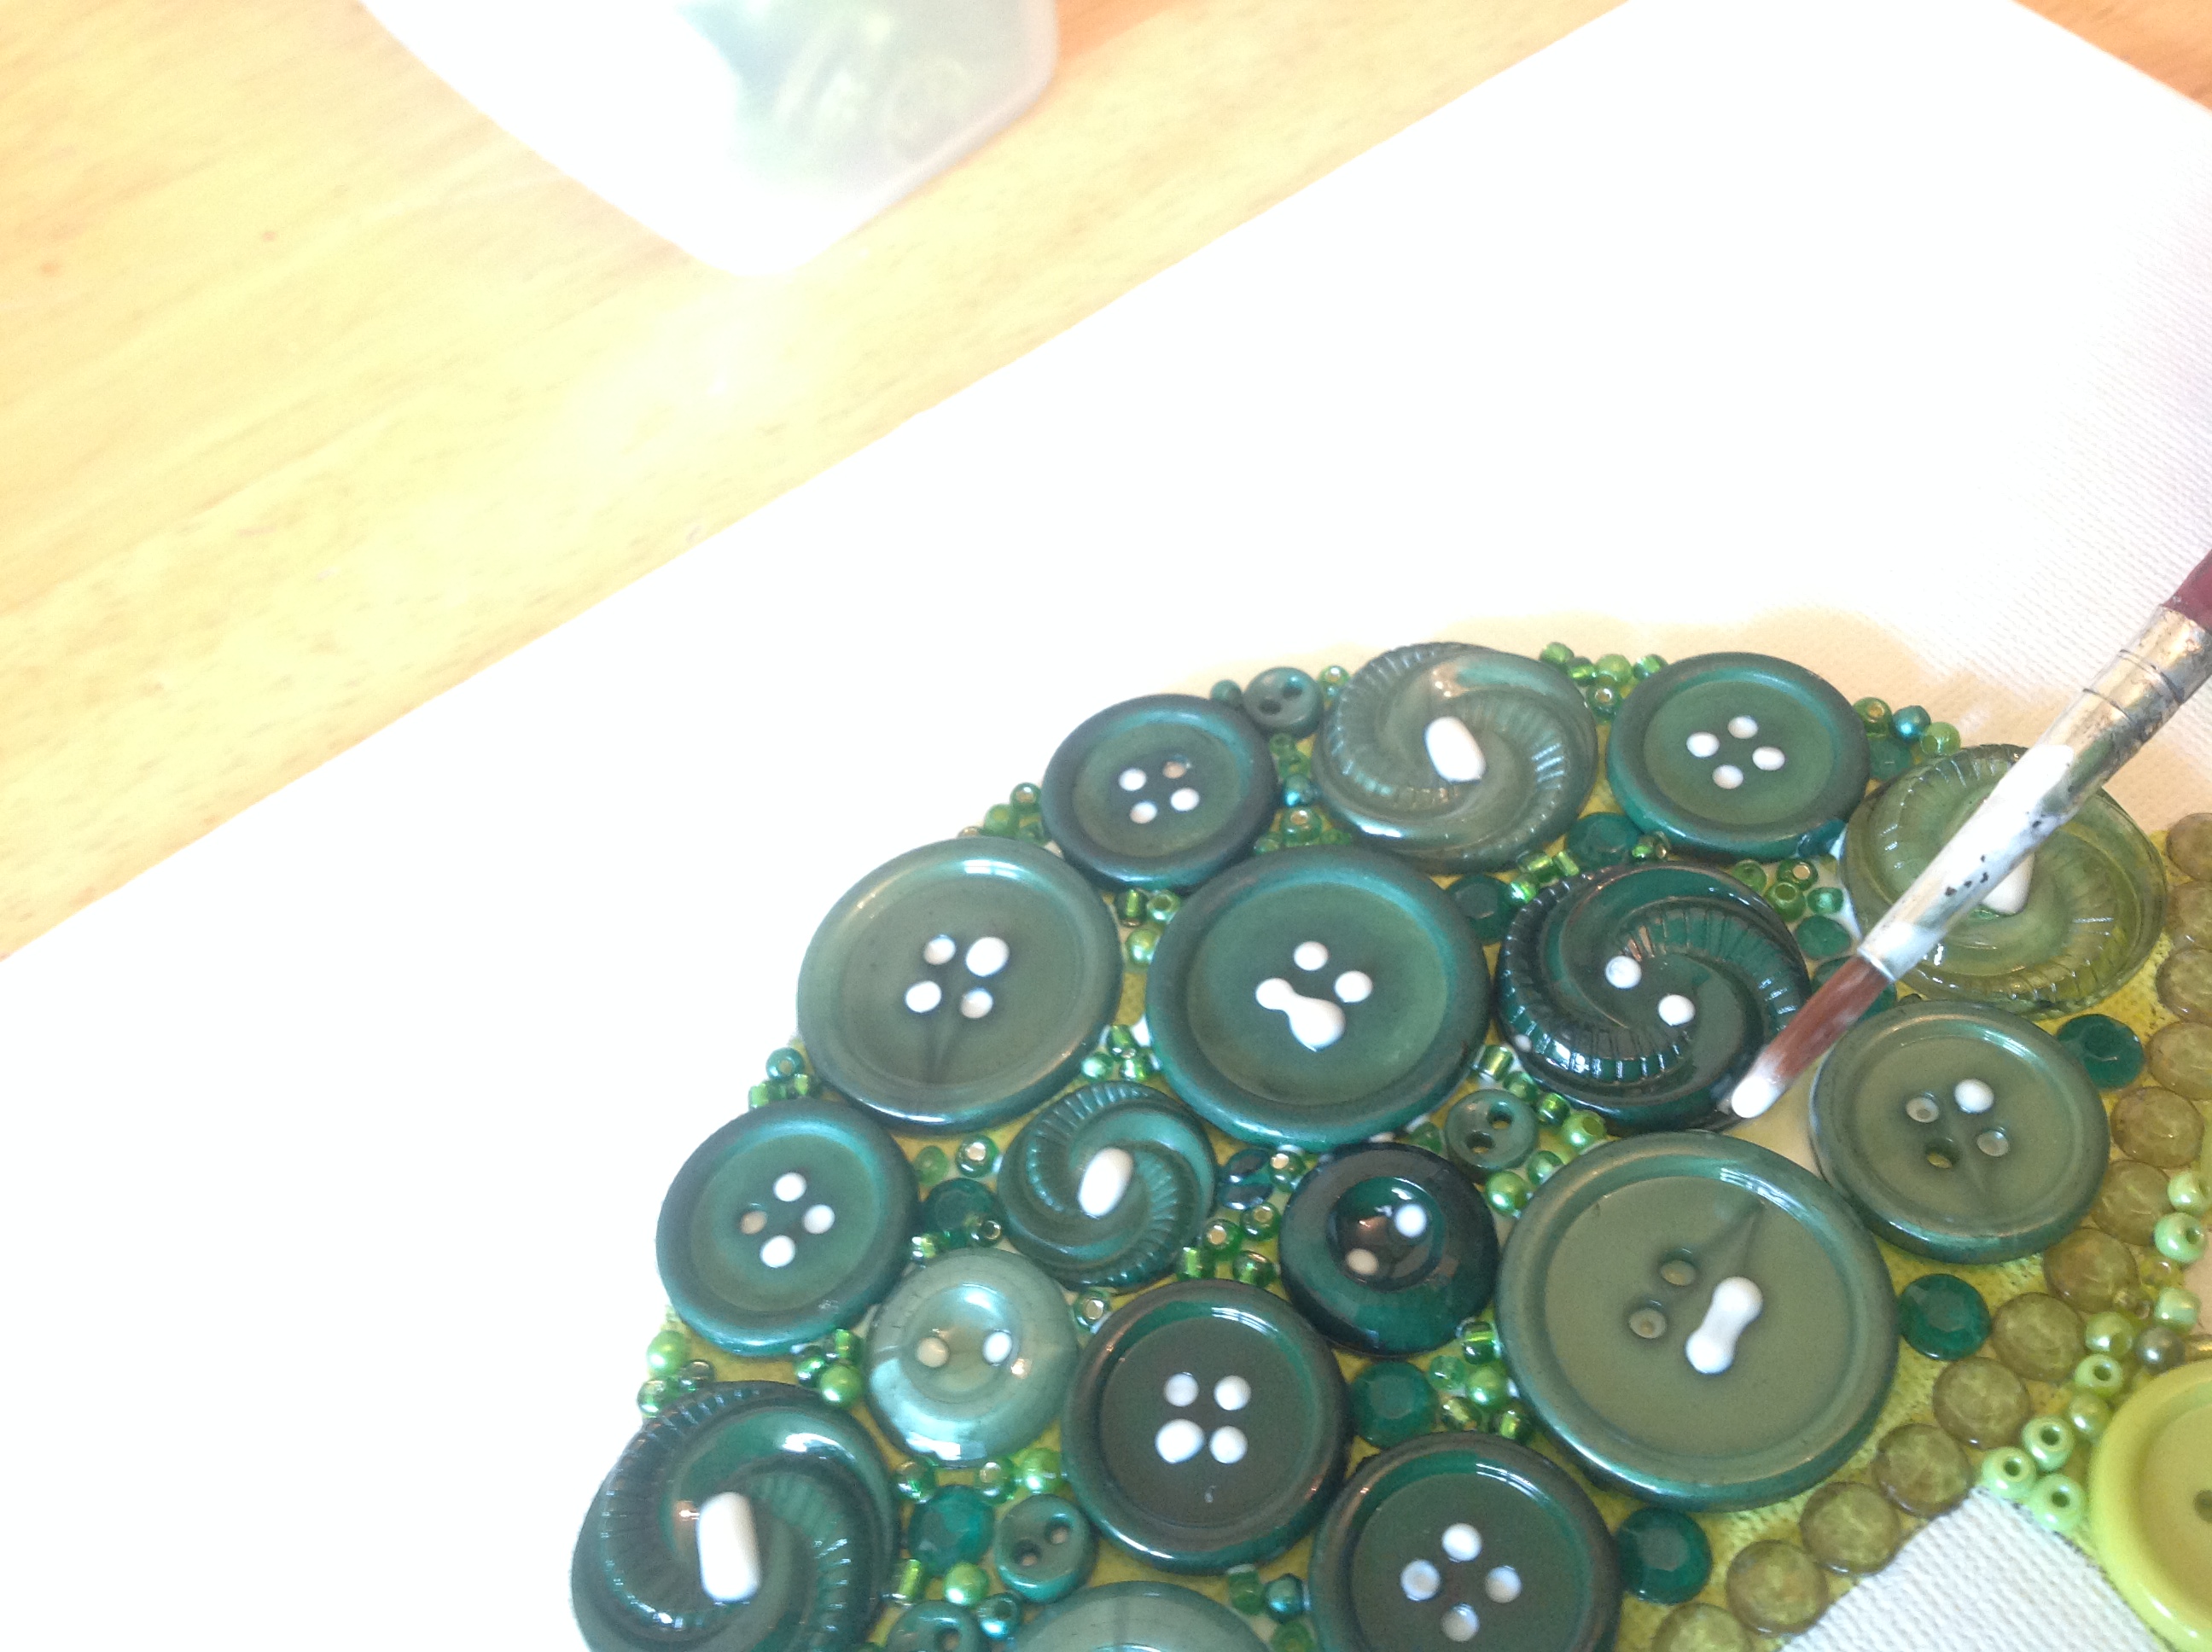 Here is another sub-standard photo to help explain the process! When gluing the beads into the tight spaces, I just used a paint brush to add a thick layer to one space at a time, then I carefully grabbed a pinch of beads and dropped them into the glue, adjusting a bit!
 Remember the glue dries clear- and while it’s drying, make sure to keep it sitting flat! I let it dry for a good few hours. Of course I needed to add some details- cute button eyes and a wooden button butterfly to keep Mr. Turtle company.
I am super happy with how this design turned out, and with how FUN it was to use these new crafty kits! I have a lot more ideas planned, and I only used less than a fifth of each pack of buttons etc!! So they are a great deal too- Thanks again Button Lovers, don’t forget to pick up your own The Button Artist sets here.
Well it is Midnight, and I need to get to bed- I have a big day tomorrow- I am starting training with an incredible Autism Support Dog, who was recently matched with my 9 year old son! Asher has very high needs, and this dog is basically an incredible unicorn who will keep Asher safe and comforted in ways that he has never been able to experience before. Our lives are about to become more manageable and the world is about to become more accessible! If you want to learn more, check out Autism Support Dogs HERE 🙂
Happy Buttoning, Beading, Blinging andddddd reading up on majestic unicorn doggies 🙂
~Dot


Pingback: Аппликация из пуговиц Черепаха | Мастер Поделок
Pingback: 60+ Free Craft Tutorials for Button Lovers | Underground Crafter