Button Tree Bag

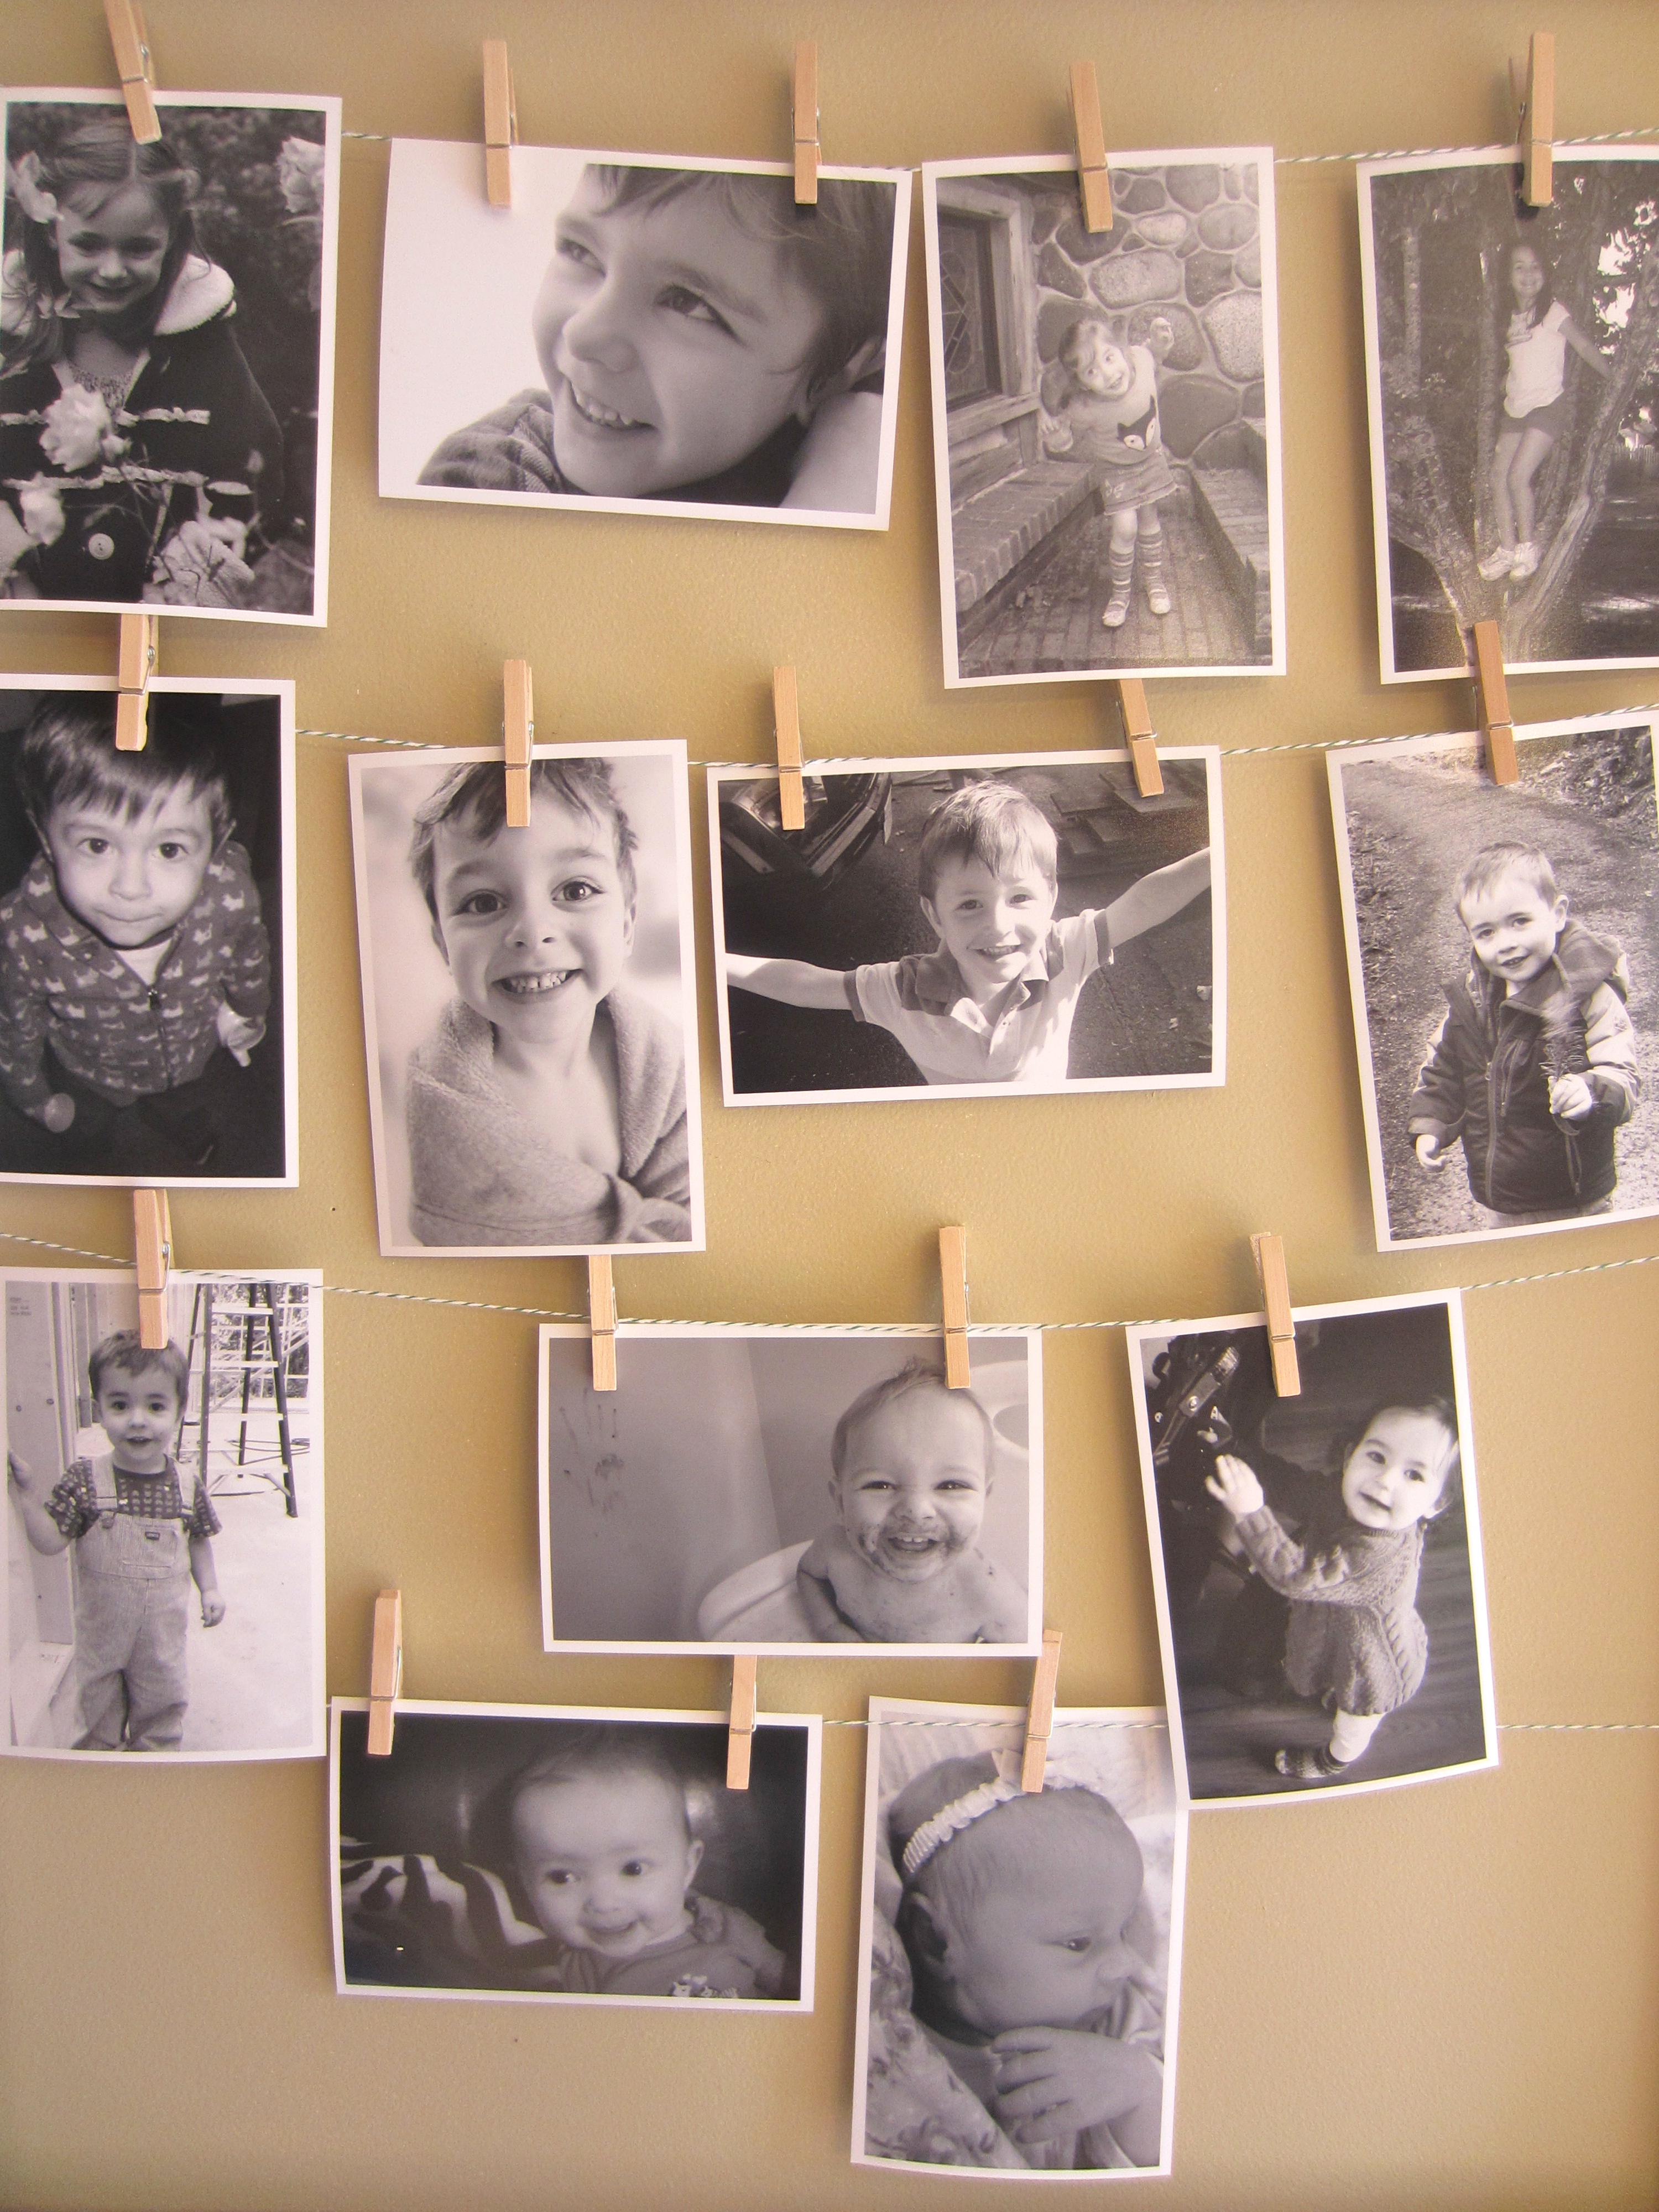
Ohmagoodness! I haven’t blogged for two months! EEK! Bad blogger. I suppose with the crazy autistic kiddos and the newborn with kidney problems it’s just been easier to share my brain spillage with you on Facebook and Instagram.

P.S. I’m addicted to Instagram, and if you’d like to see sneak peeks and progress pics of my projects, ridiculous hashtags, or if you are interested in observing what I eat, be sure to follow me.

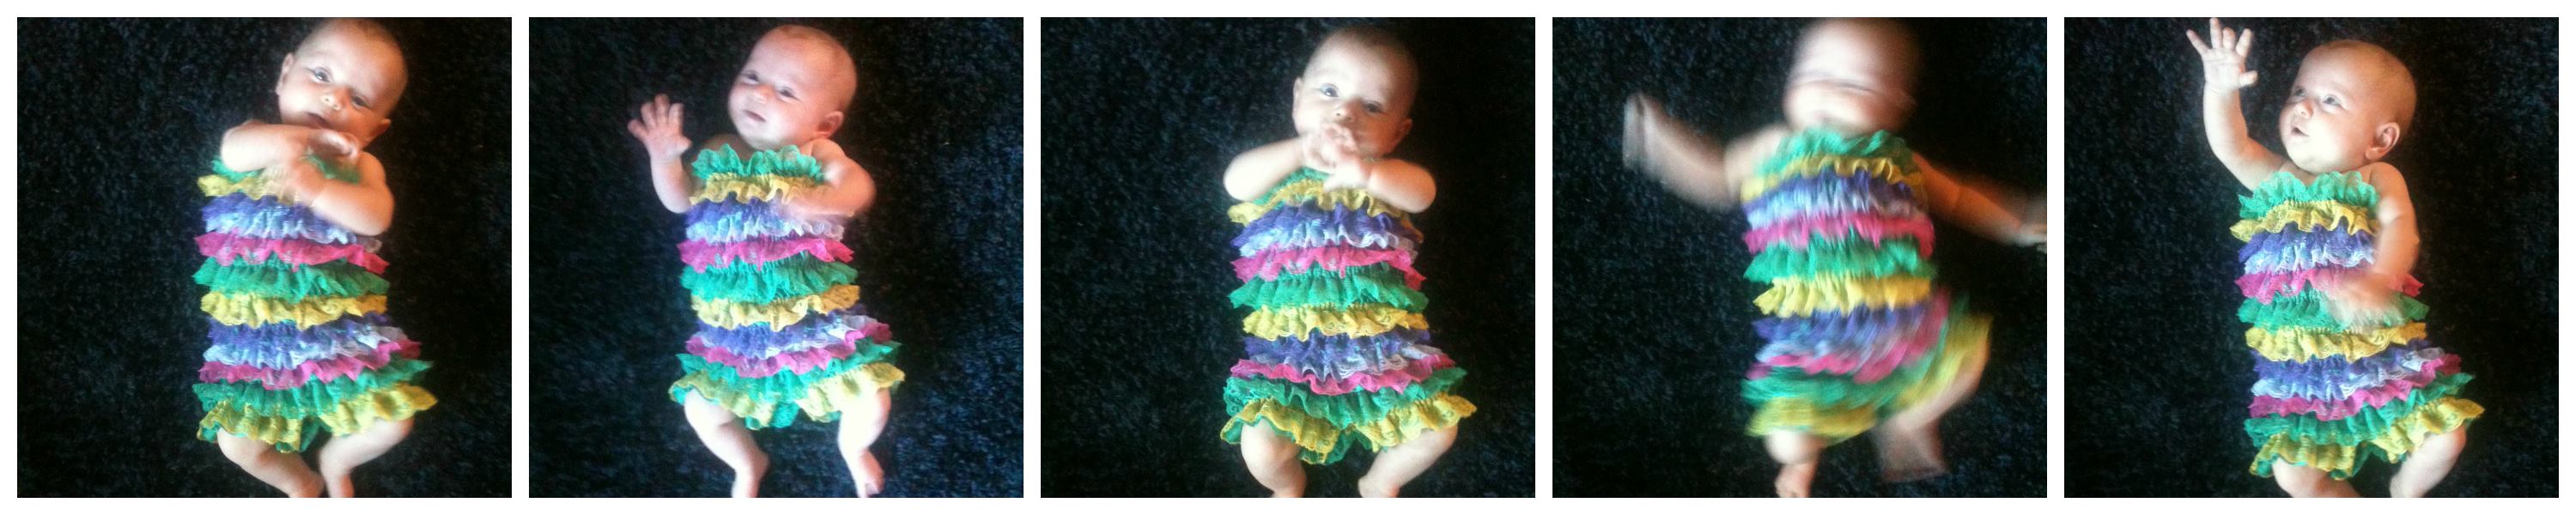
Oh, and my kids are doing fine, in case I worried you. Here is a photo of Flora dancing to Salt N Pepa’s ‘Push It’ to prove it to you:

966138_348911751902136_1082463569_o

It feels good to be back on here, so I figured I’d come back with a bang:

IMG_1423

Oh, yes I did!

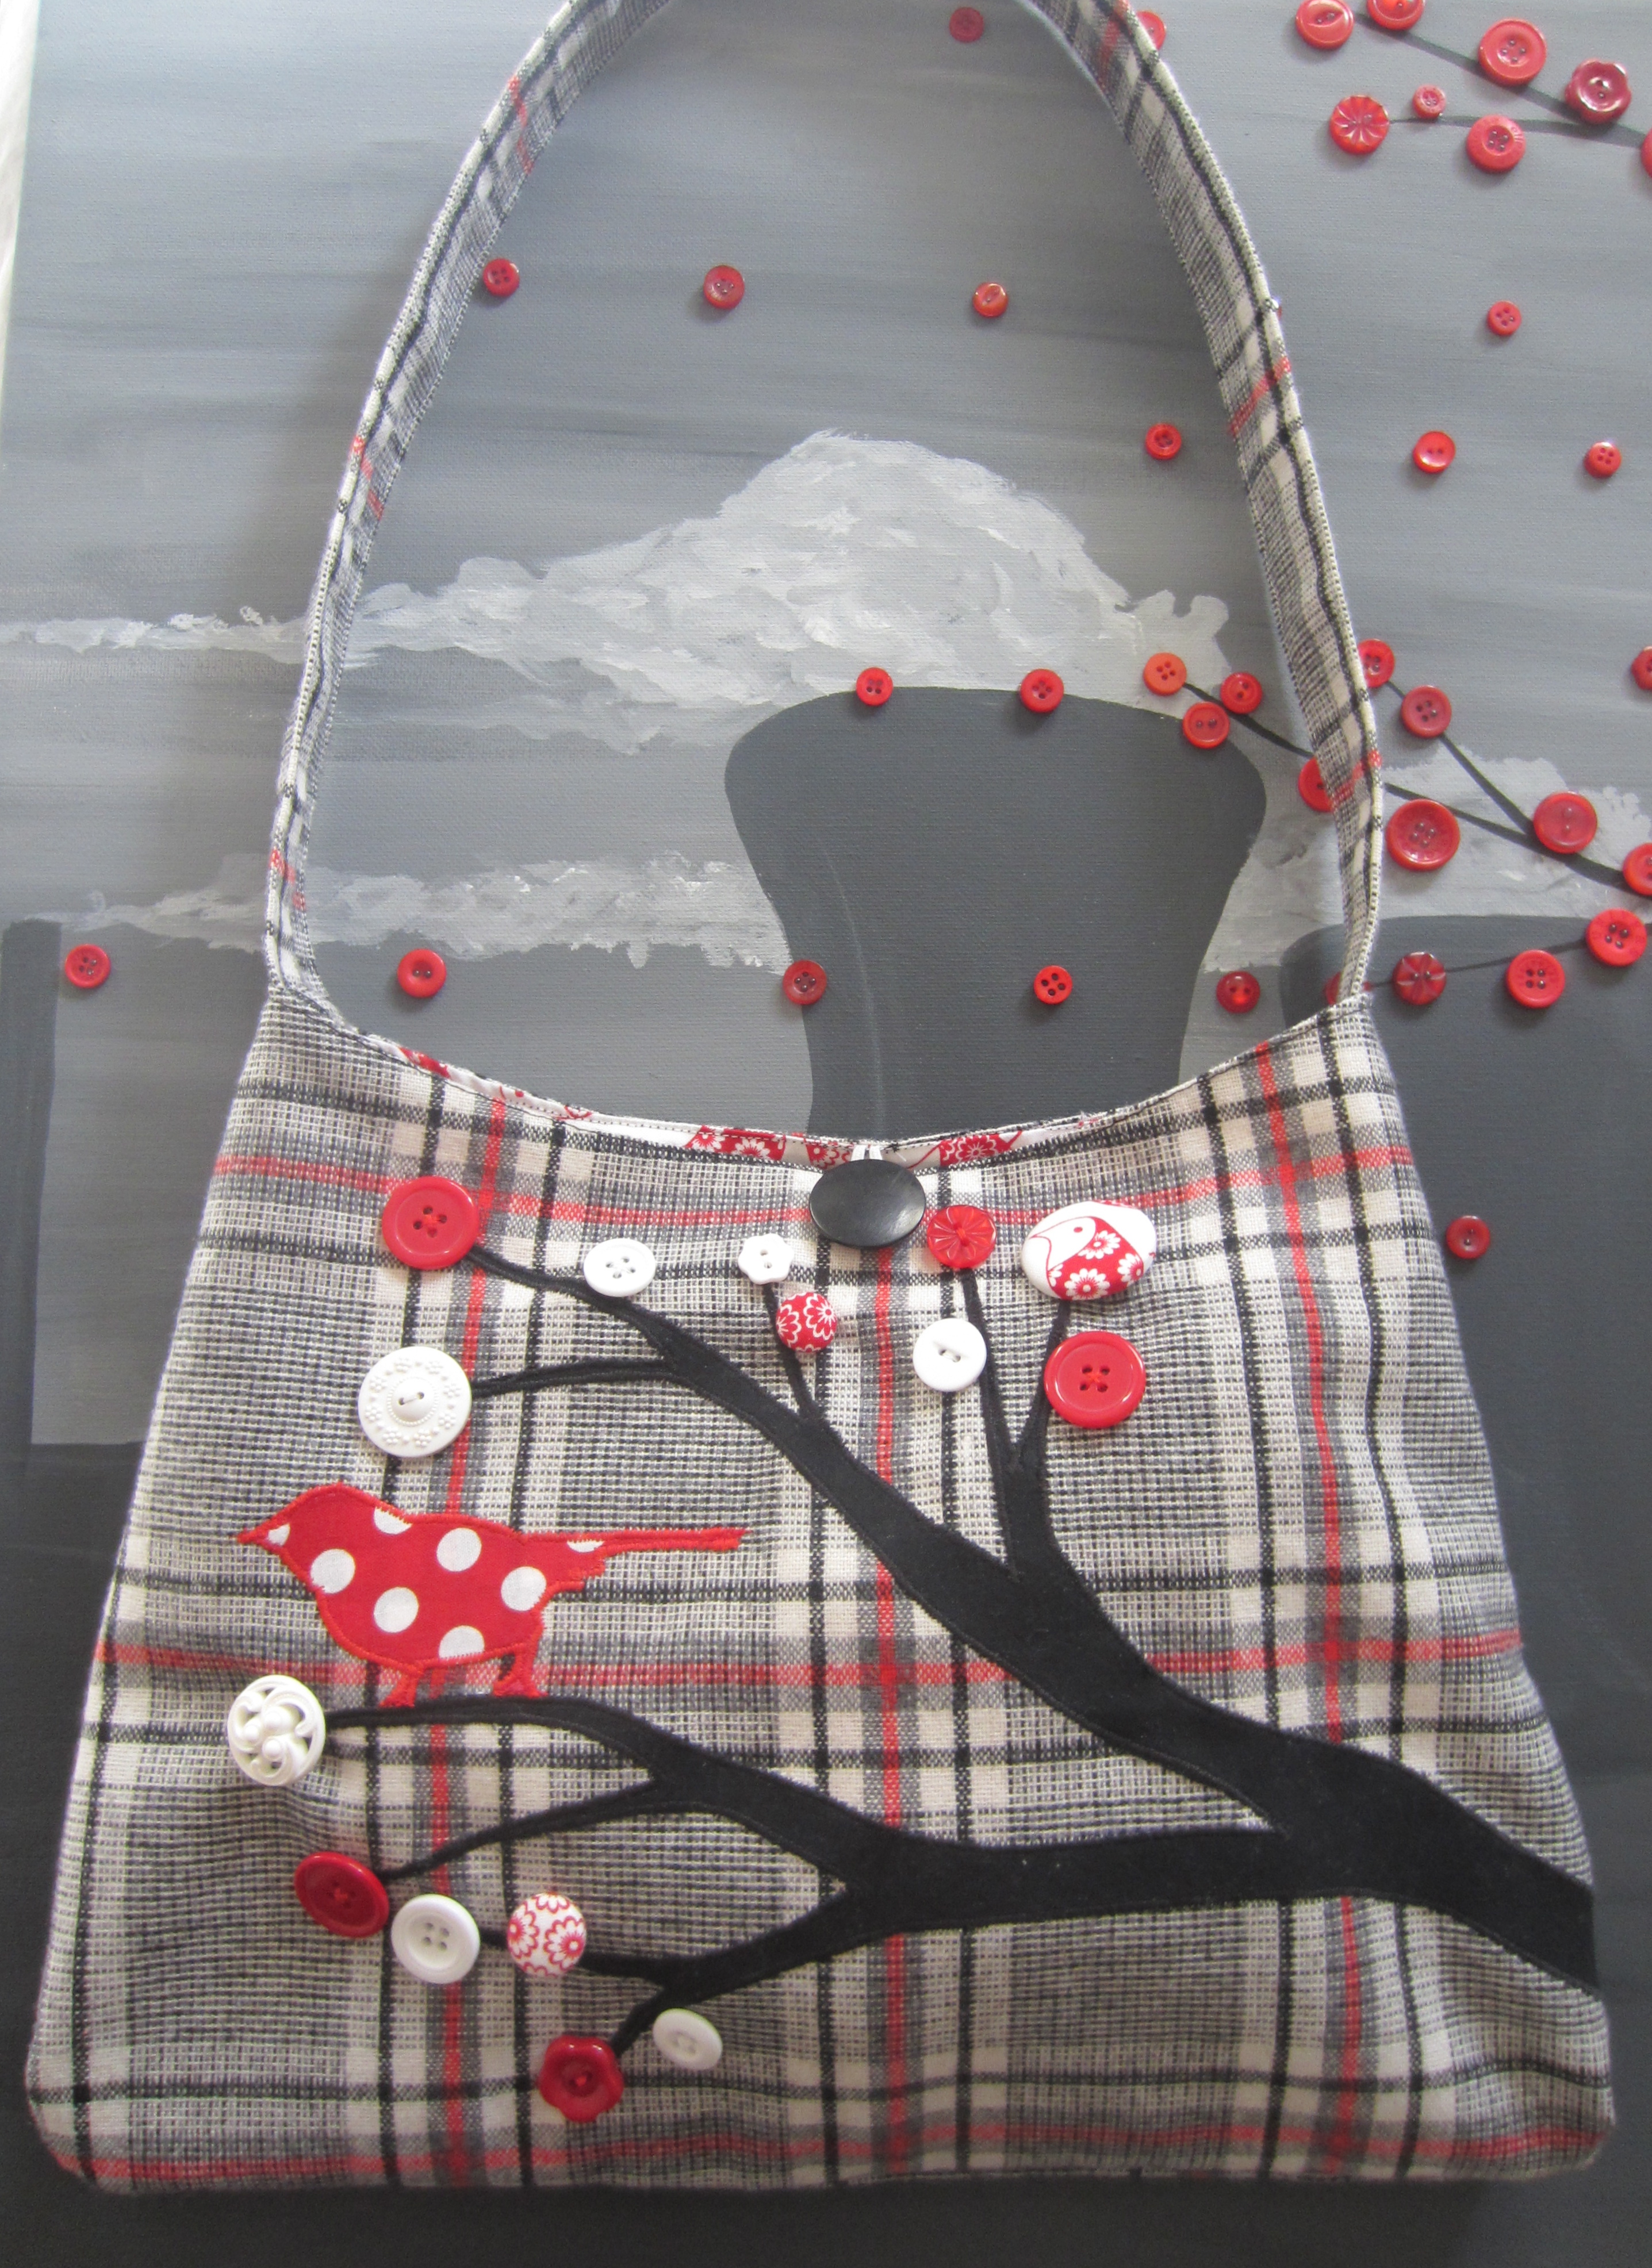
I made a button tree purse! FINALLY, hey? I’ve been wanting to make one of these since I did my very first button painting, and I’ve gotten dozens of requsts, but something held me back…

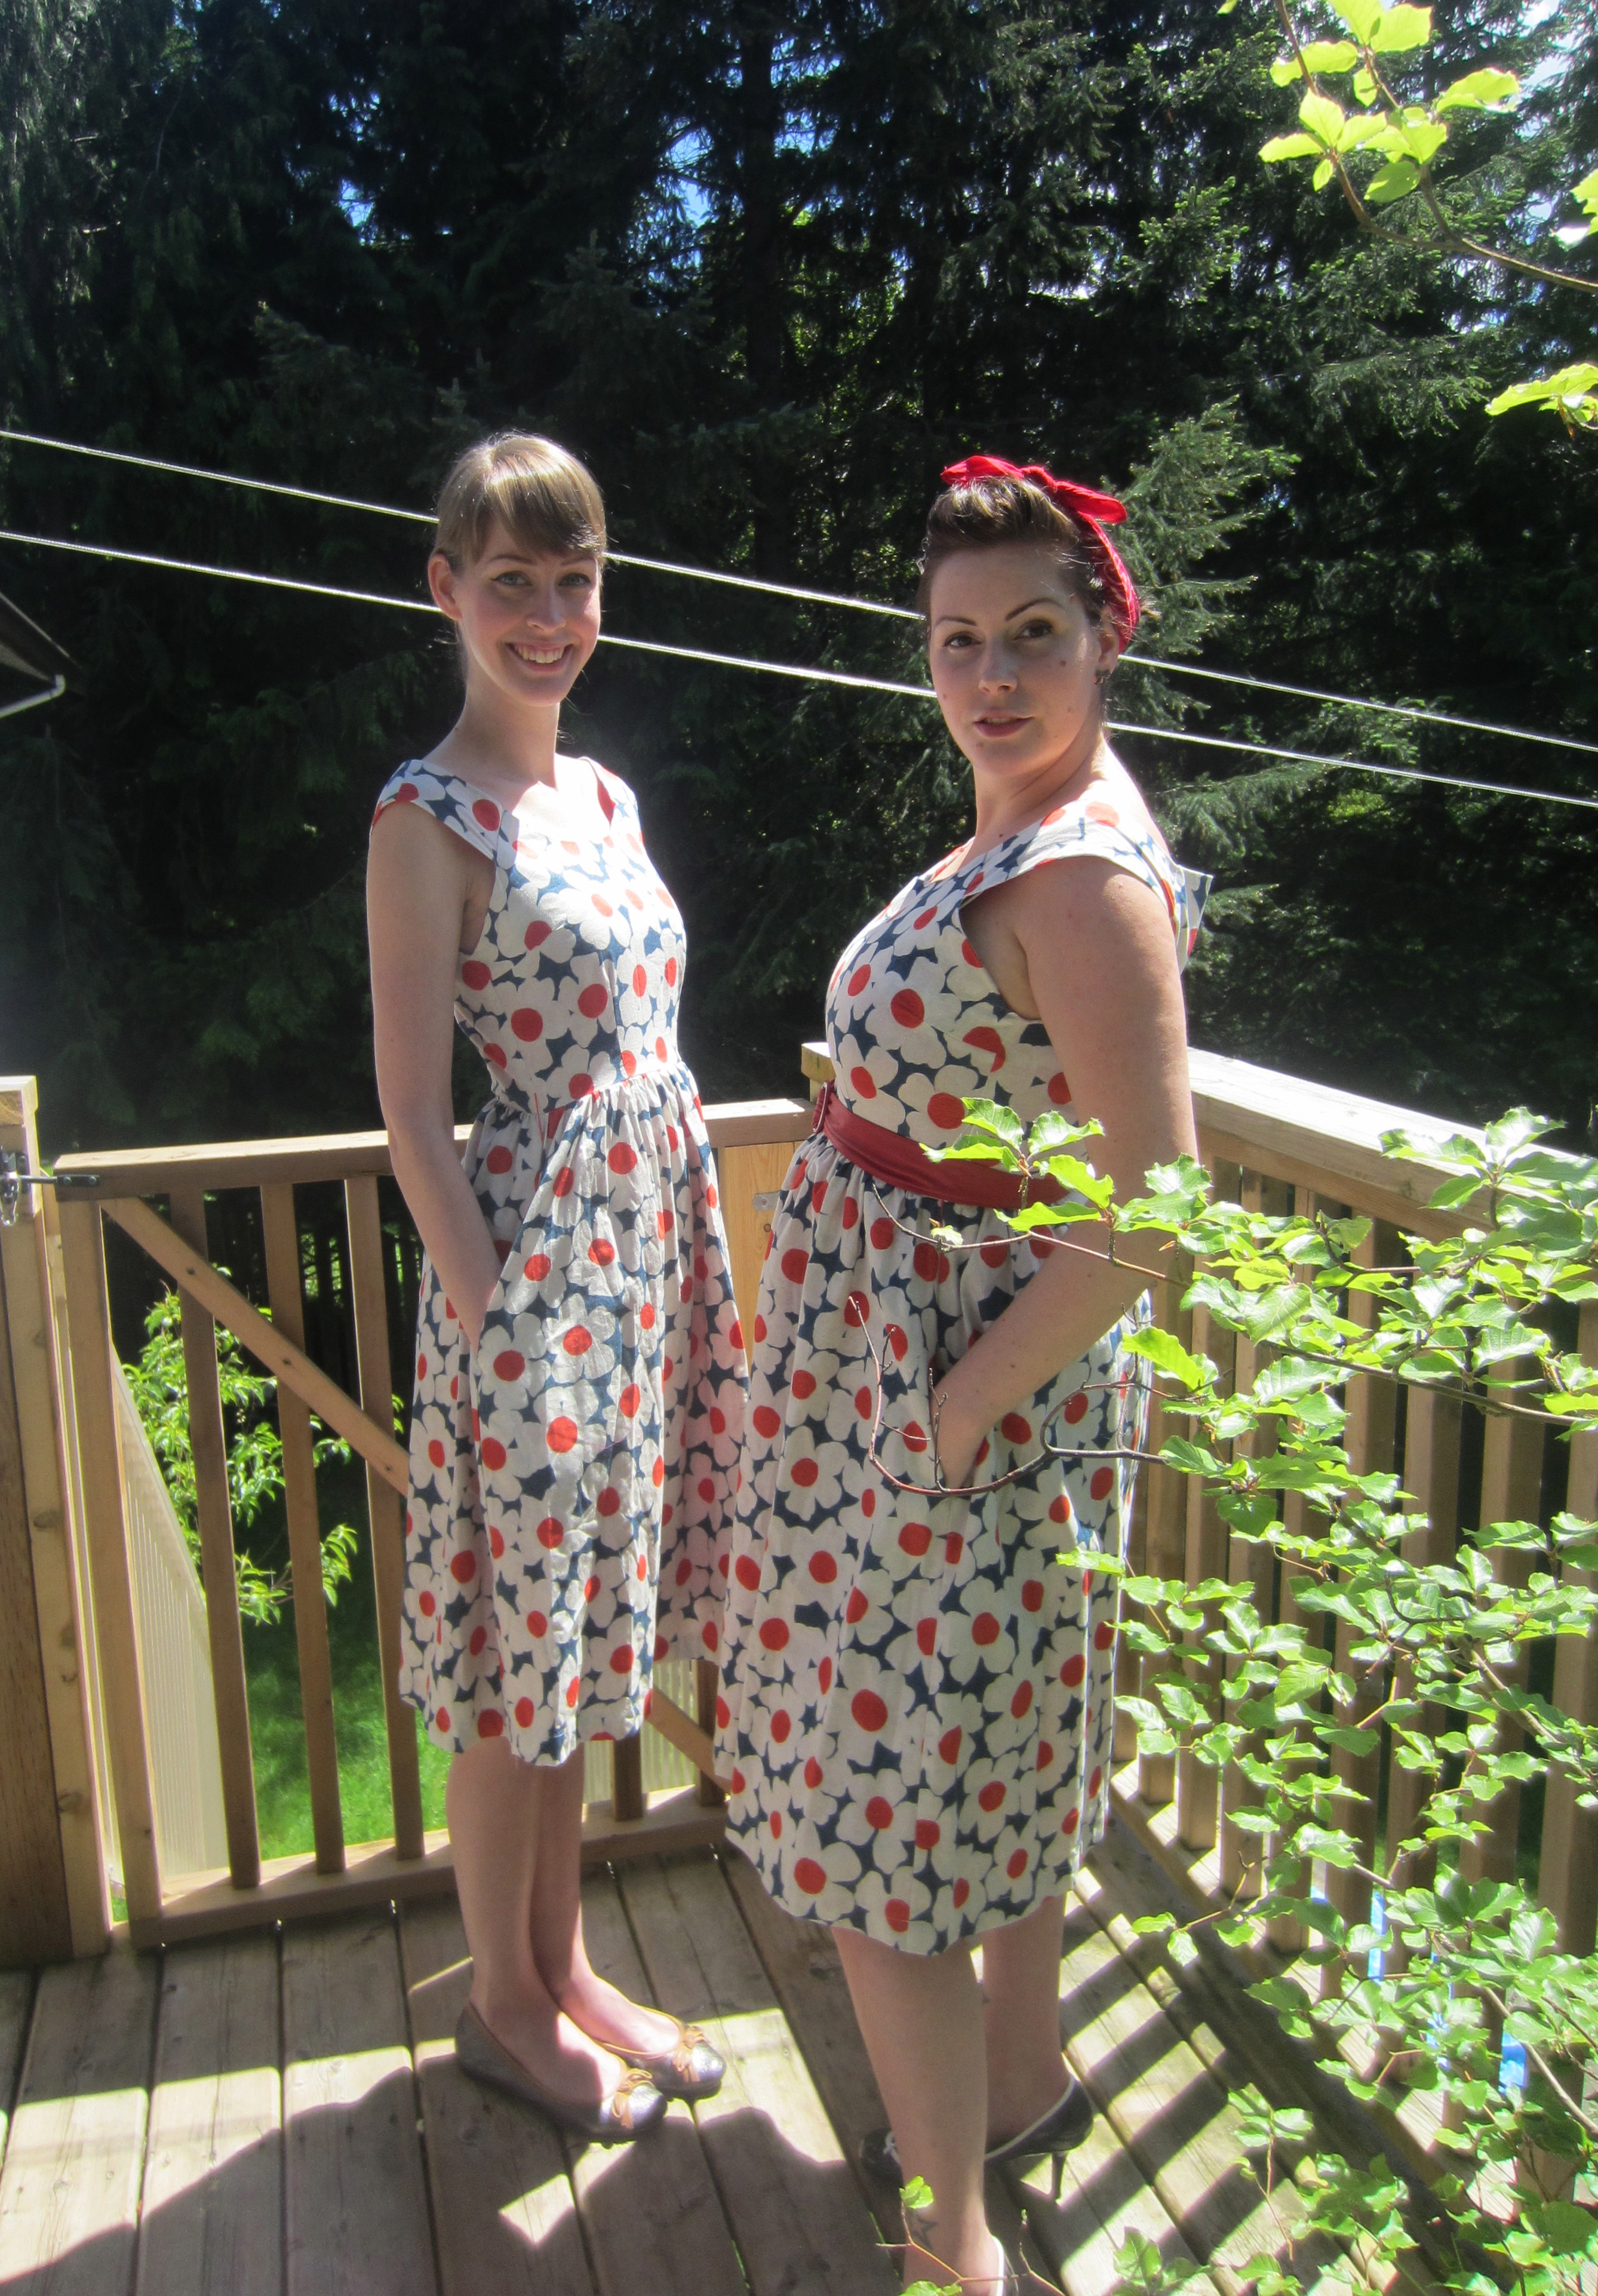
I. Hate. Sewing. BUT I CAN SEW… It’s  a terrible position to be in. My mom taught all my sisters (and some of my brothers!) how to sew, and a few of them have perfected the skill- like my twin sister, Debbie, who designs, sews, and controls half of the universe Happy Yellow Dress. Here is a pic of us in one of her current designs. Warning- we don’t look like we are related, let-alone twins:

IMG_1247

So my sister likes to sew, but hates crafting, and I love crafting, but hate sewing. We are such strange people. At least we’re pretty, right???

prettyug words

I don’t know what it is about sewing that I don’t like. I actually sold bags for 3 years, I think I must have overdosed on sewing… Sewing is a lot like heroin: Too much and … Okay.. I’m going to stop that analogy here.

SO HOW BOUT I STOP THIS NONSENSE AND ACTUALLY TEACH YOU SOMETHING instead of wasting your time? Sorry, It’s been a while, and the last 2 months of my writing stores are just pouring out my fingers, like food poisoning, if you know what I mean 😉

The original pattern for the main part of this bag is from Skip To My Lou, so check that out for perfecto instructions, and read on if you want to see what I did, including my added twist- the button branch!

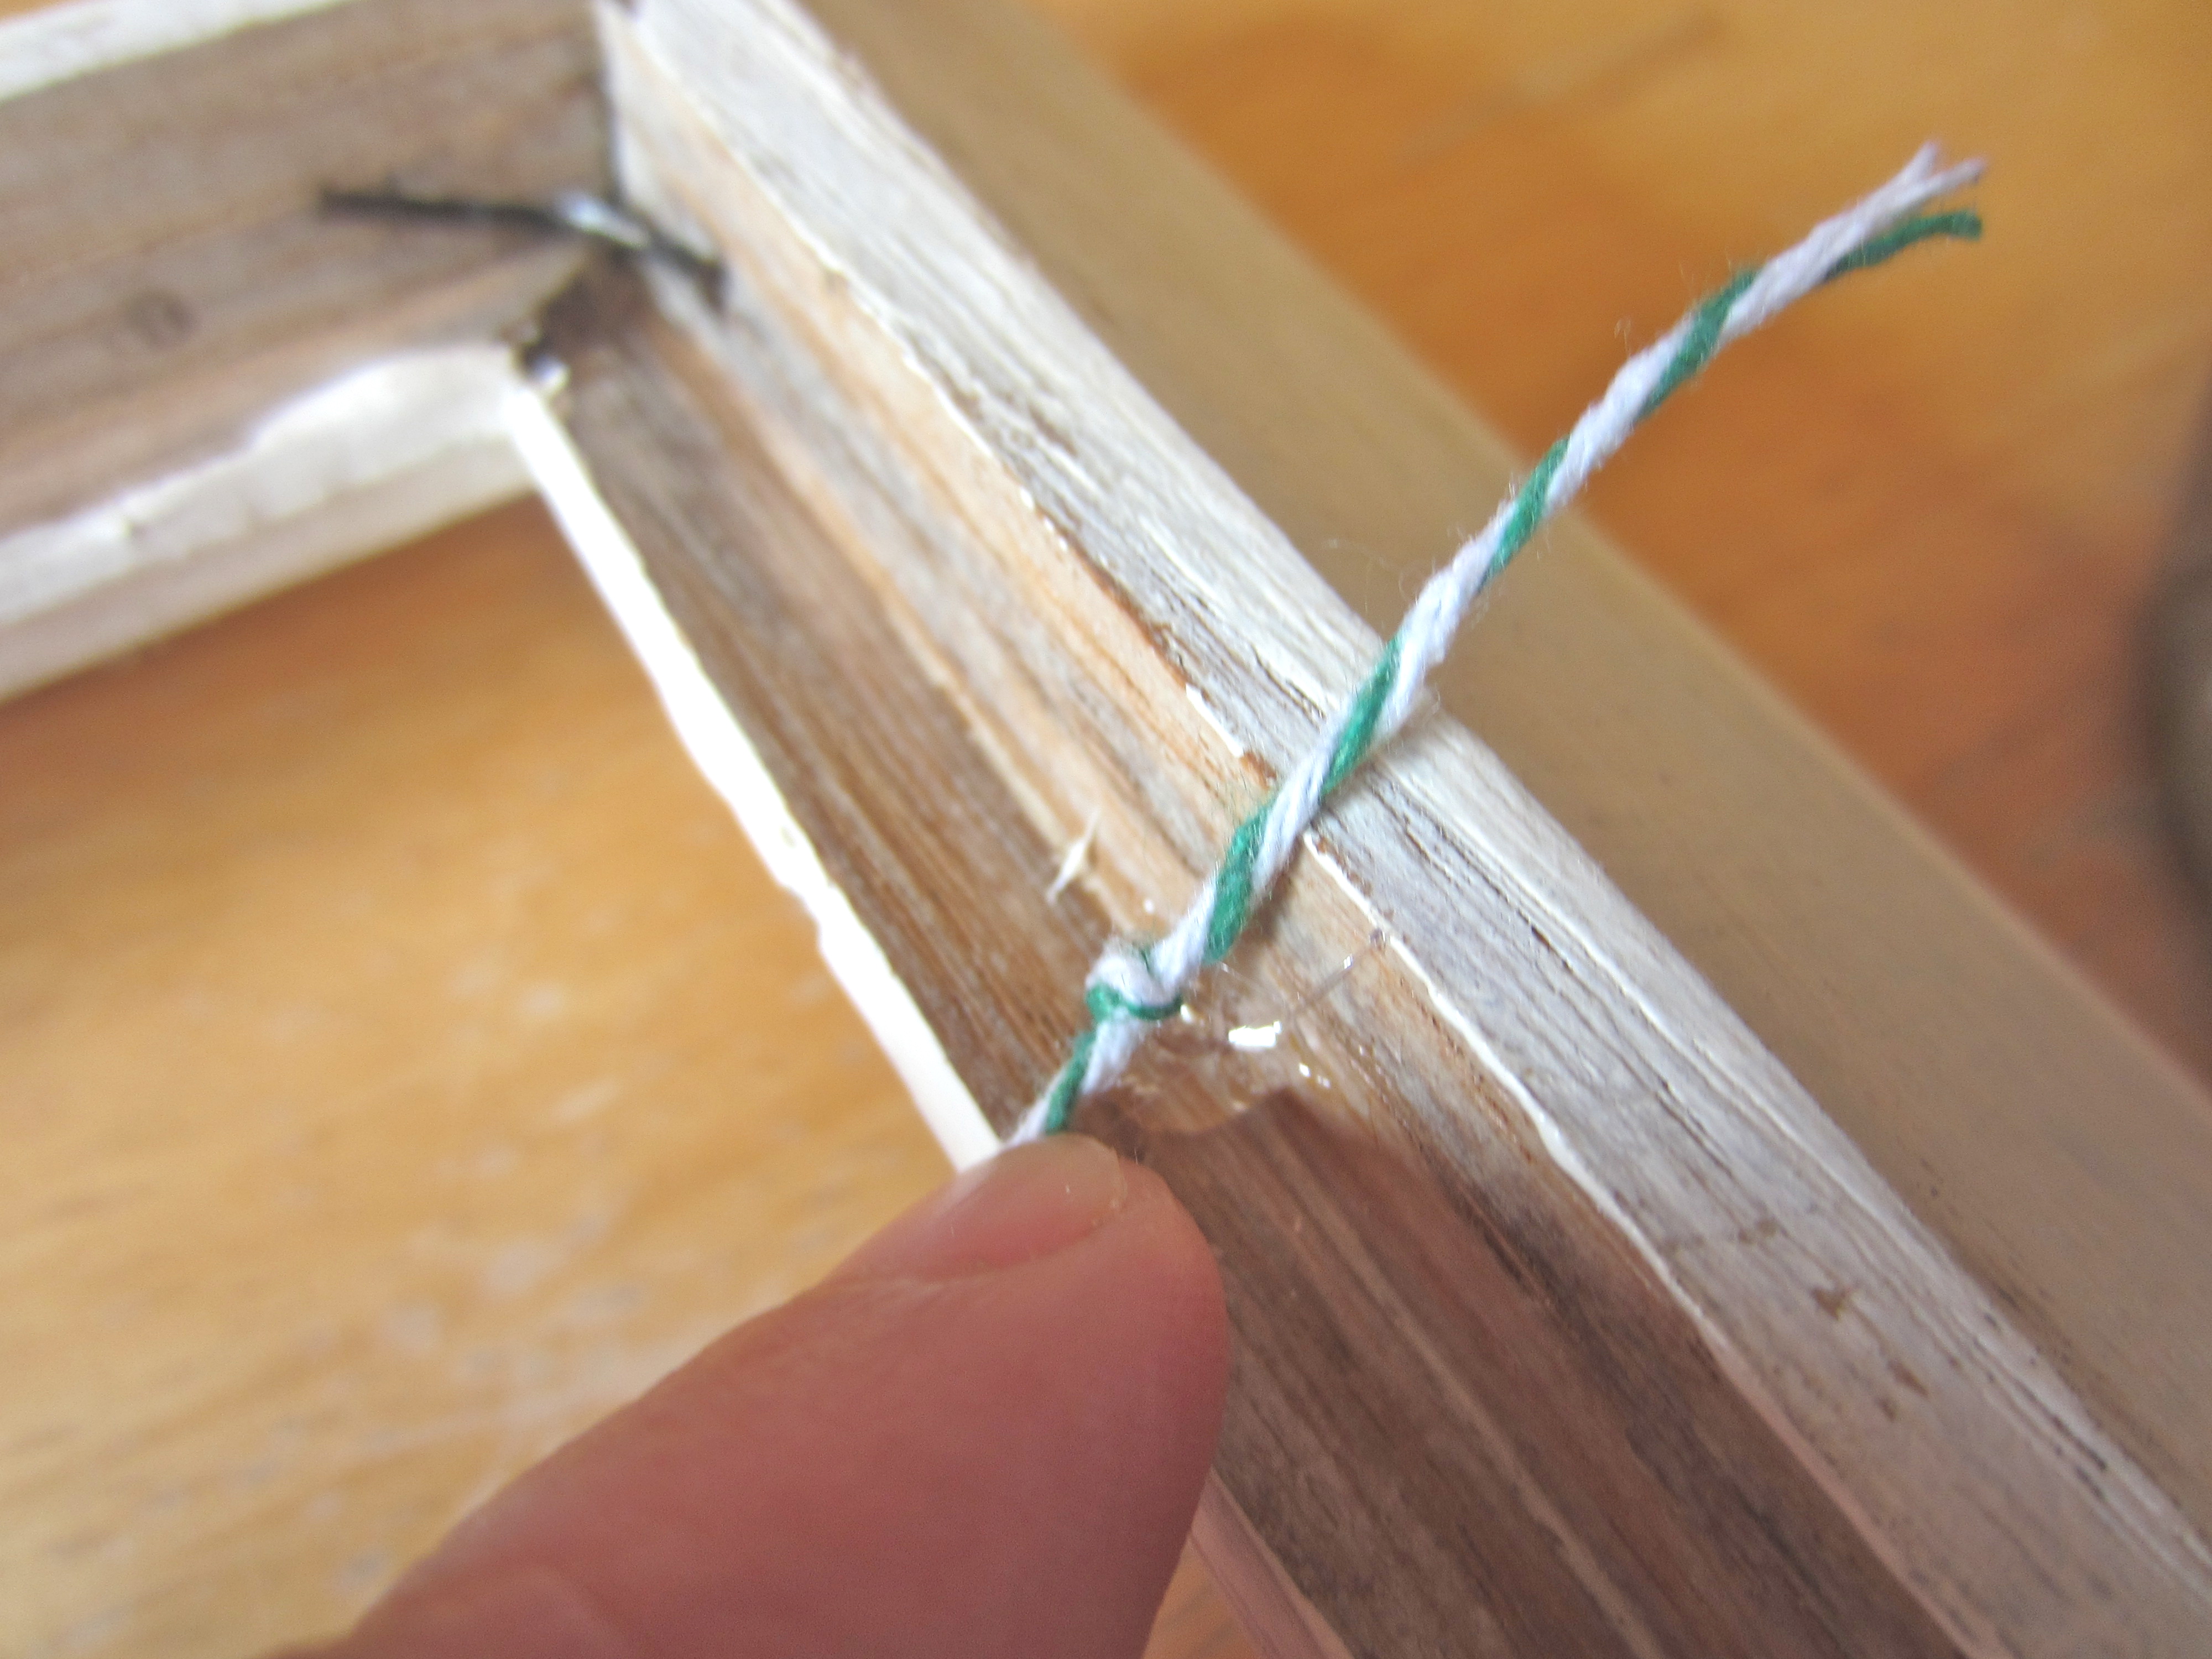
Let’s start with the appliqué. This might not be the most detailed description- I forgot to take some pictures during the process. (DARN KIDS! Why do they need meals and attention?)
IMG_1376


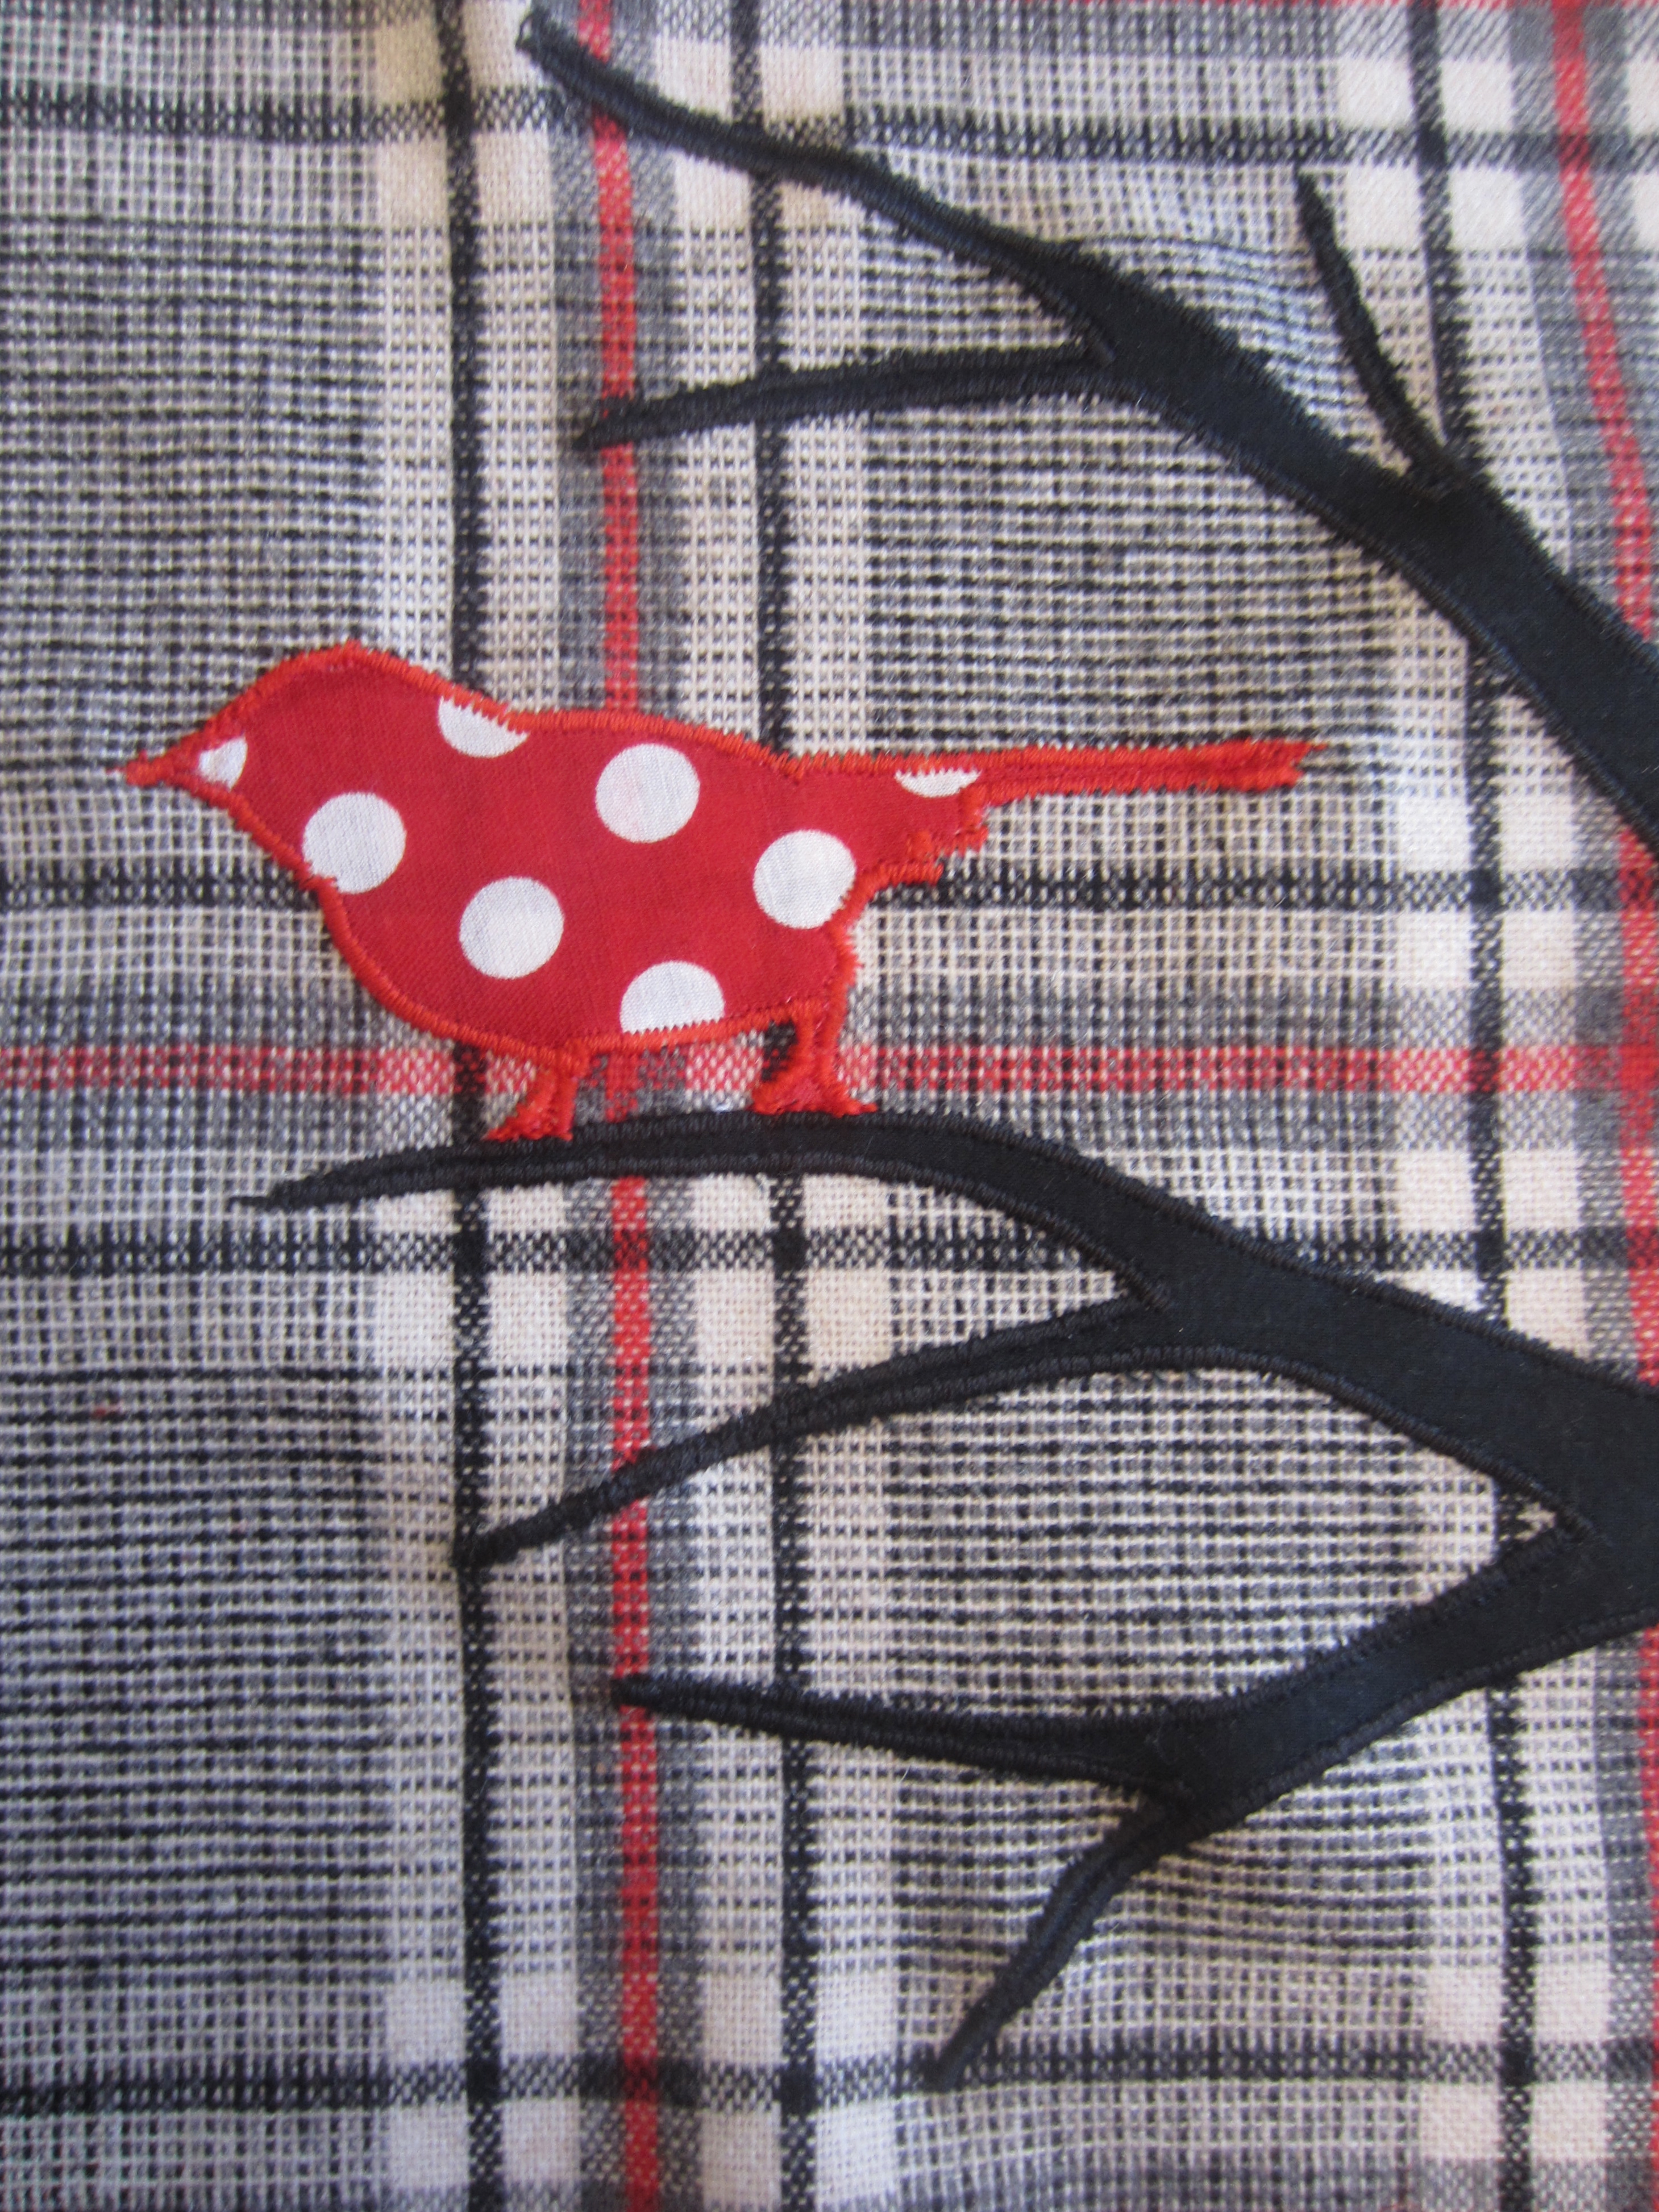
I used some Heat And Bond Lite- which is a sewable, Iron-on adhesive that you can get at any craft or fabric store, and attached it to my black branch fabric, and my polka dotted bird fabric (instructions here). I drew a branch and bird on the backing paper, making sure to keep it facing the opposite way that I wanted it to face on my purse. This kind of thing is always hard for me as I am severely directionally challenged. Really. It took me 45 minutes to find a bathroom in a mall once. I had been to the mall a dozen times before. Anyways, at least I can stick buttons on things.

IMG_1377

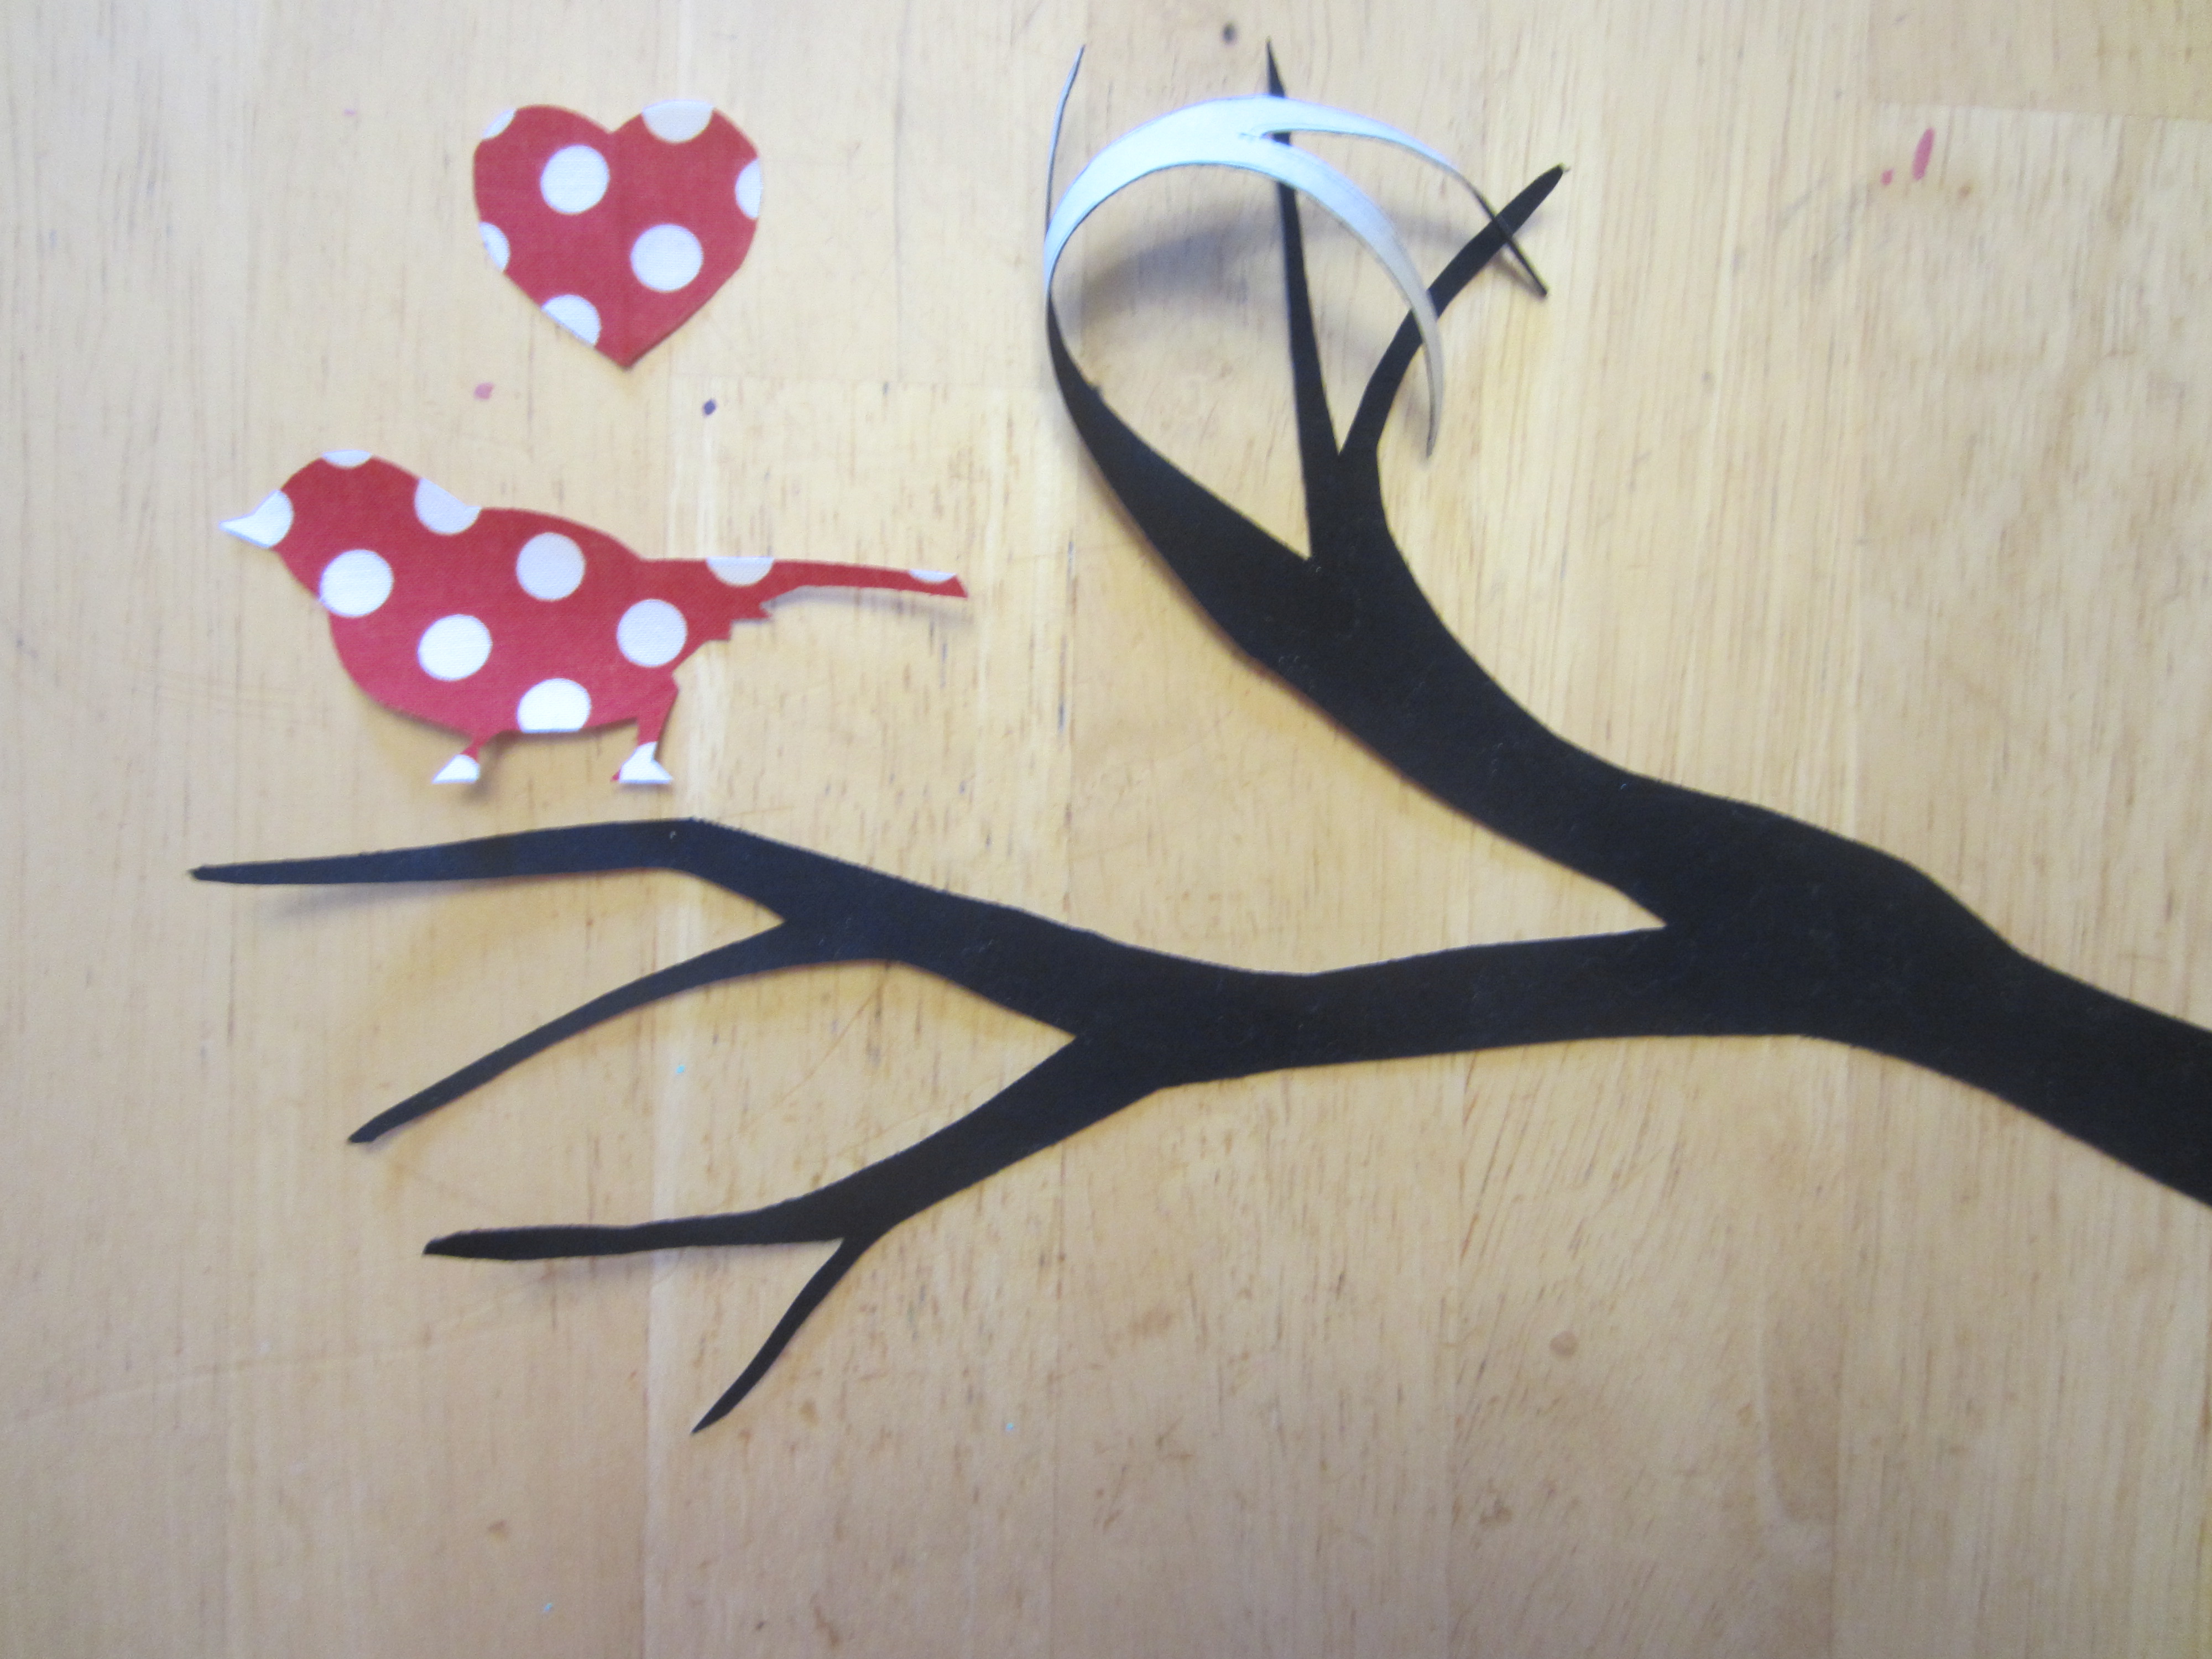
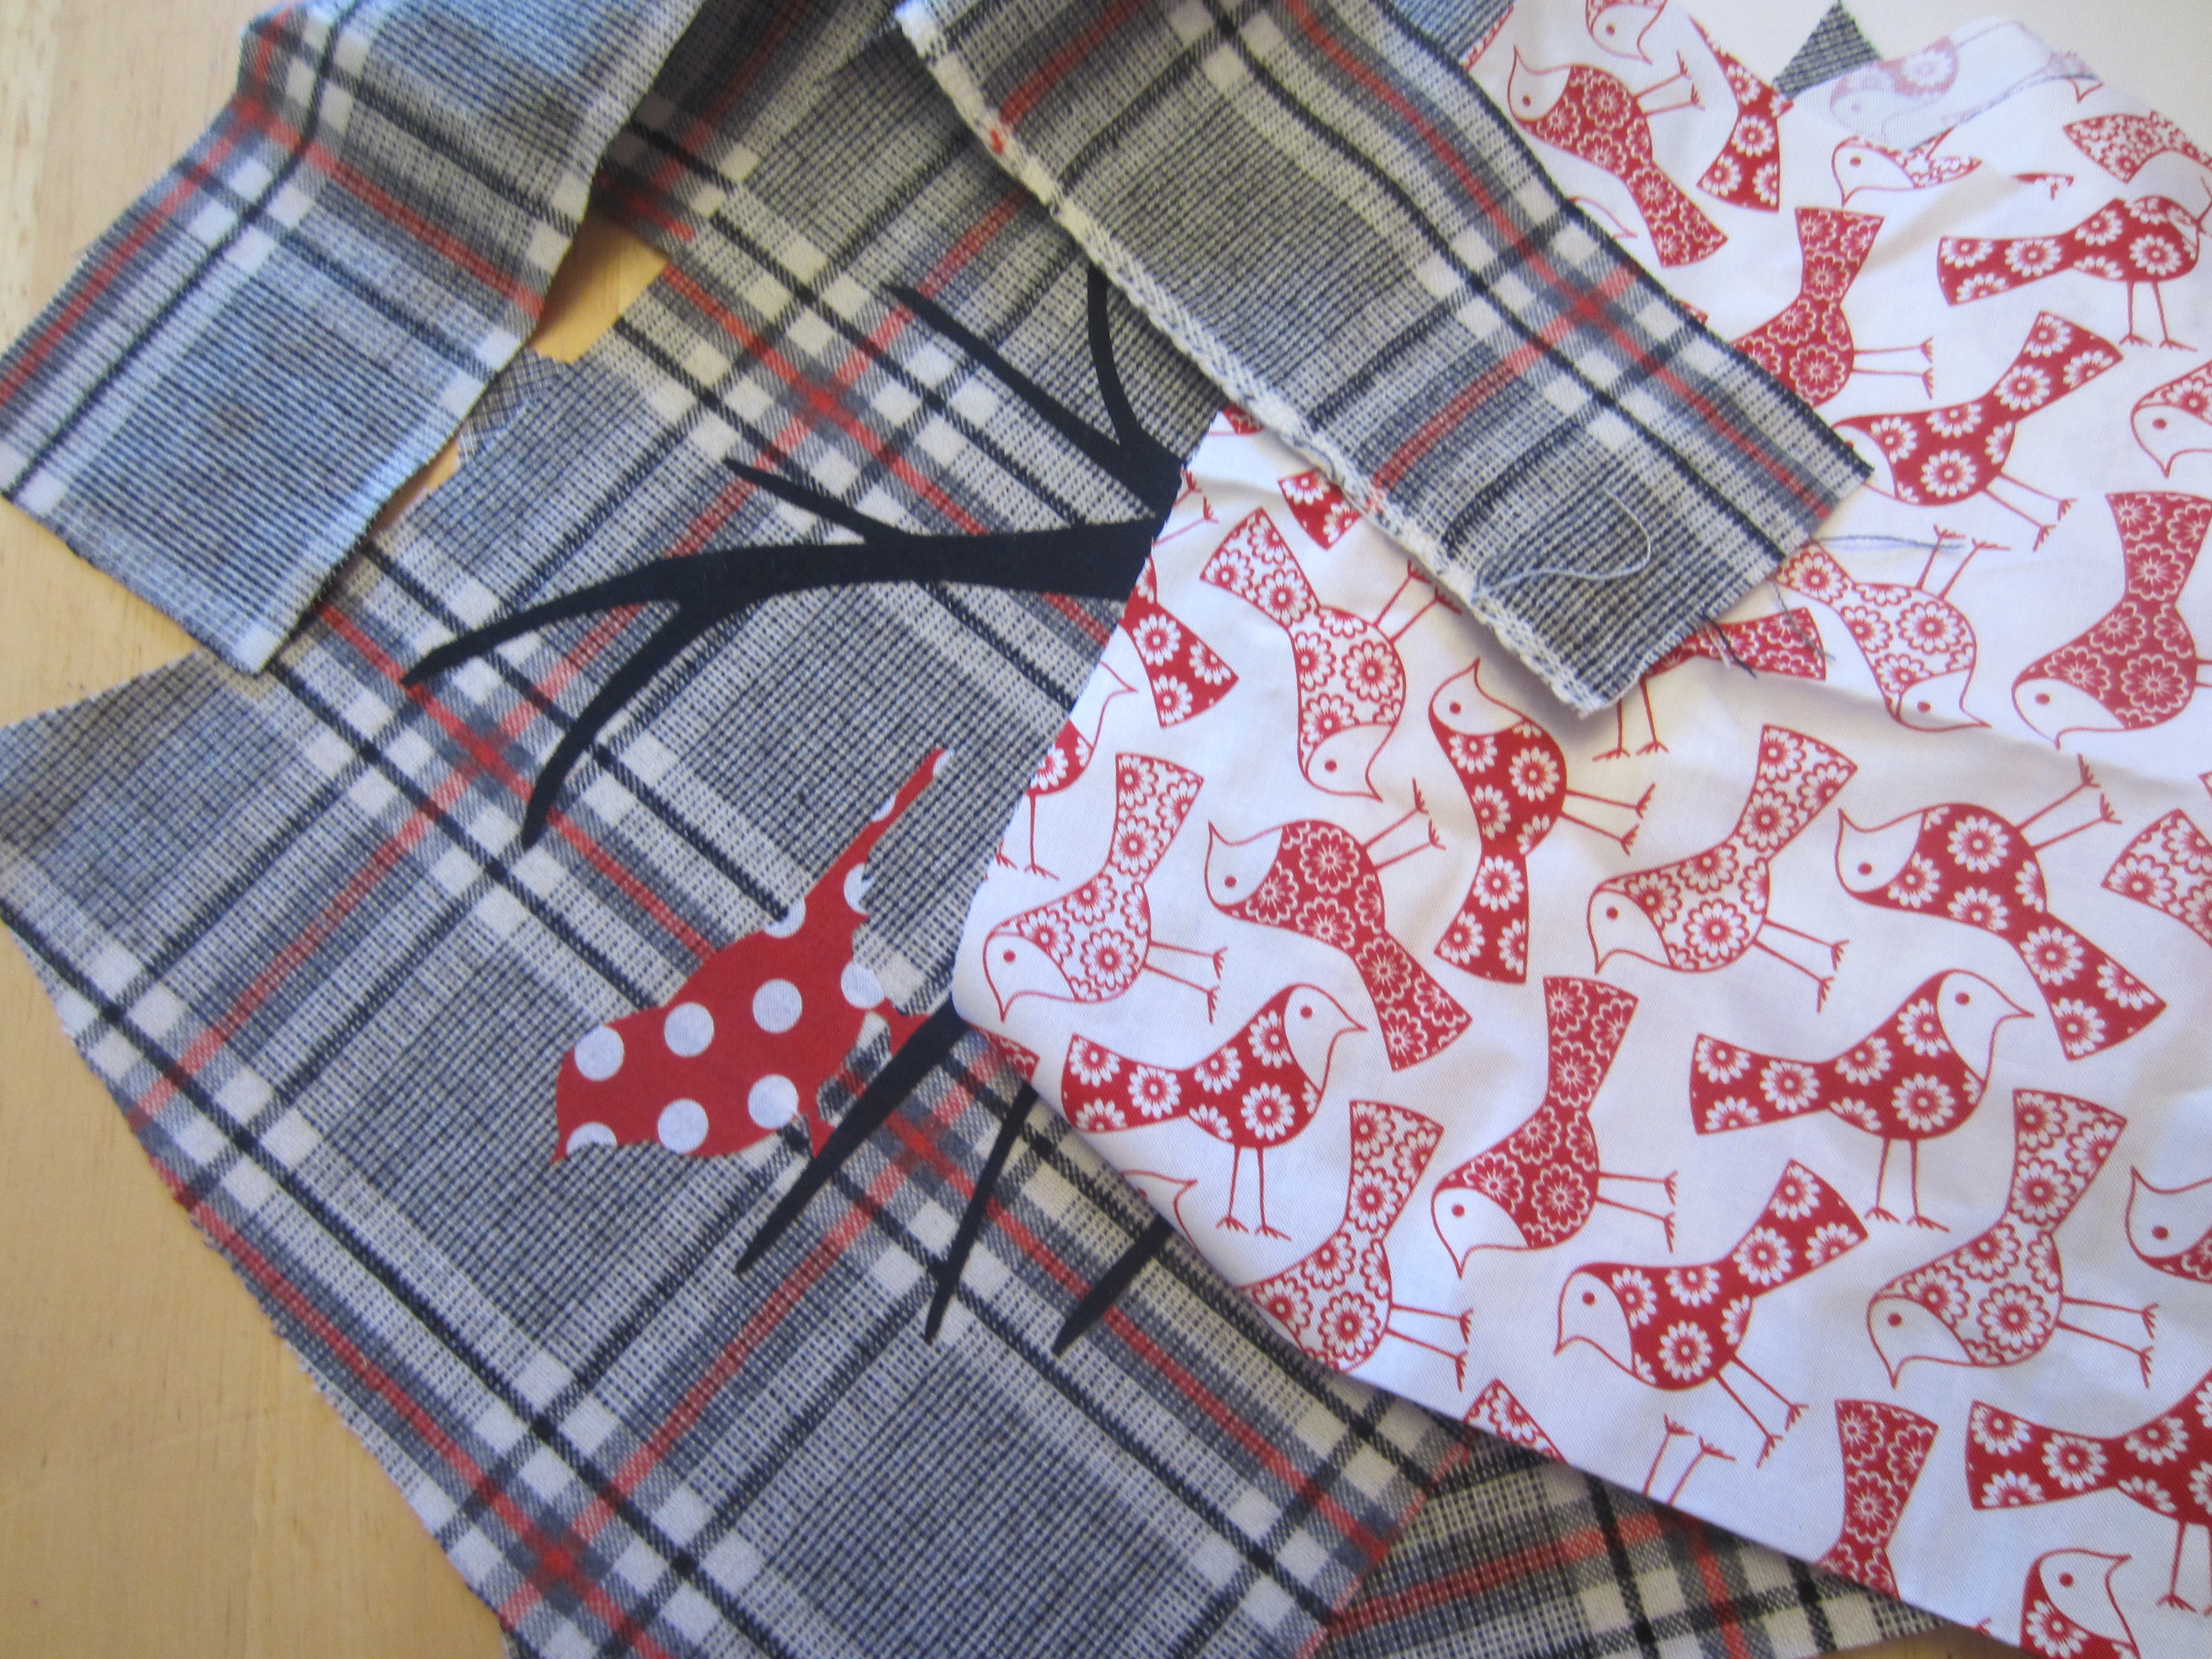
I cut out my bonded fabric like soooo, and I kept the backing on until I was ready to iron it onto my purse fabric…


IMG_1378


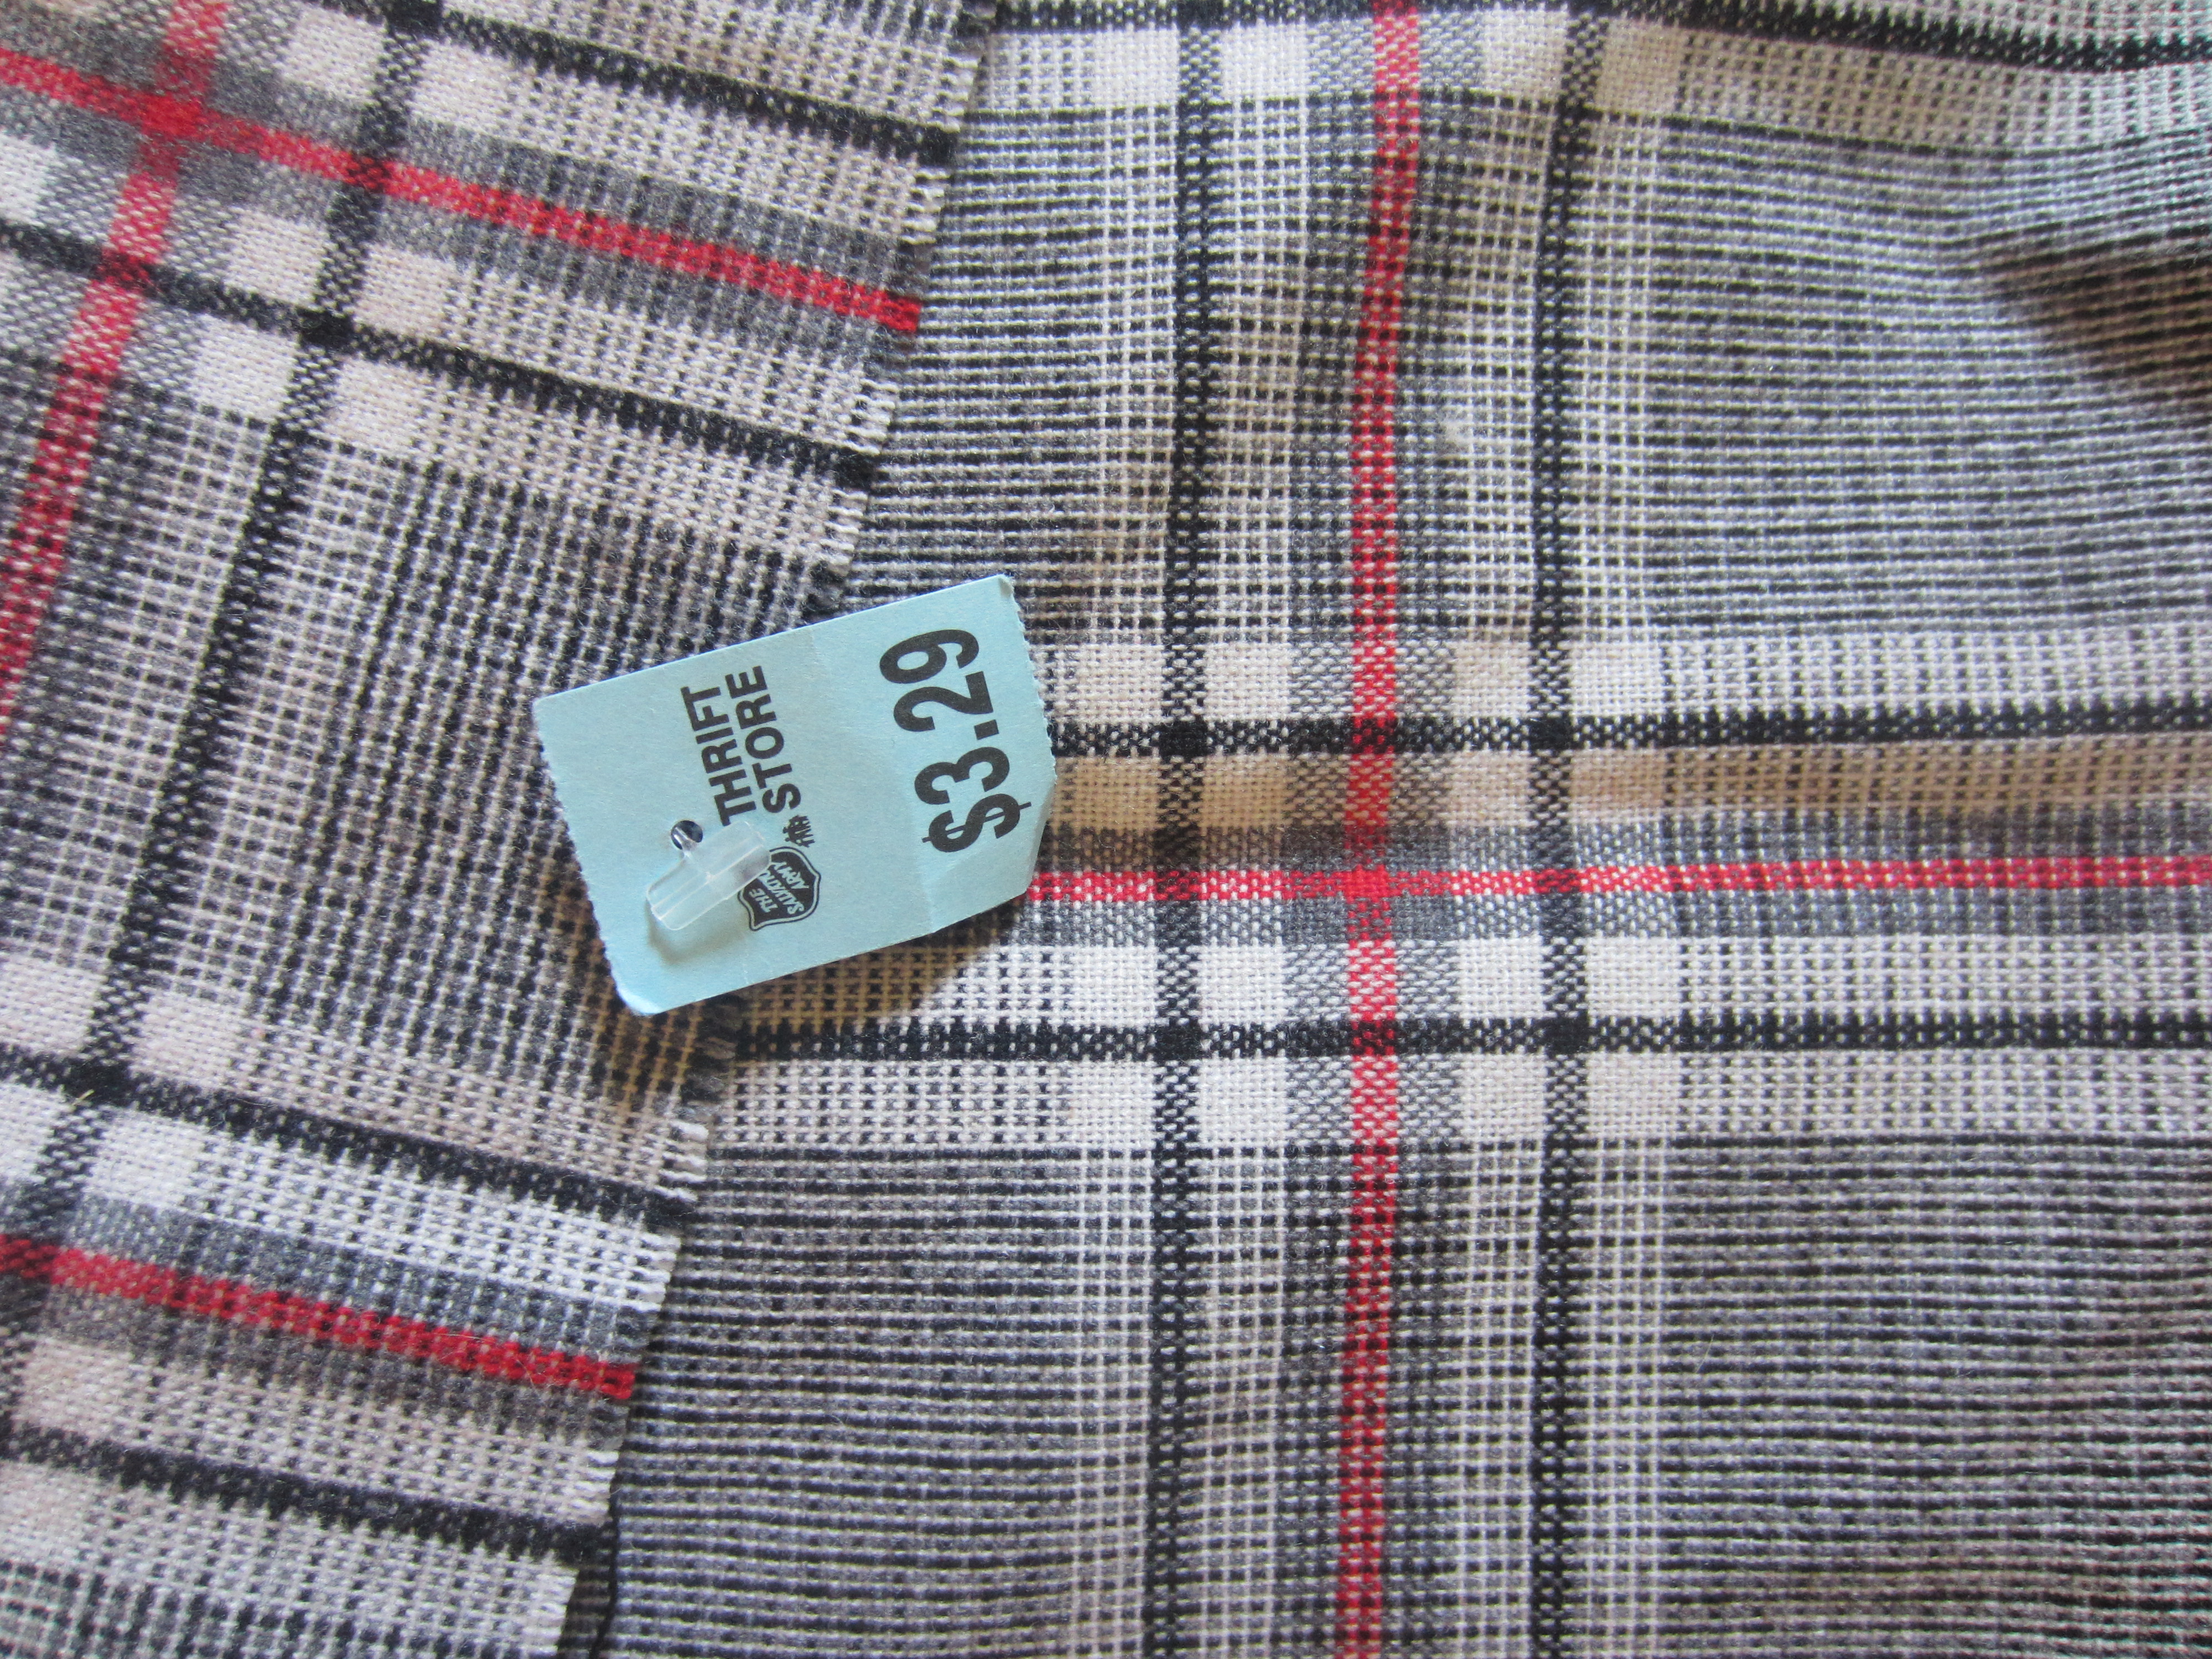
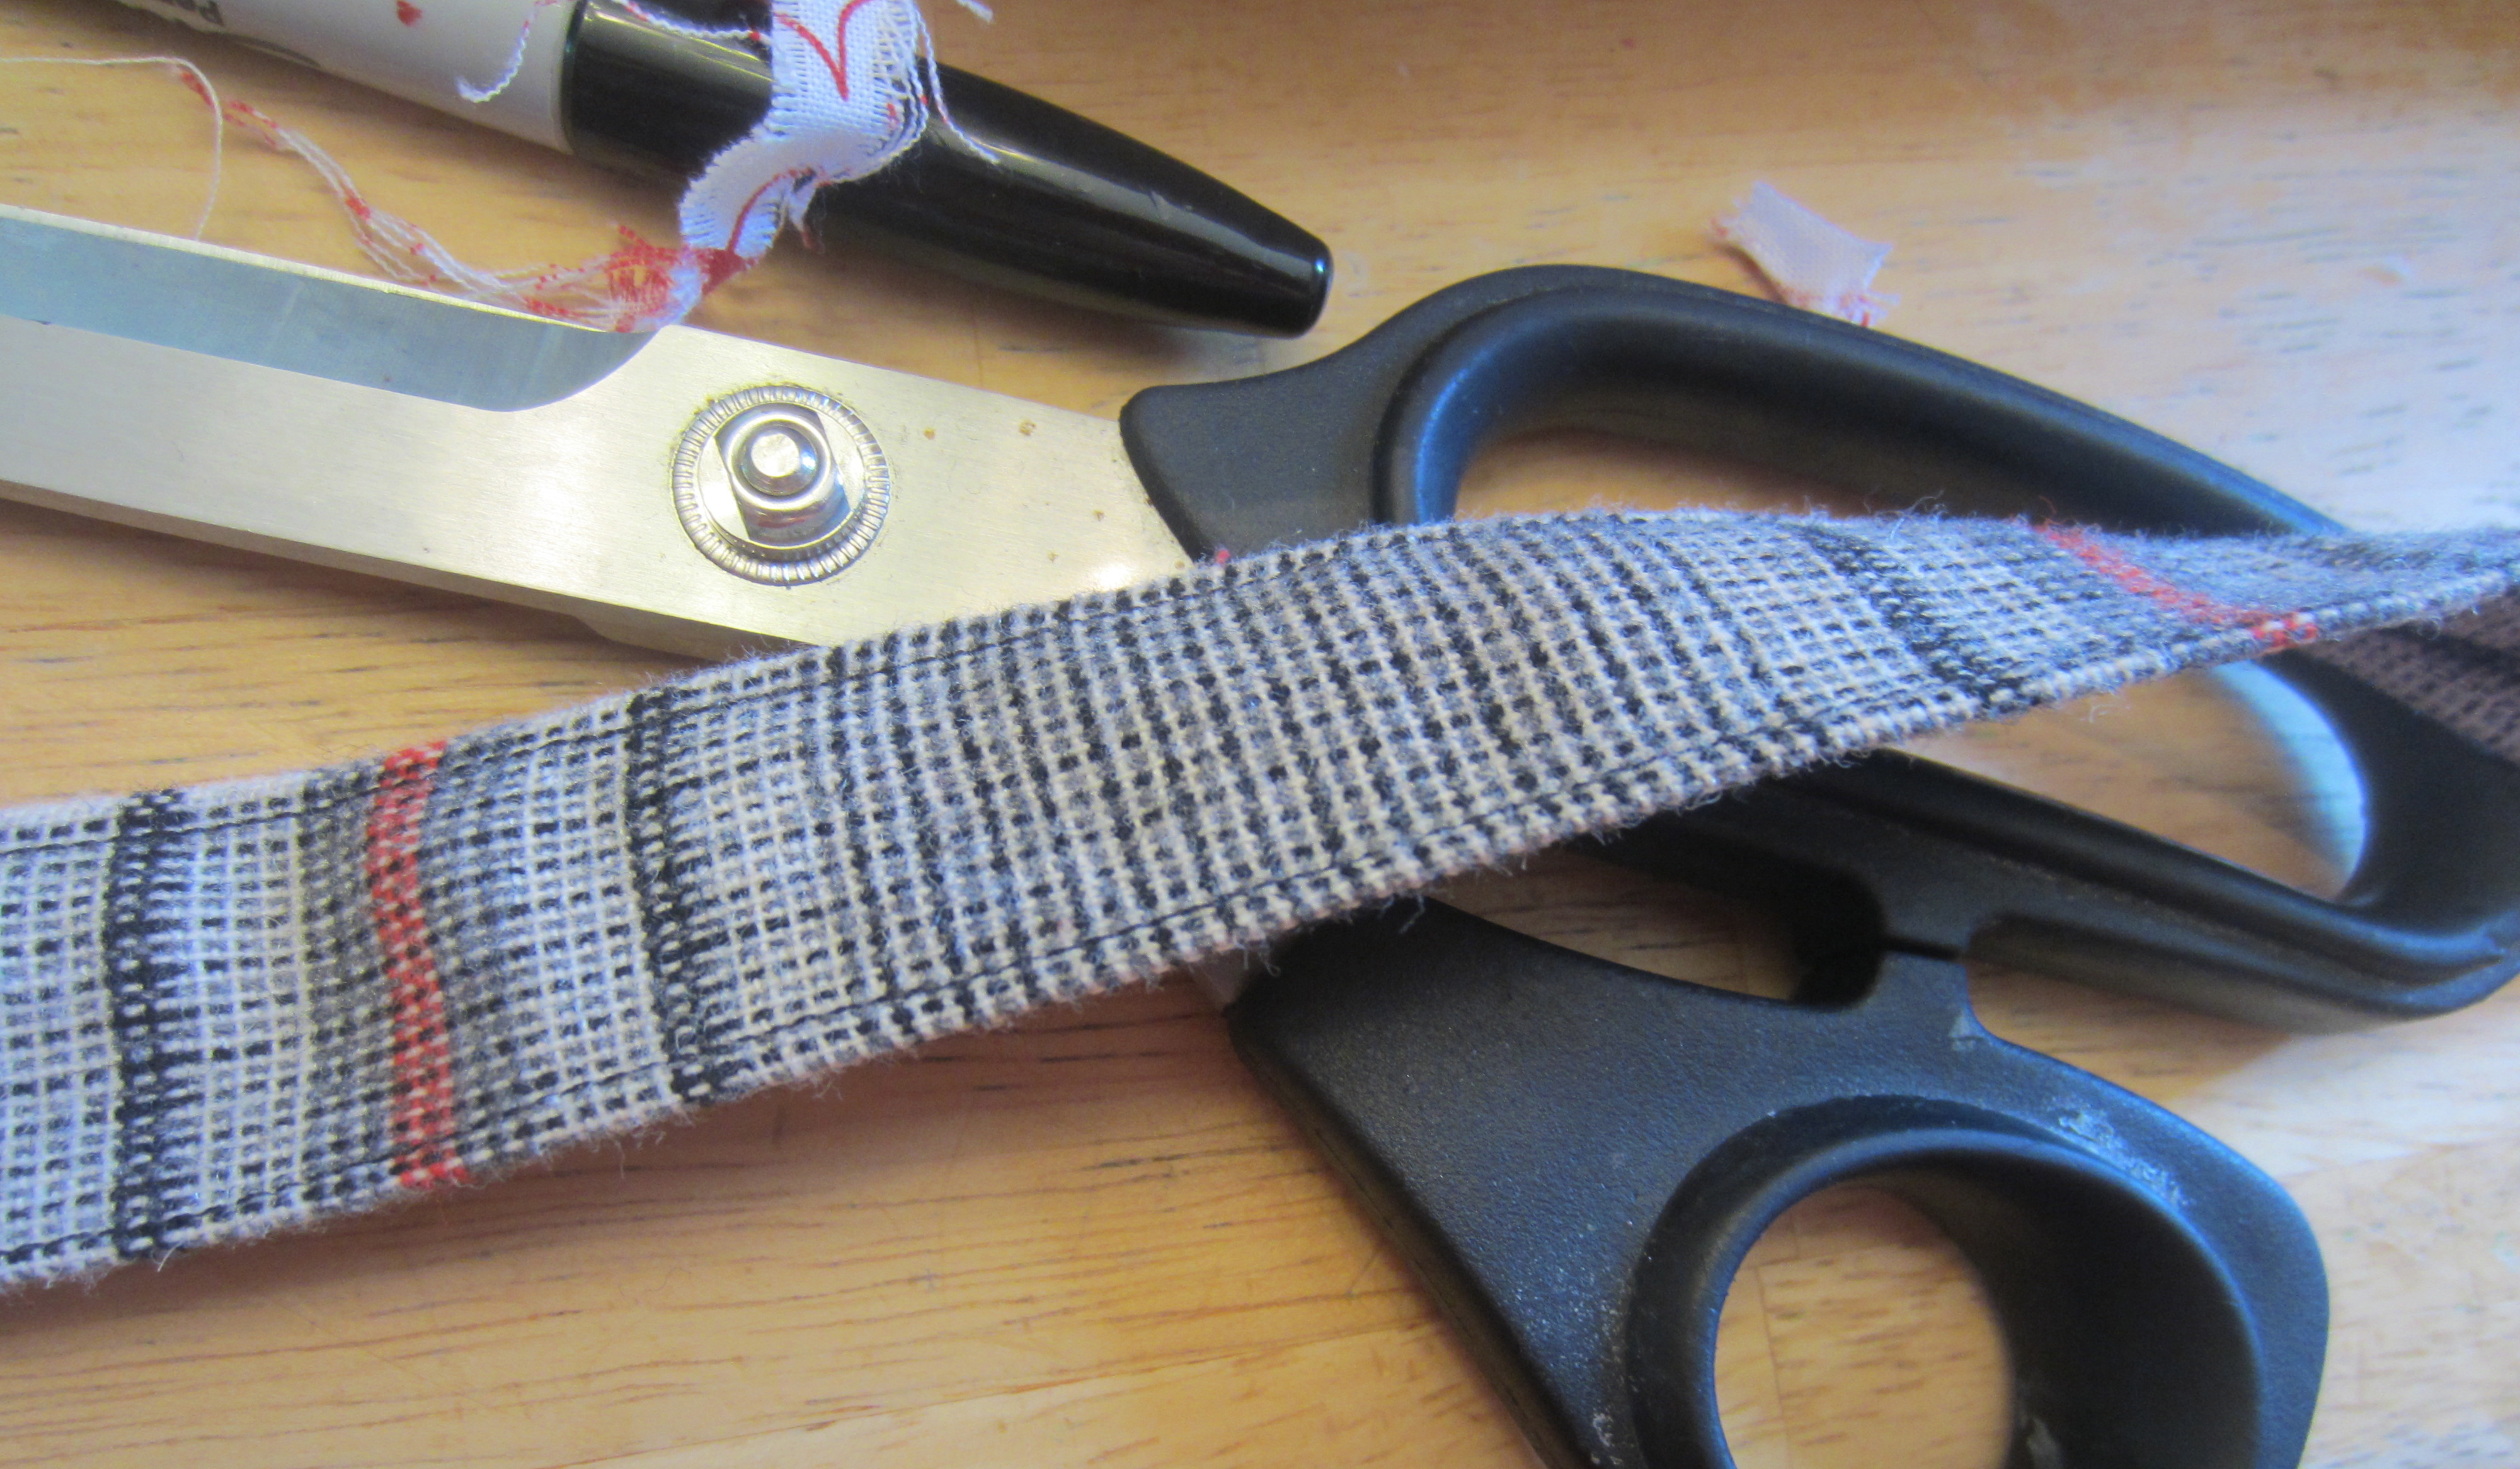
…which was a steal of a deal at only $3.29 for 4 meters! It’s real wool too! Smelled like an old lady, but for 3 bucks, I think I like that smell! Thrift stores can be such a good source for nice fabric!

IMG_1379 IMG_1380

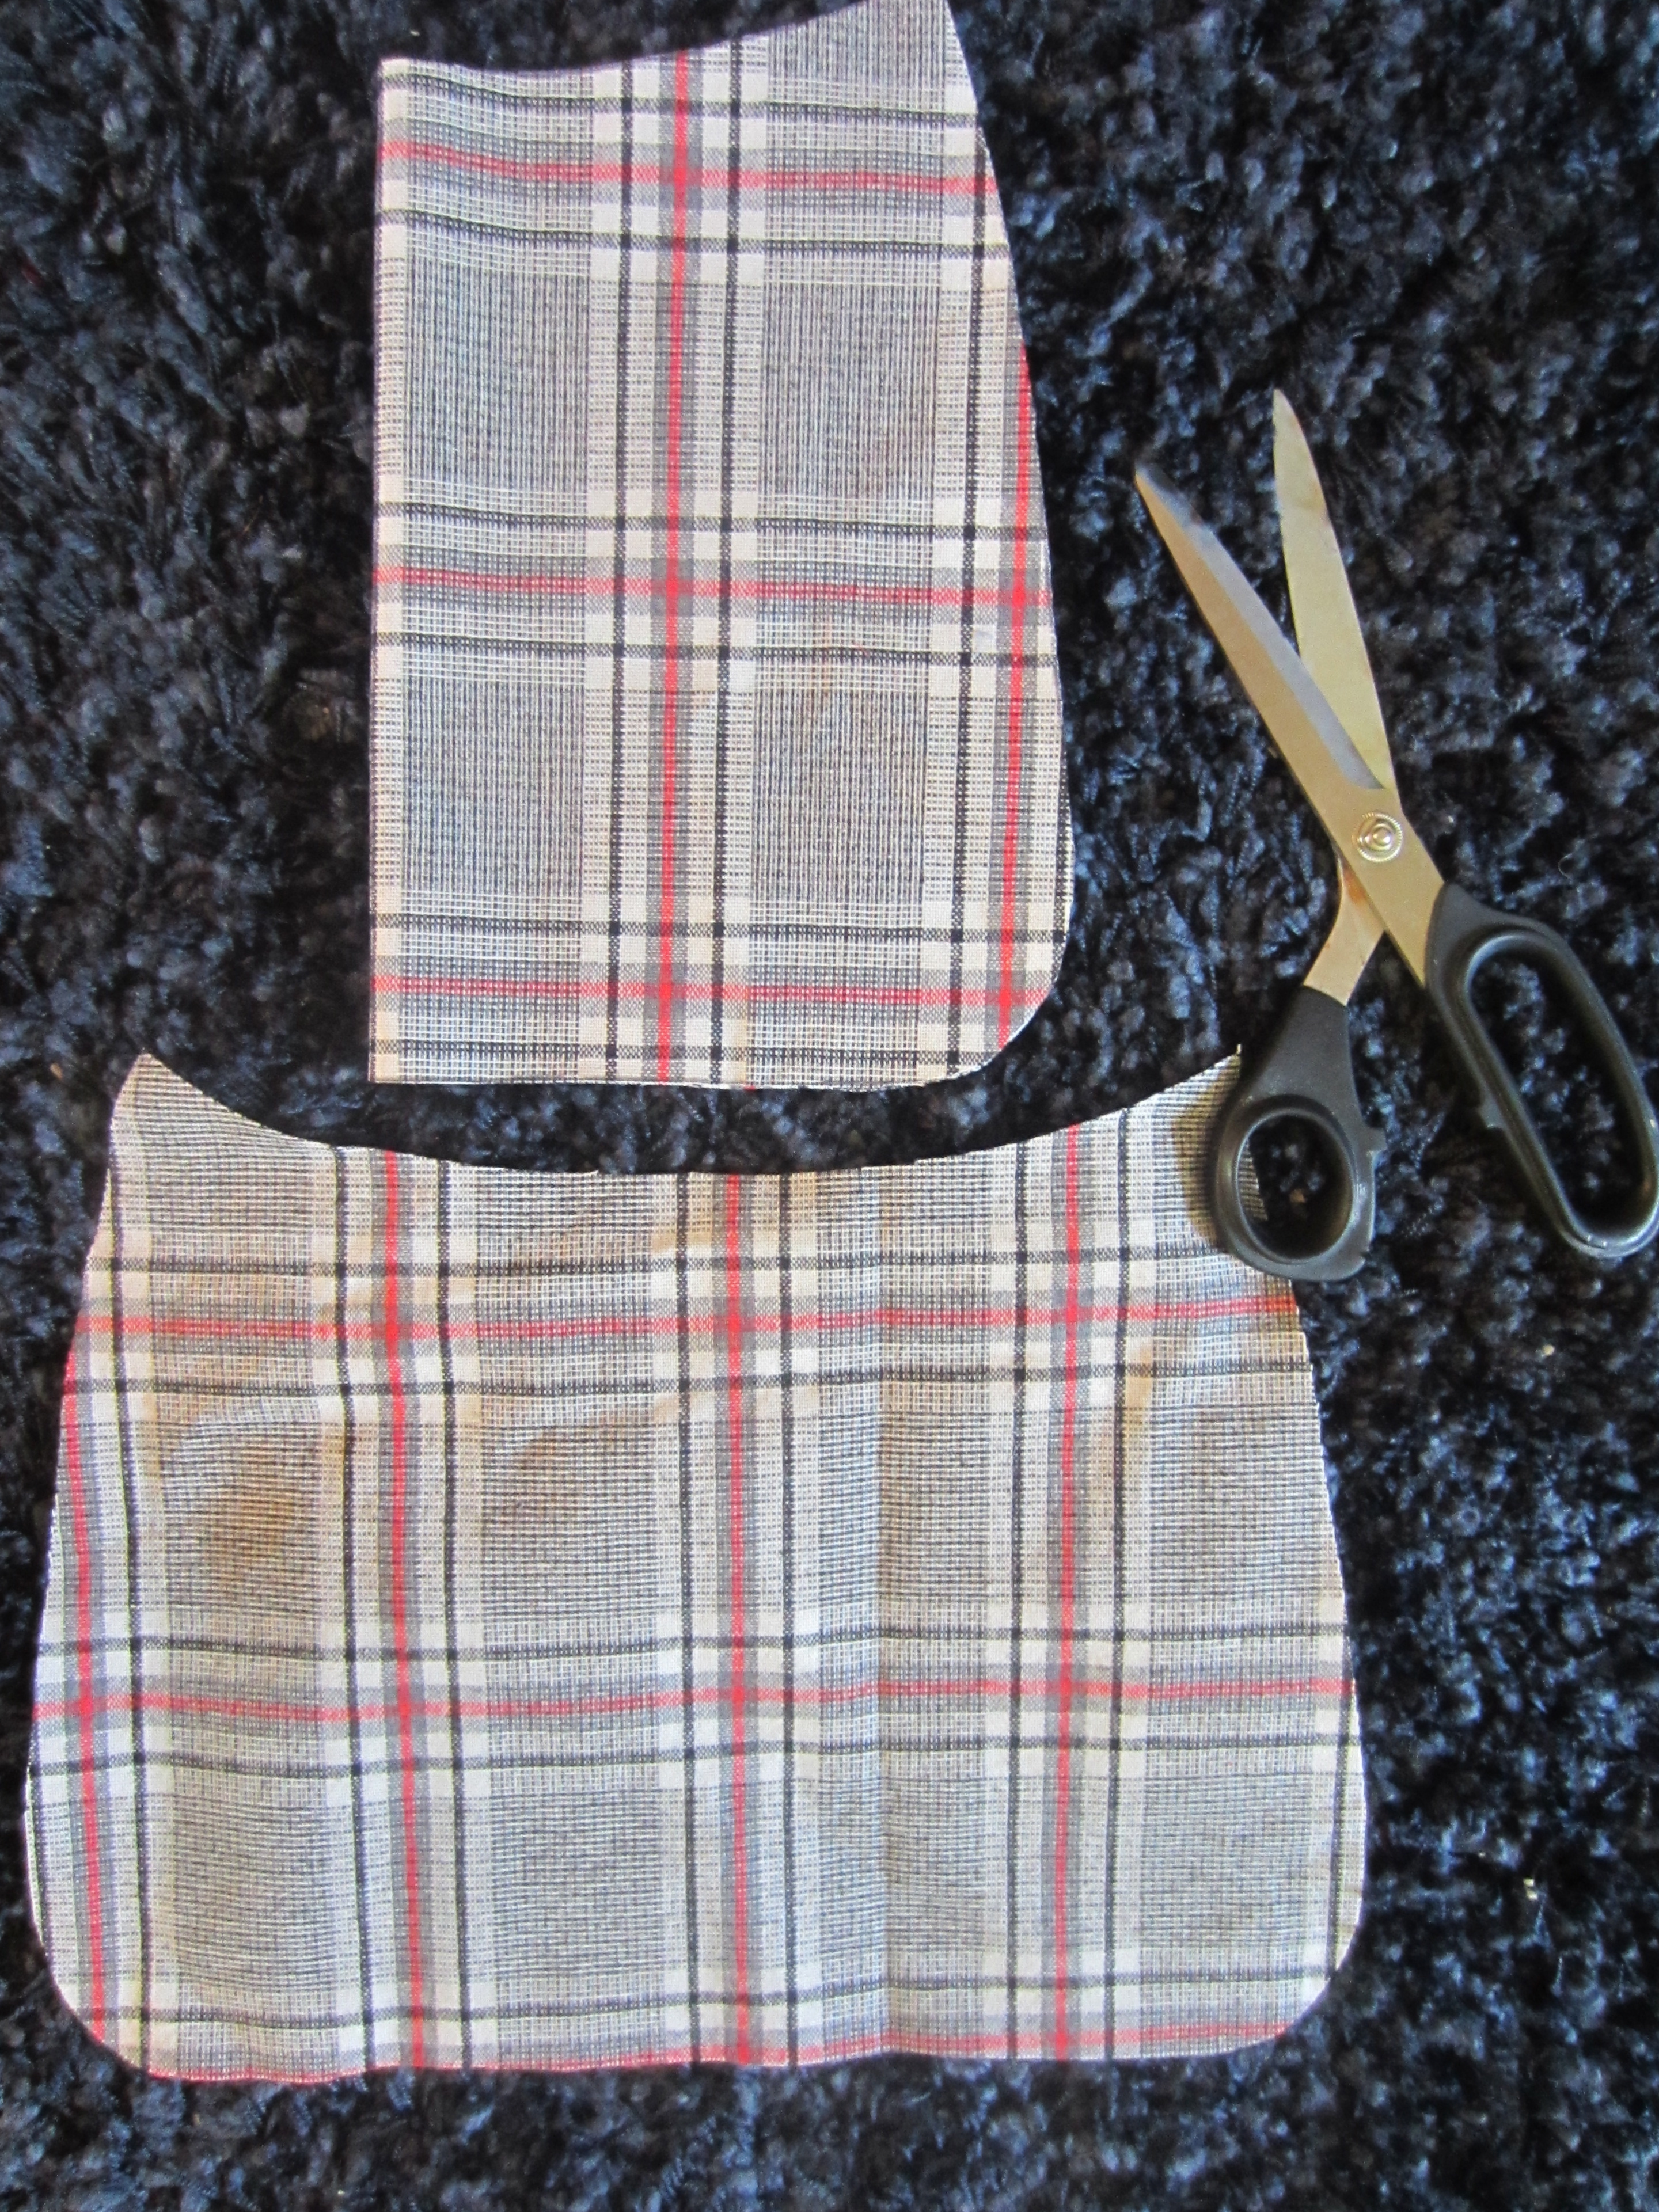
Next I cut out the pattern (which, again, you can get here).
IMG_1382

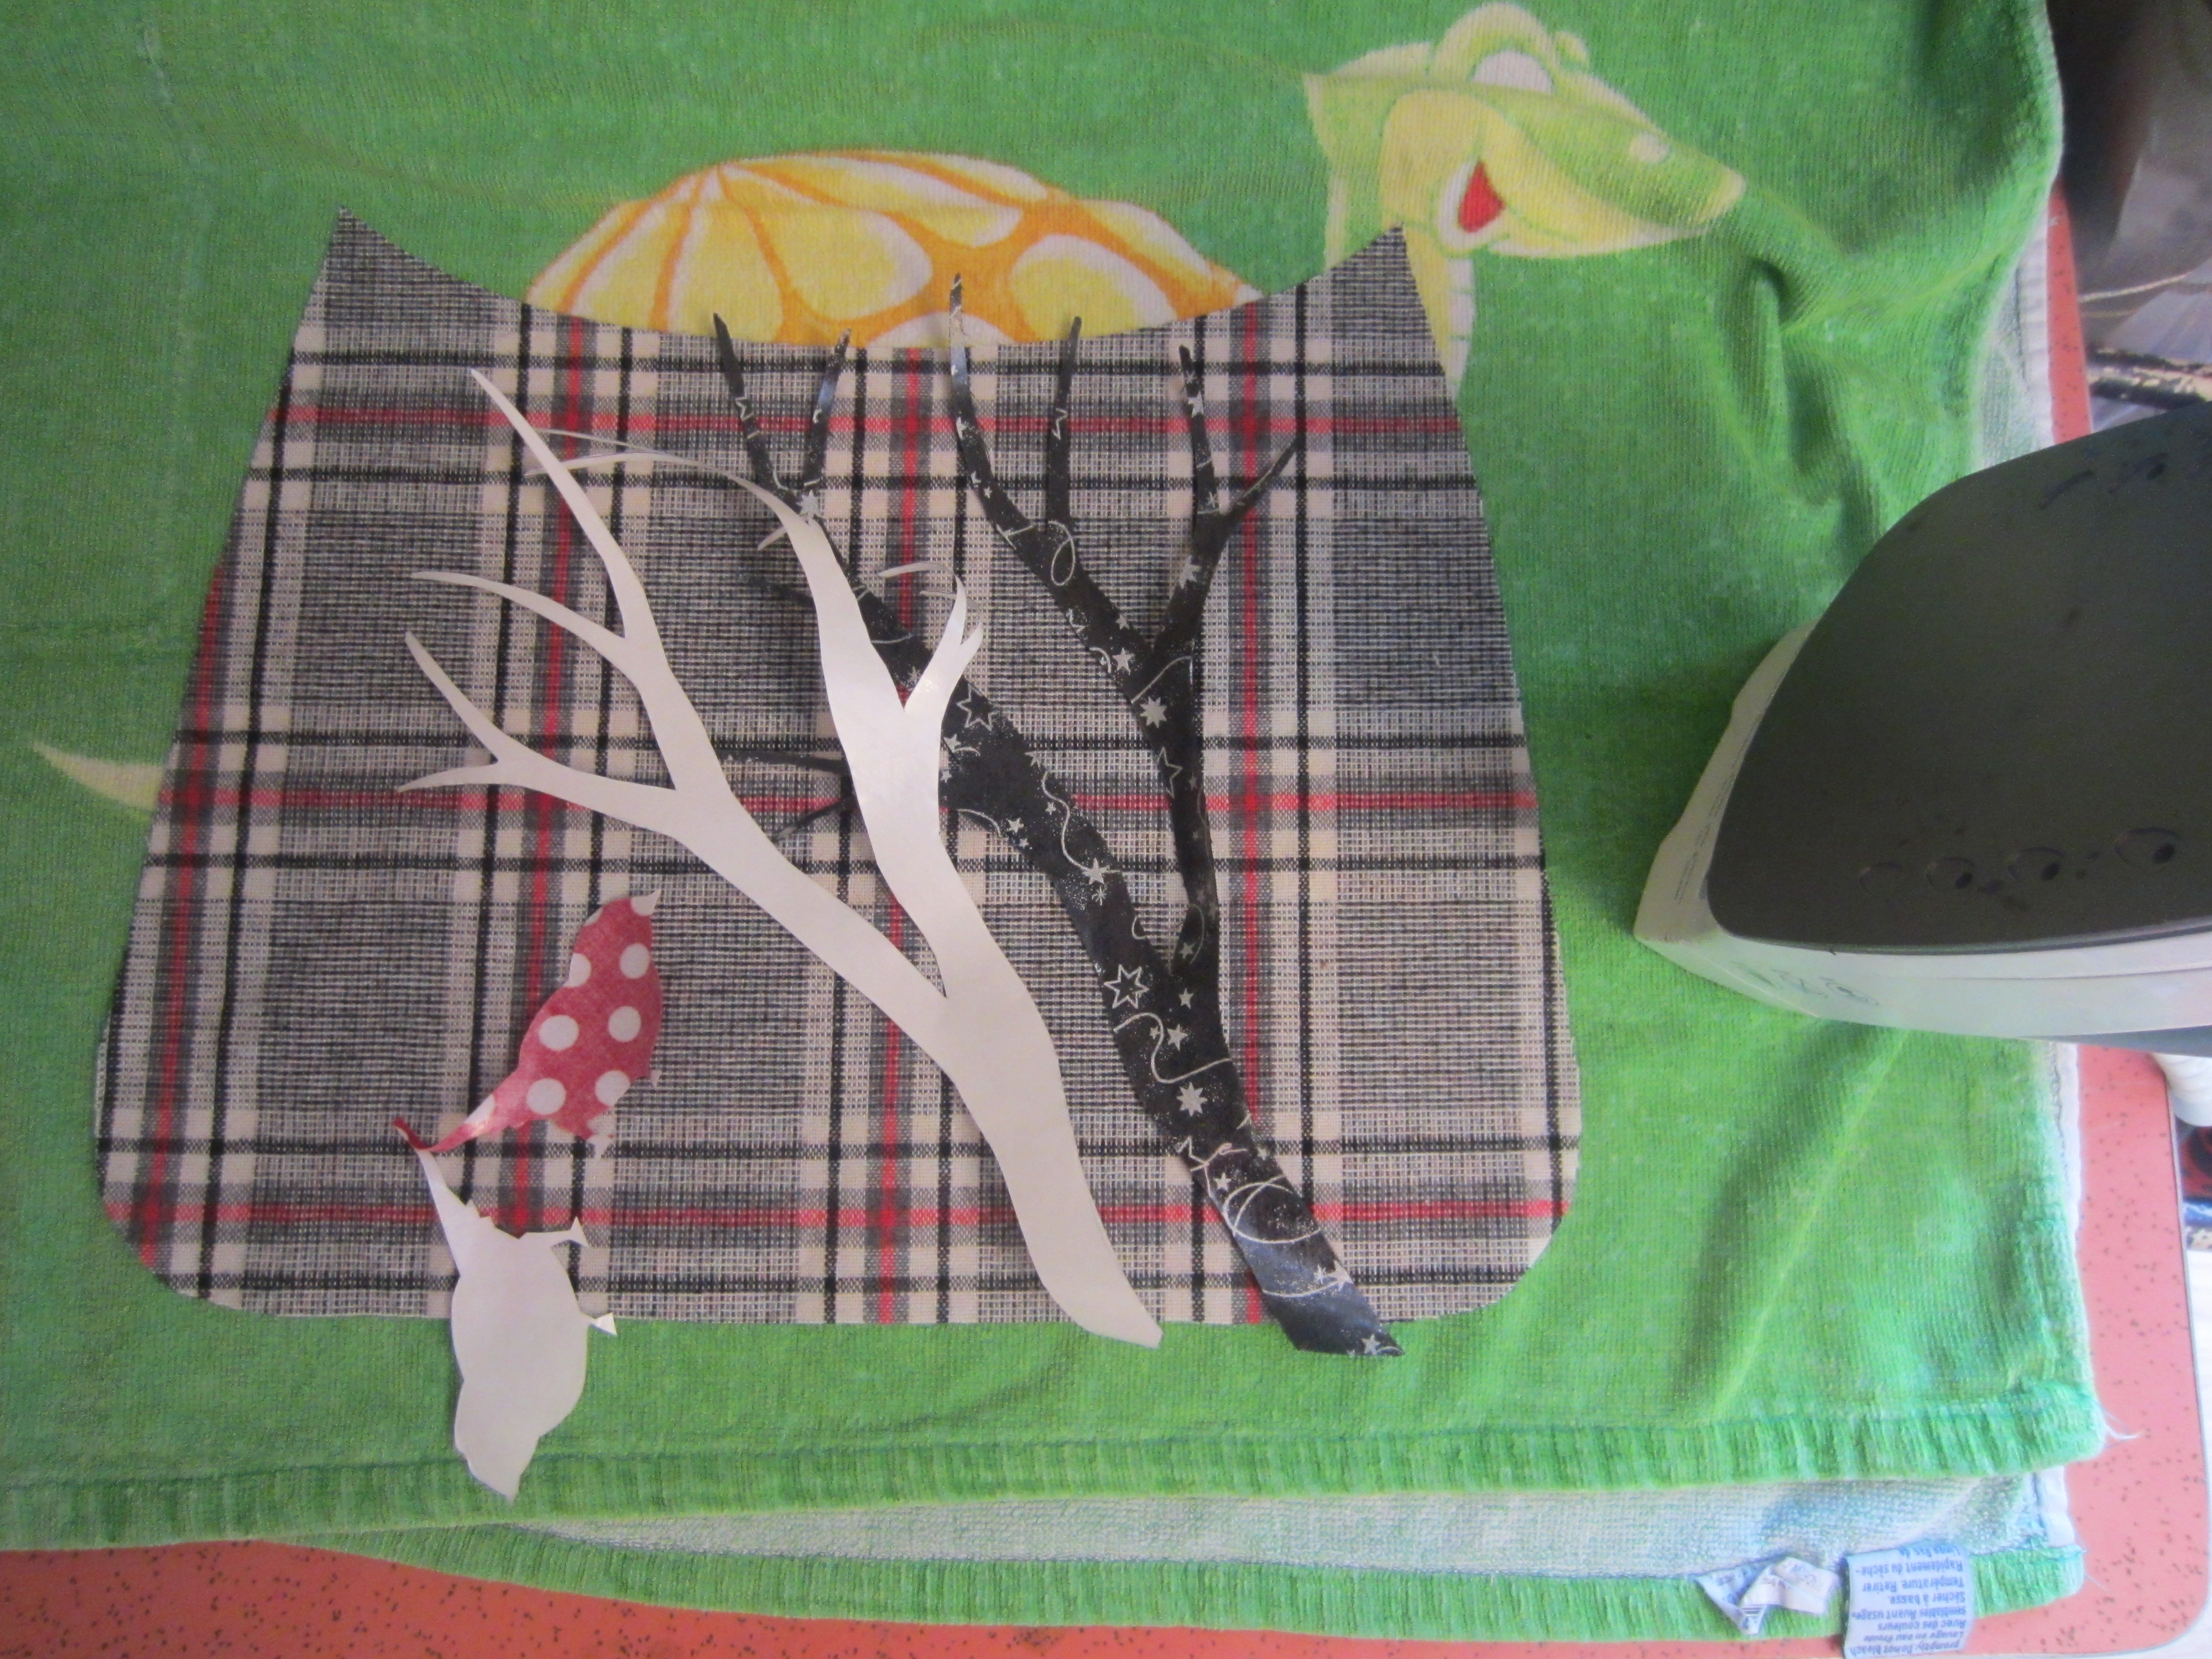
And then it was time to iron on my appliqués! Don’t forget to peel off the backing, which is super satisfying. Think of me while your doing it.

969952_623910884288106_1812334708_n-1

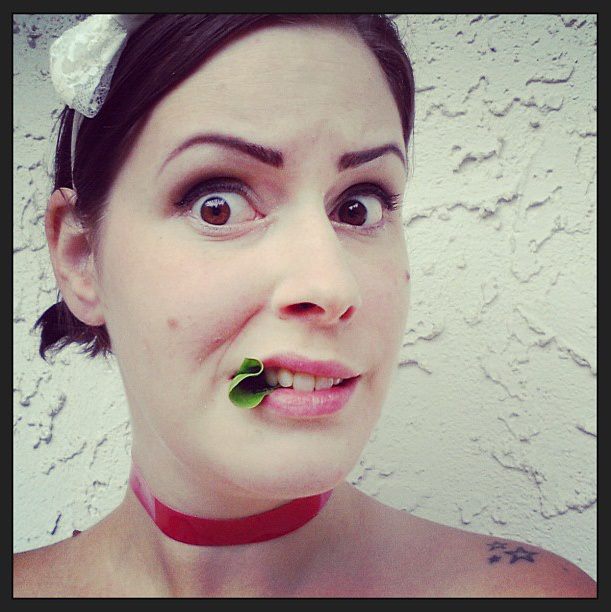
Oh! There I am. Is there spinach in my teeth?


IMG_1384

So after I flossed my teeth had all my pieces cut and ironed, I was ready to sew. This pile contained two pieces each of the main bag pattern and the lining pattern, and one strap piece. (I didn’t use wadding like she did in the original tutorial because I was using a heavier fabric, but if you want to make a bag out of two lightweight fabrics, you can use wadding to bulk it up!)

You want to sew the appliqué on BEFORE you put the purse together (seems obvious, but I have totally forgotten more times than I can remember!)

IMG_1385

I don’t even know if I do this the ‘right’ way- I just sew a really teensy and tight zig zag around the fabric like so. Practice a bit on some scraps, go slowly, and you will learn! If you want more details, click here.
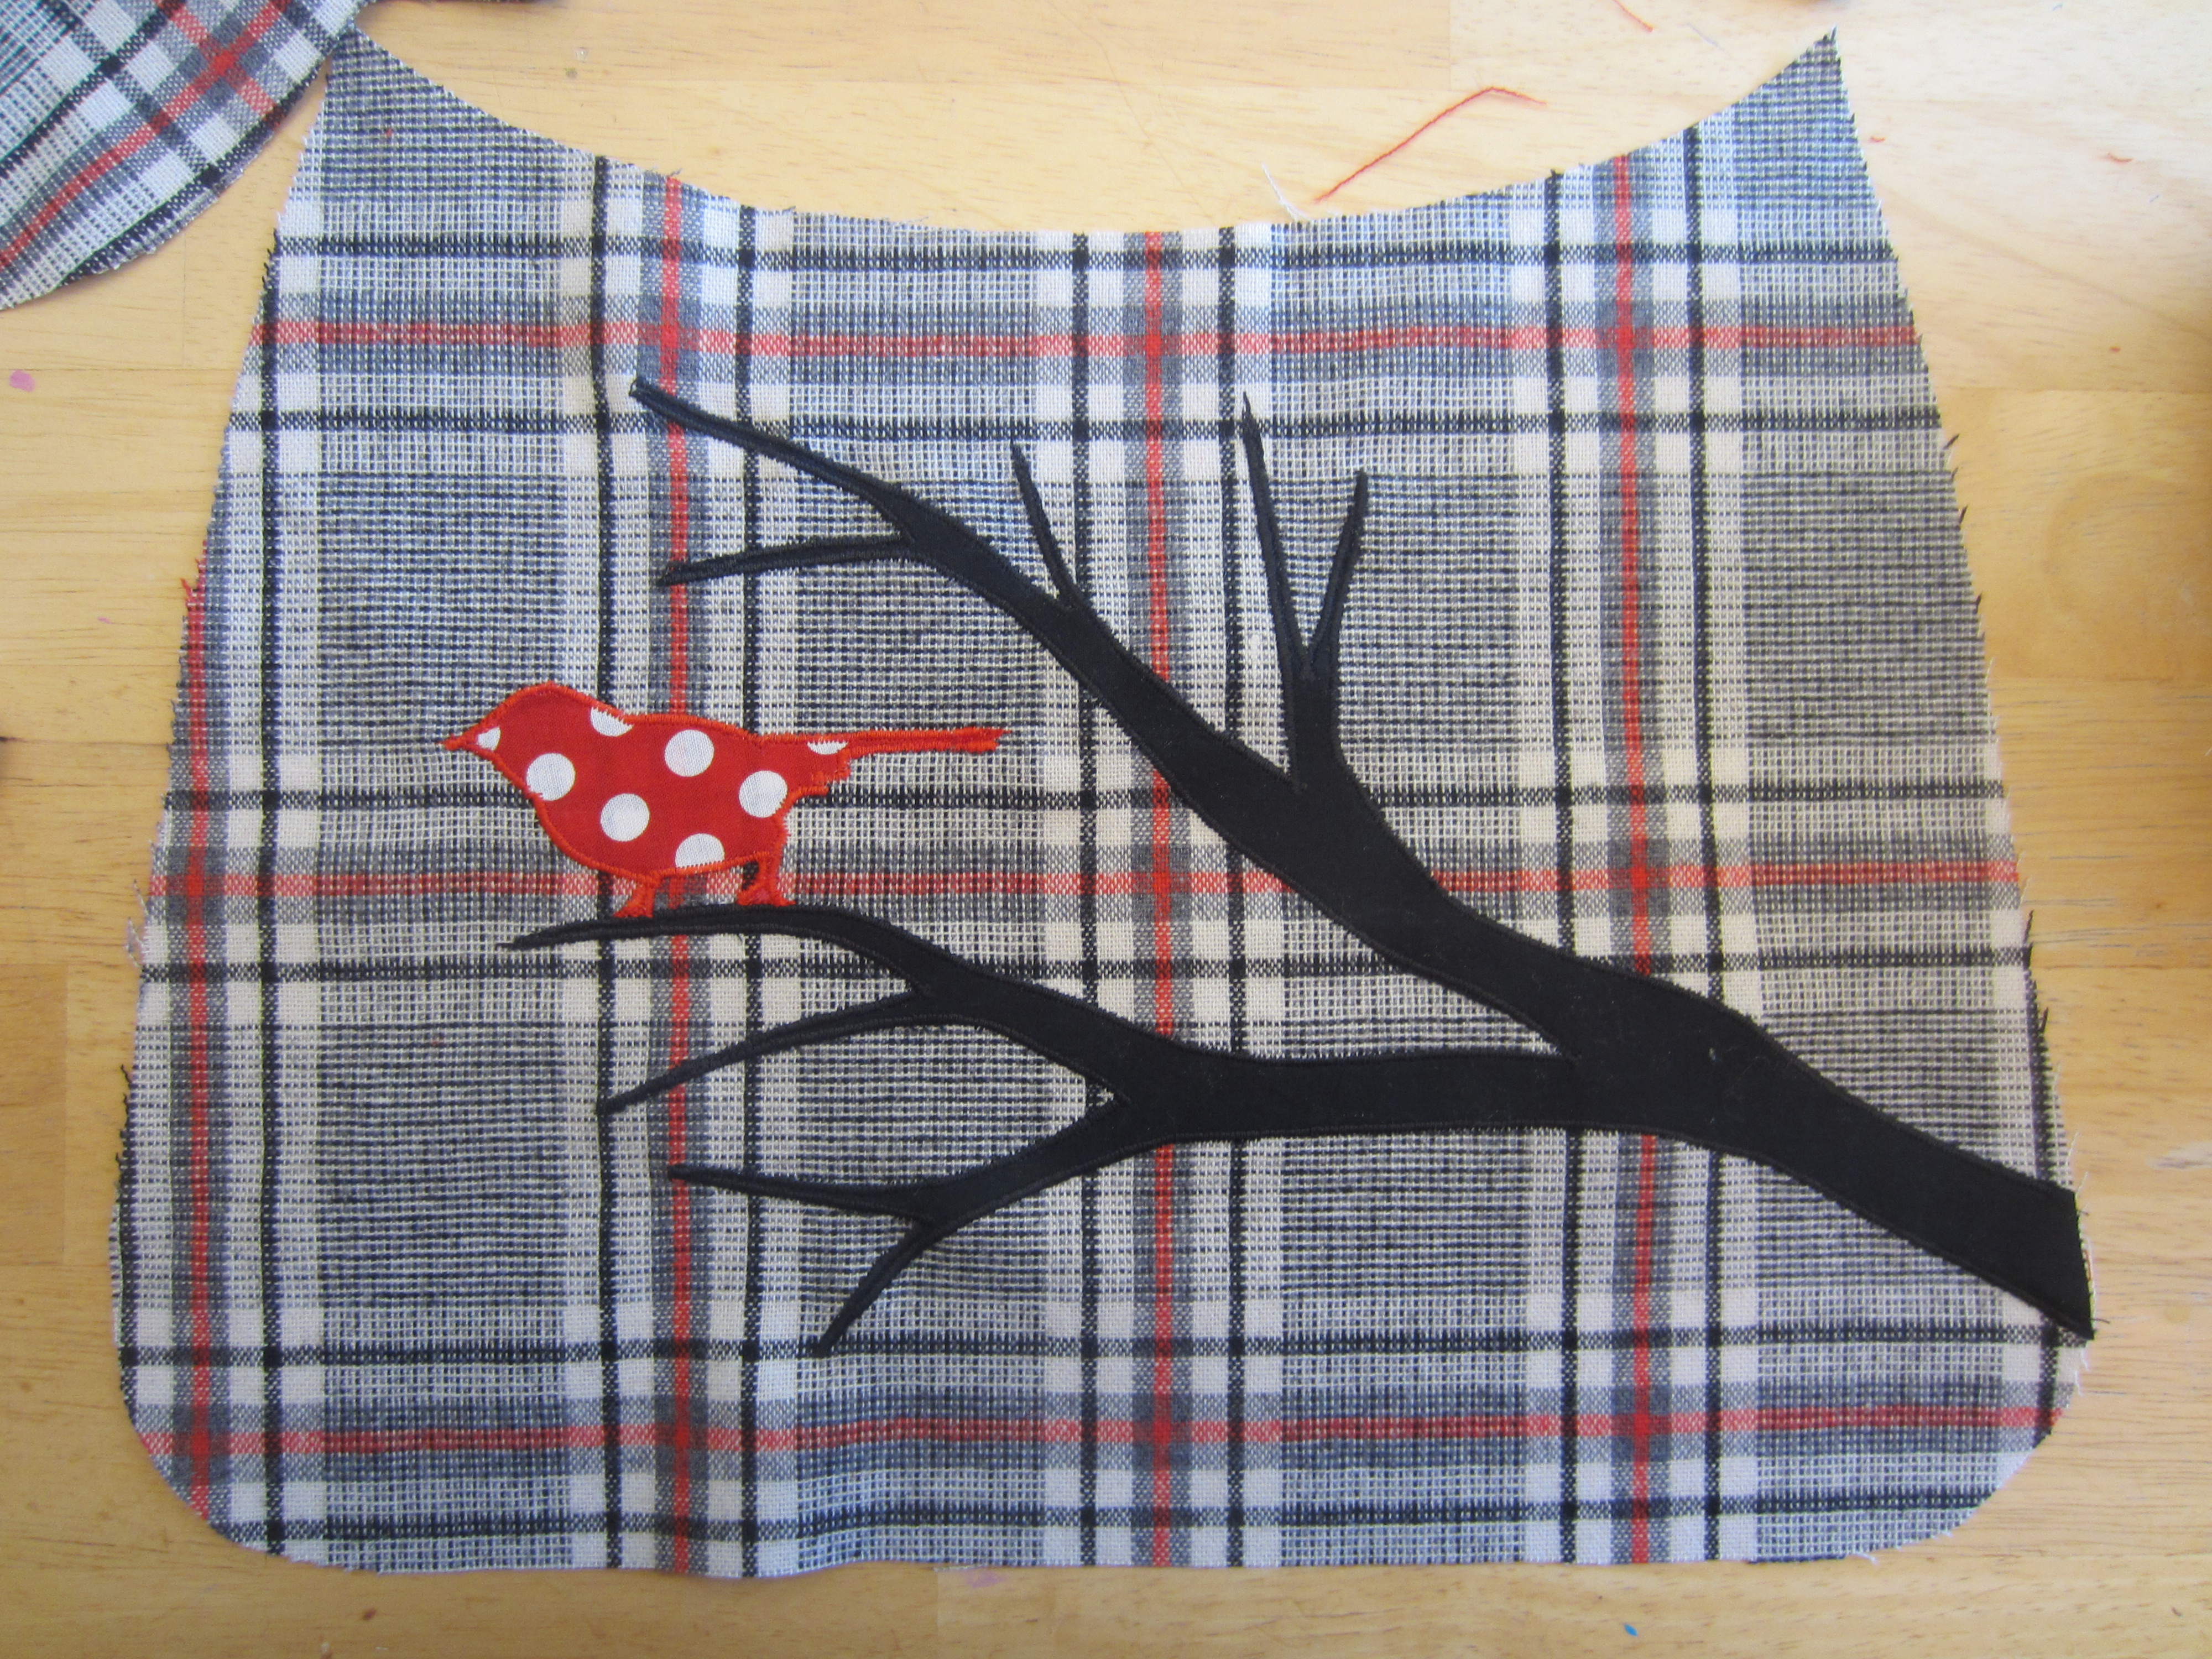
 IMG_1388

Ooh.

Now, on to the sewing of the purse!

I used to avoid pinning fabric, because I was lazy. But in the end my mom was right, and it is totally worth it to not skip this step.

IMG_1389

So who snuck in a blue pin???

IMG_1390

Pin your two purse pieces like that, making sure the front sides are facing inwards. Well, that looks kind of cool! Maybe I should have just done an outline to begin with!

IMG_1391

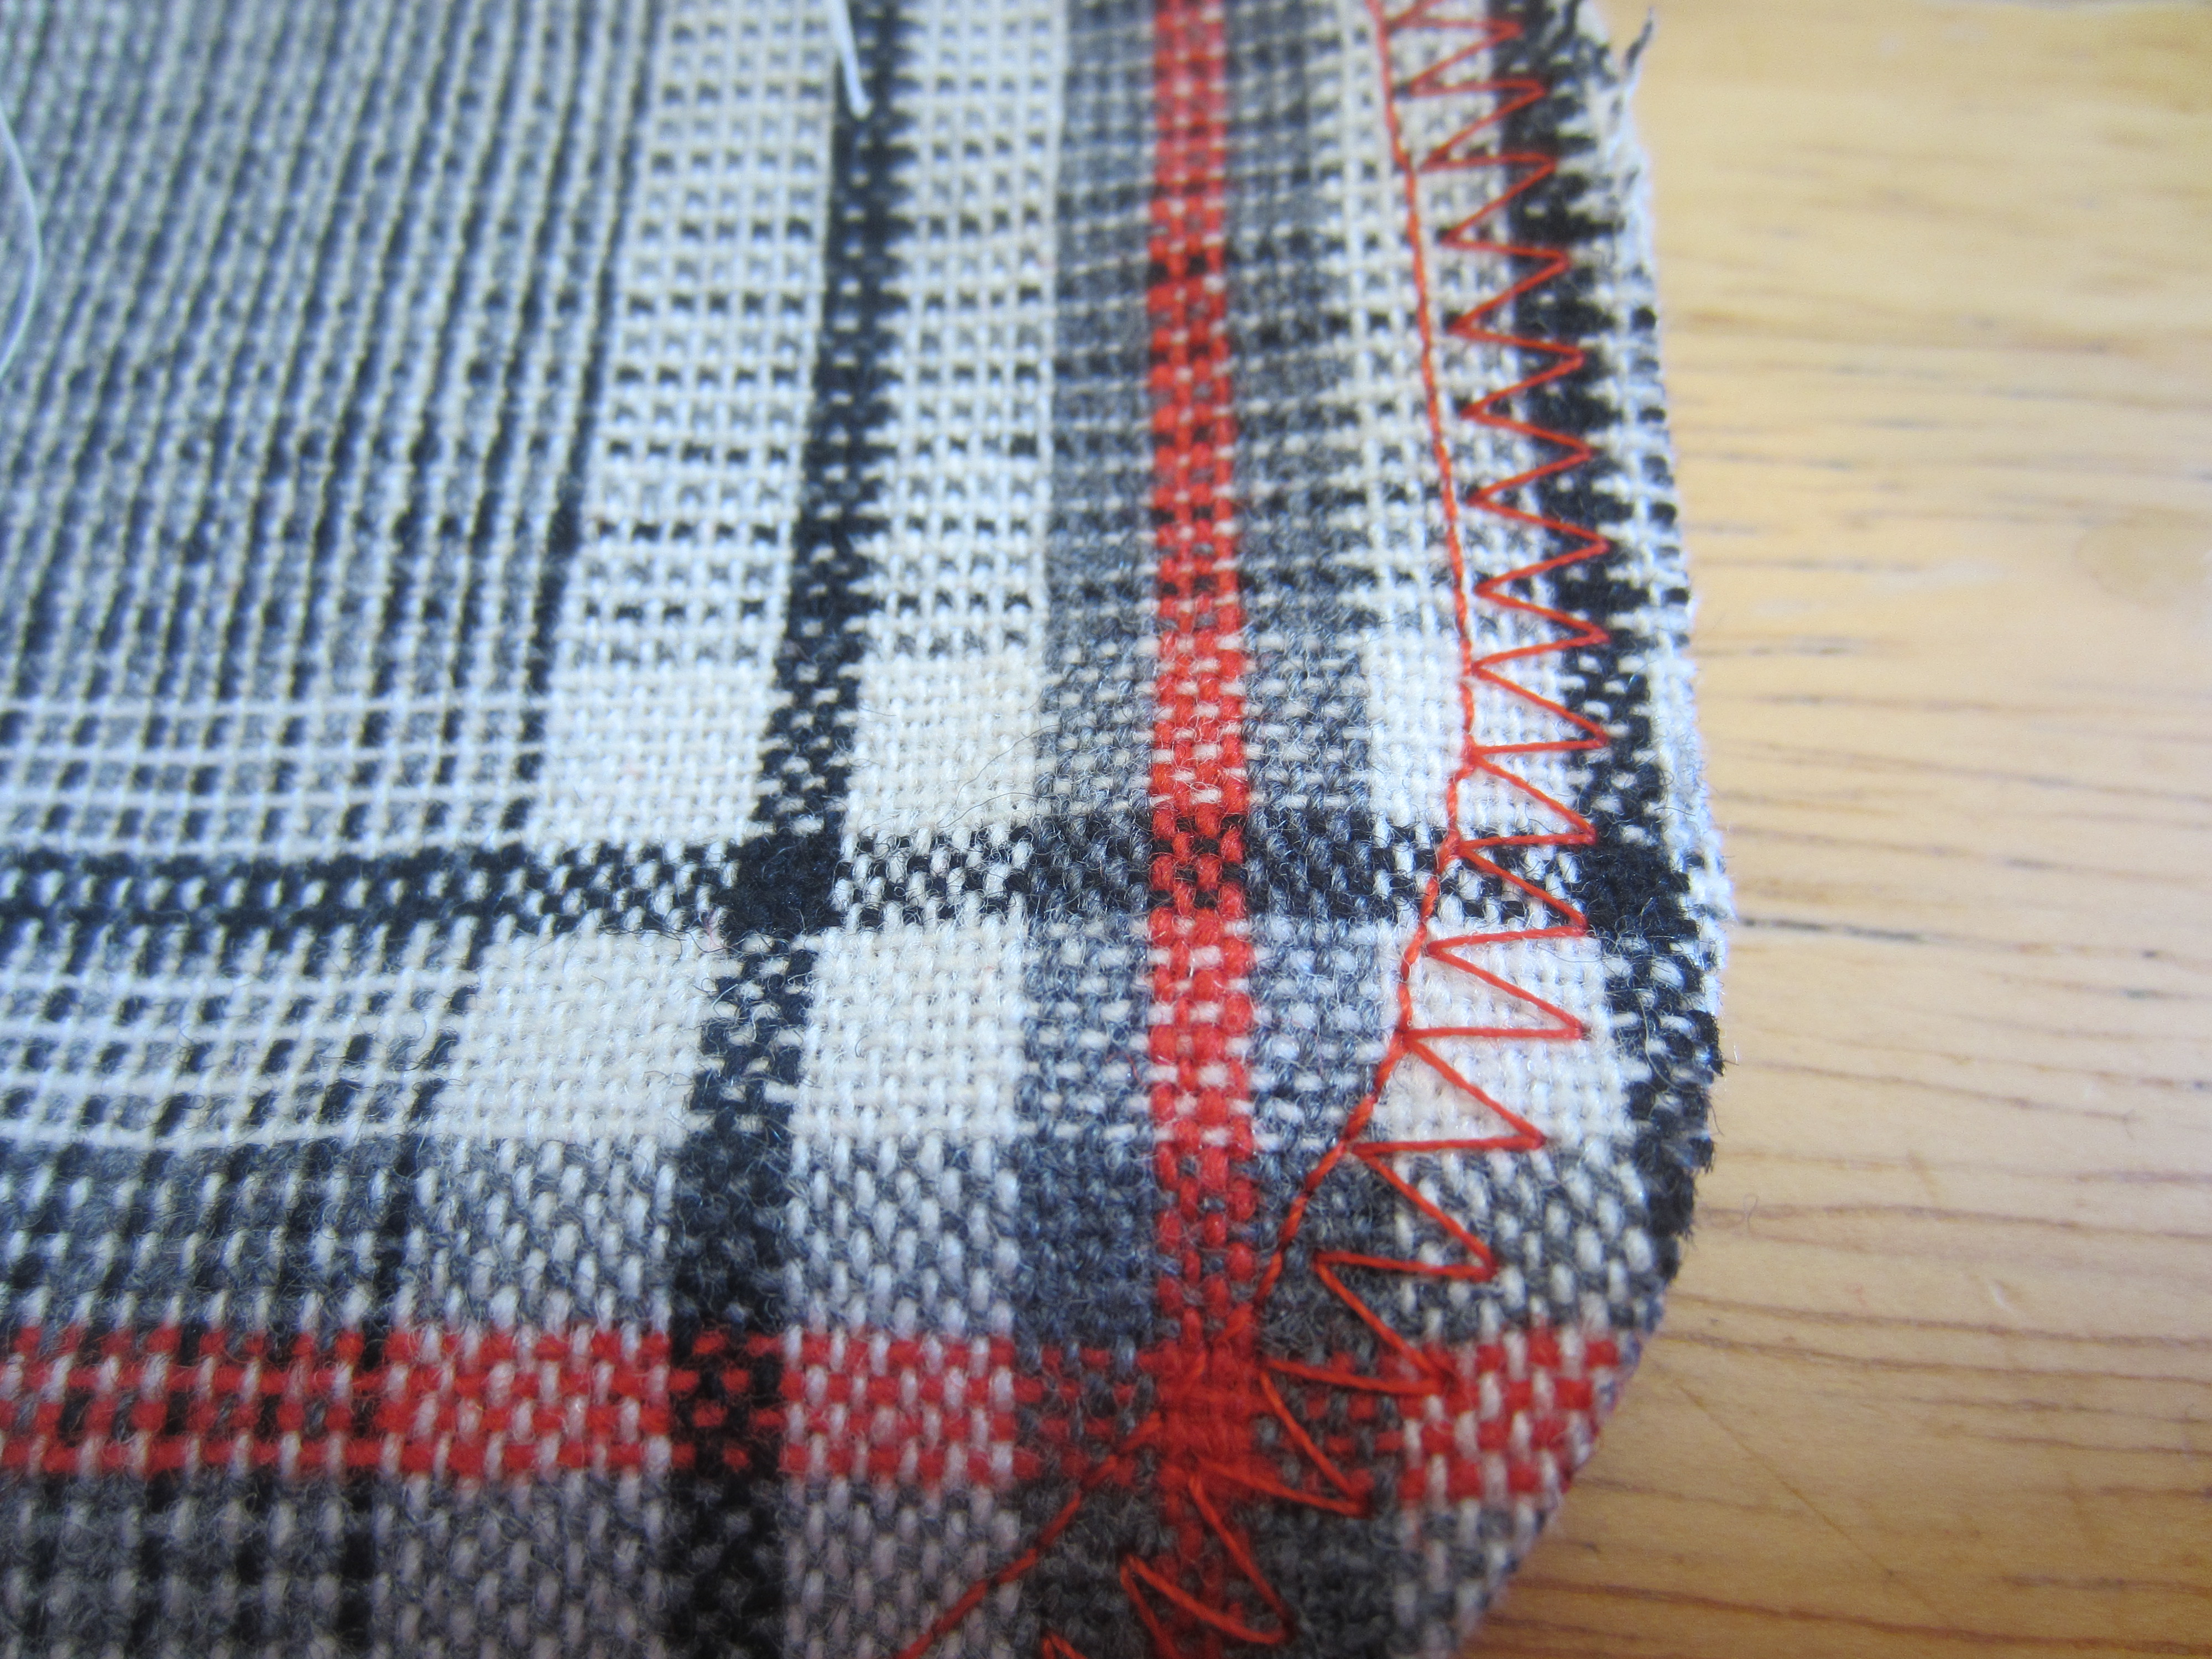
Sew around the sides and bottom of your purse, and go back and do a zig zag on the edge to prevent fraying. I used to have a serger to help with this step, but we didn’t get along, and now he is in a relationship with my good pal Annie over at Dick & Jane Cloth Diapers. I hope you and Sergio make beautiful baby’s (diapers) together. Oh, here’s one now!

flora-march-0593-1

(photo by Jody Wiger Photography)

Seriously best diapers ever.

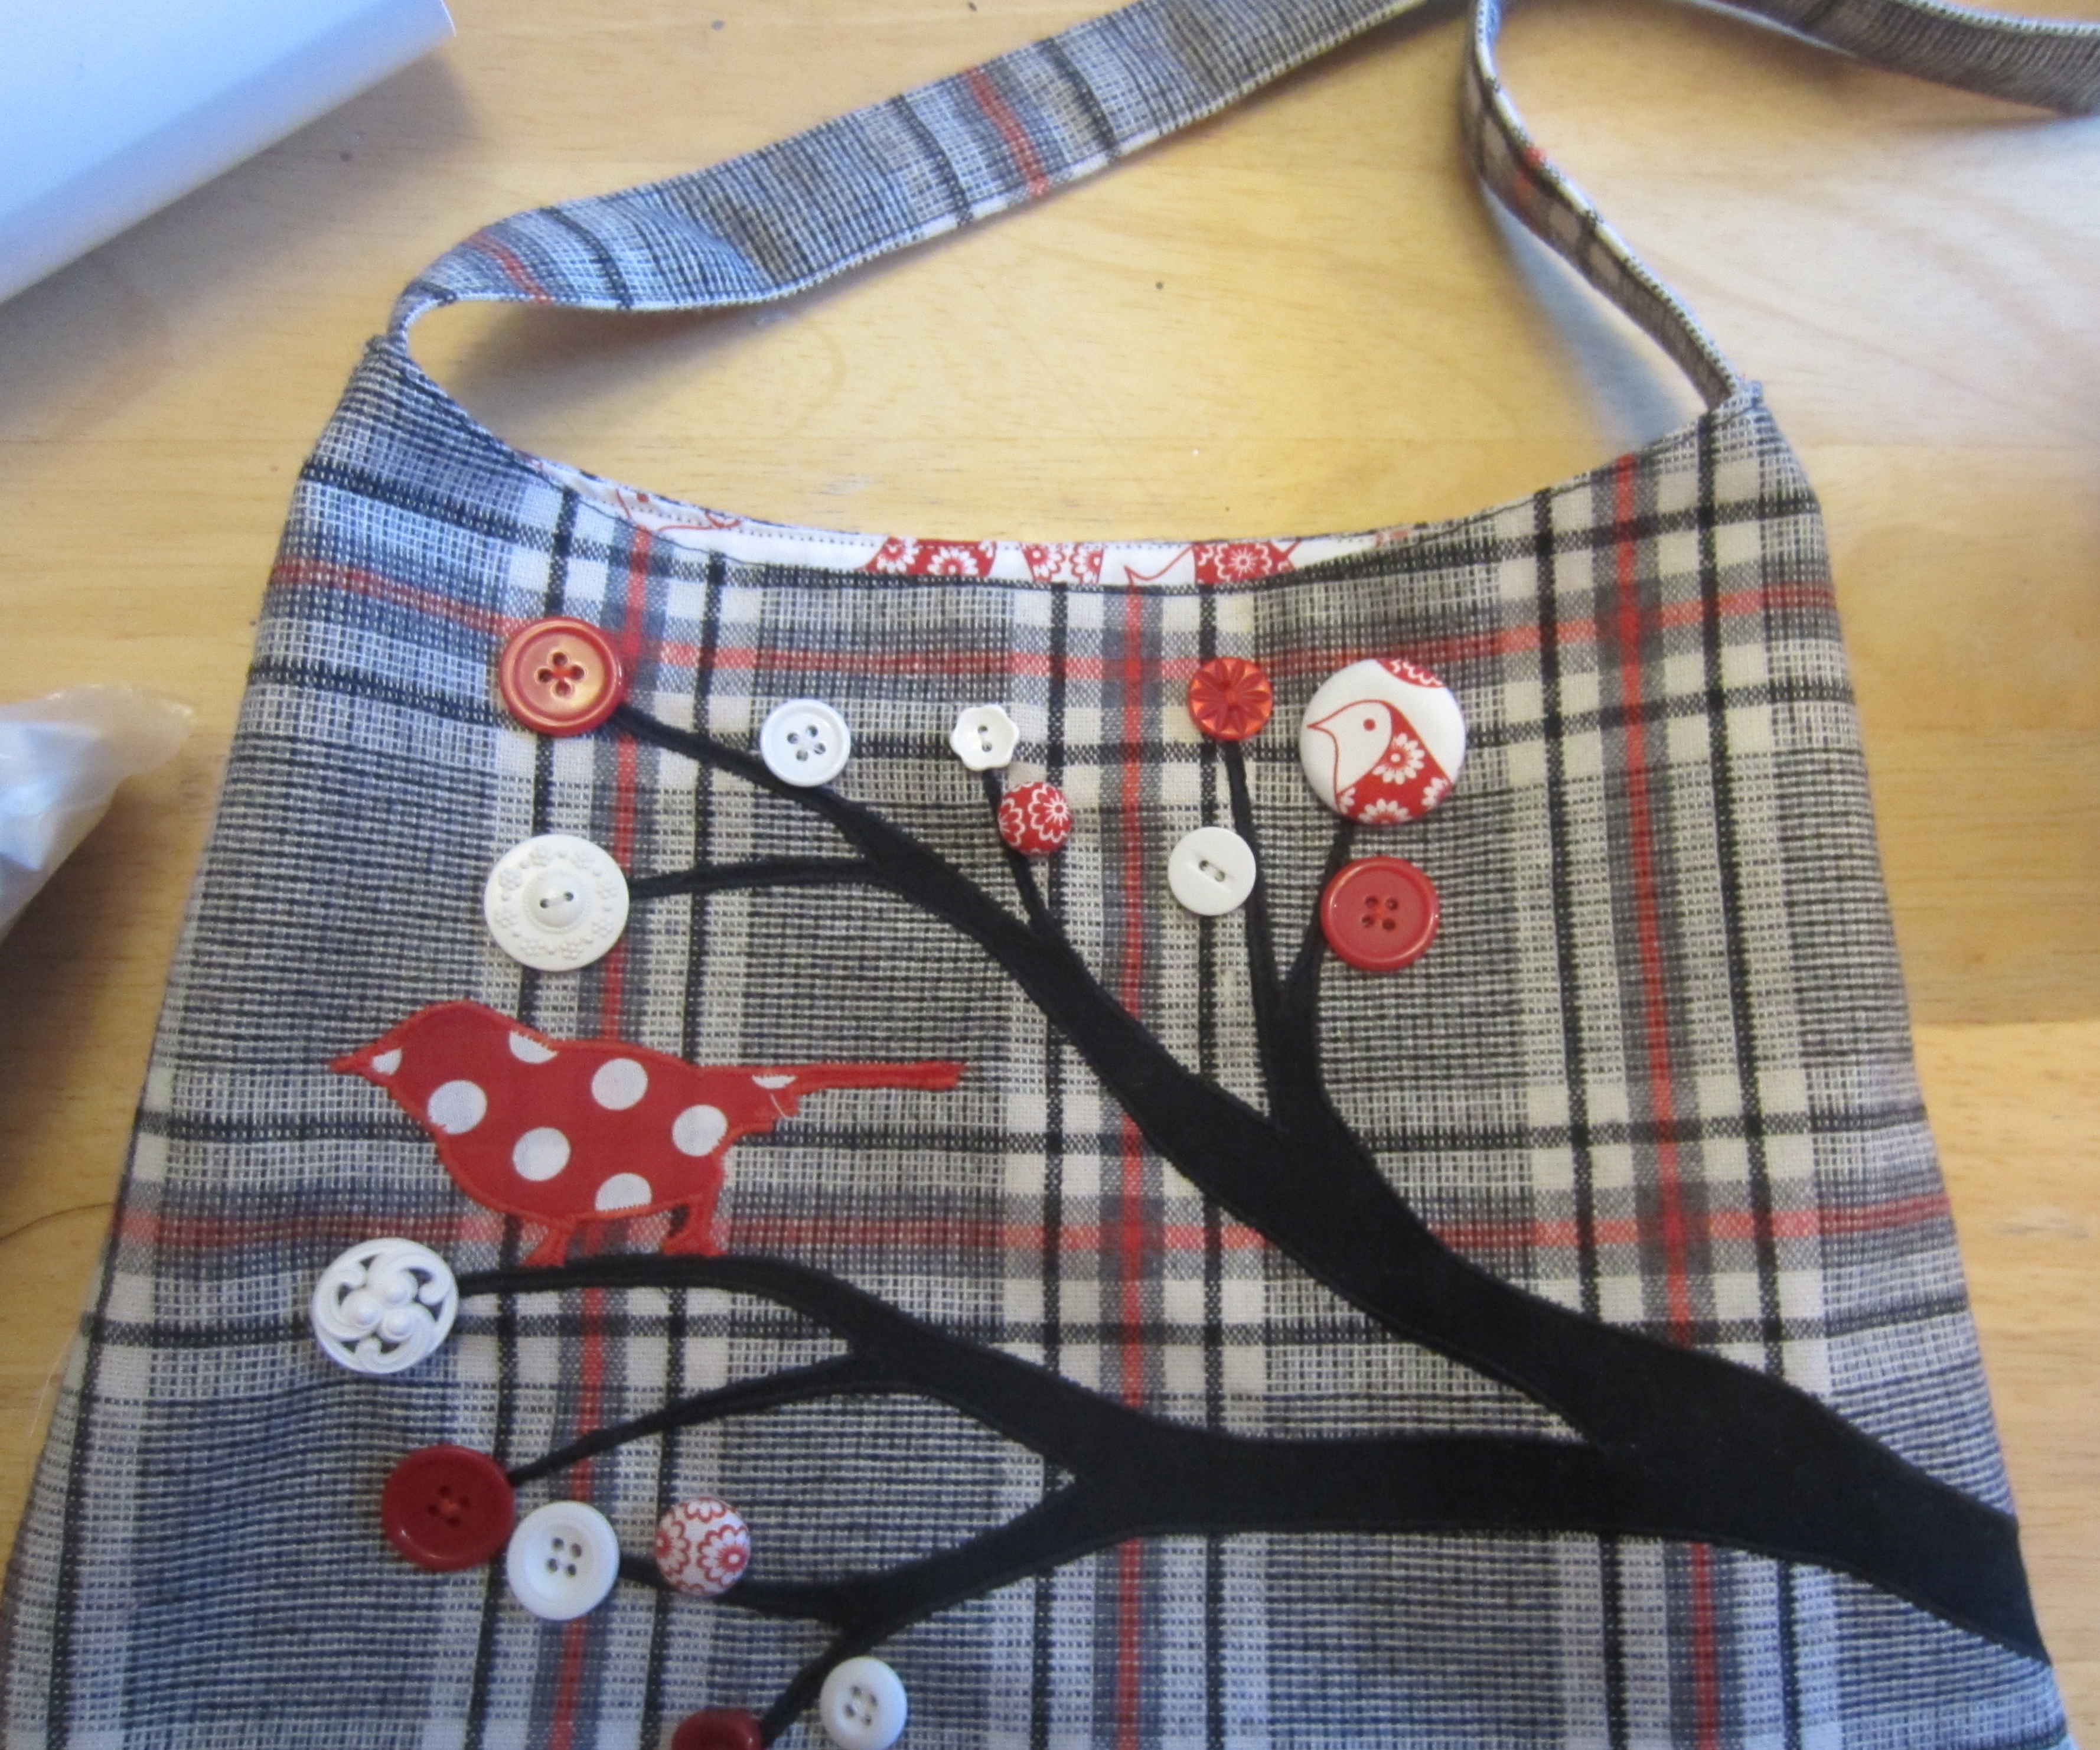
Okay, so I totally should have done this next step BEFORE I sewed the main pouch of the bag (I told you I forget these things!) But thankfully I remembered before I sewed the lining in, so here is THE MOST IMPORTANT step of the whole bag…. The buttons!
IMG_1392

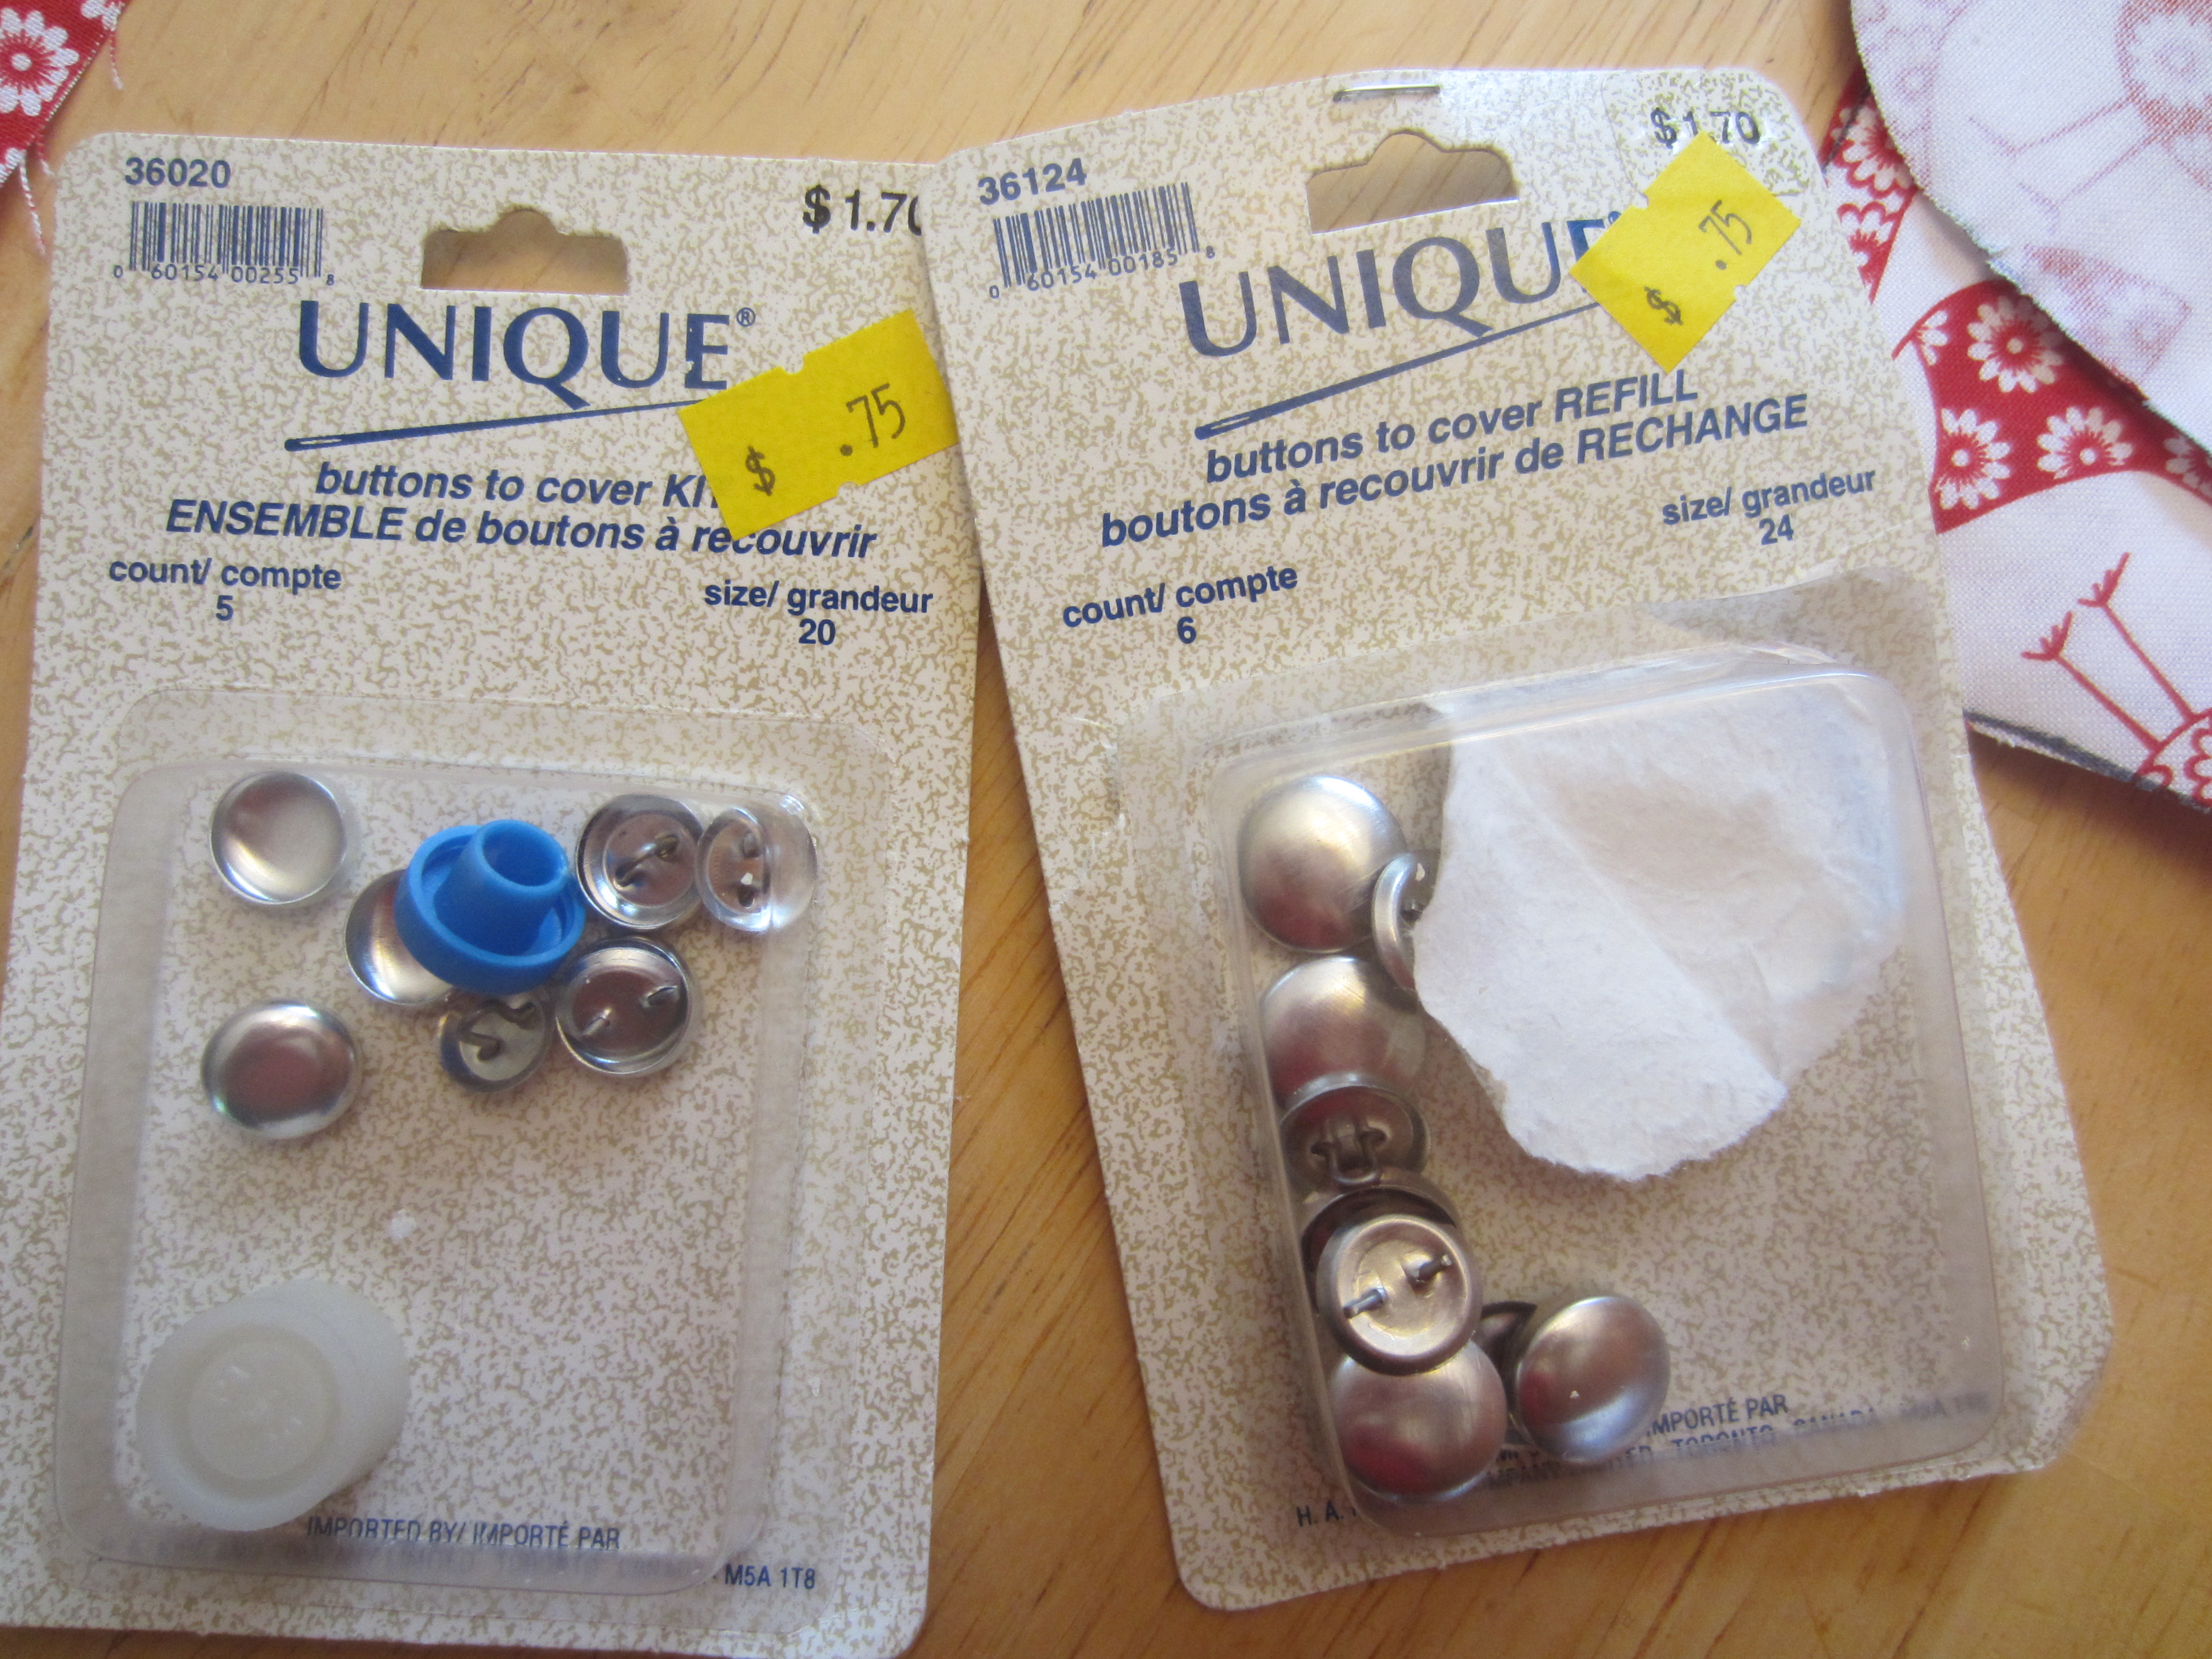
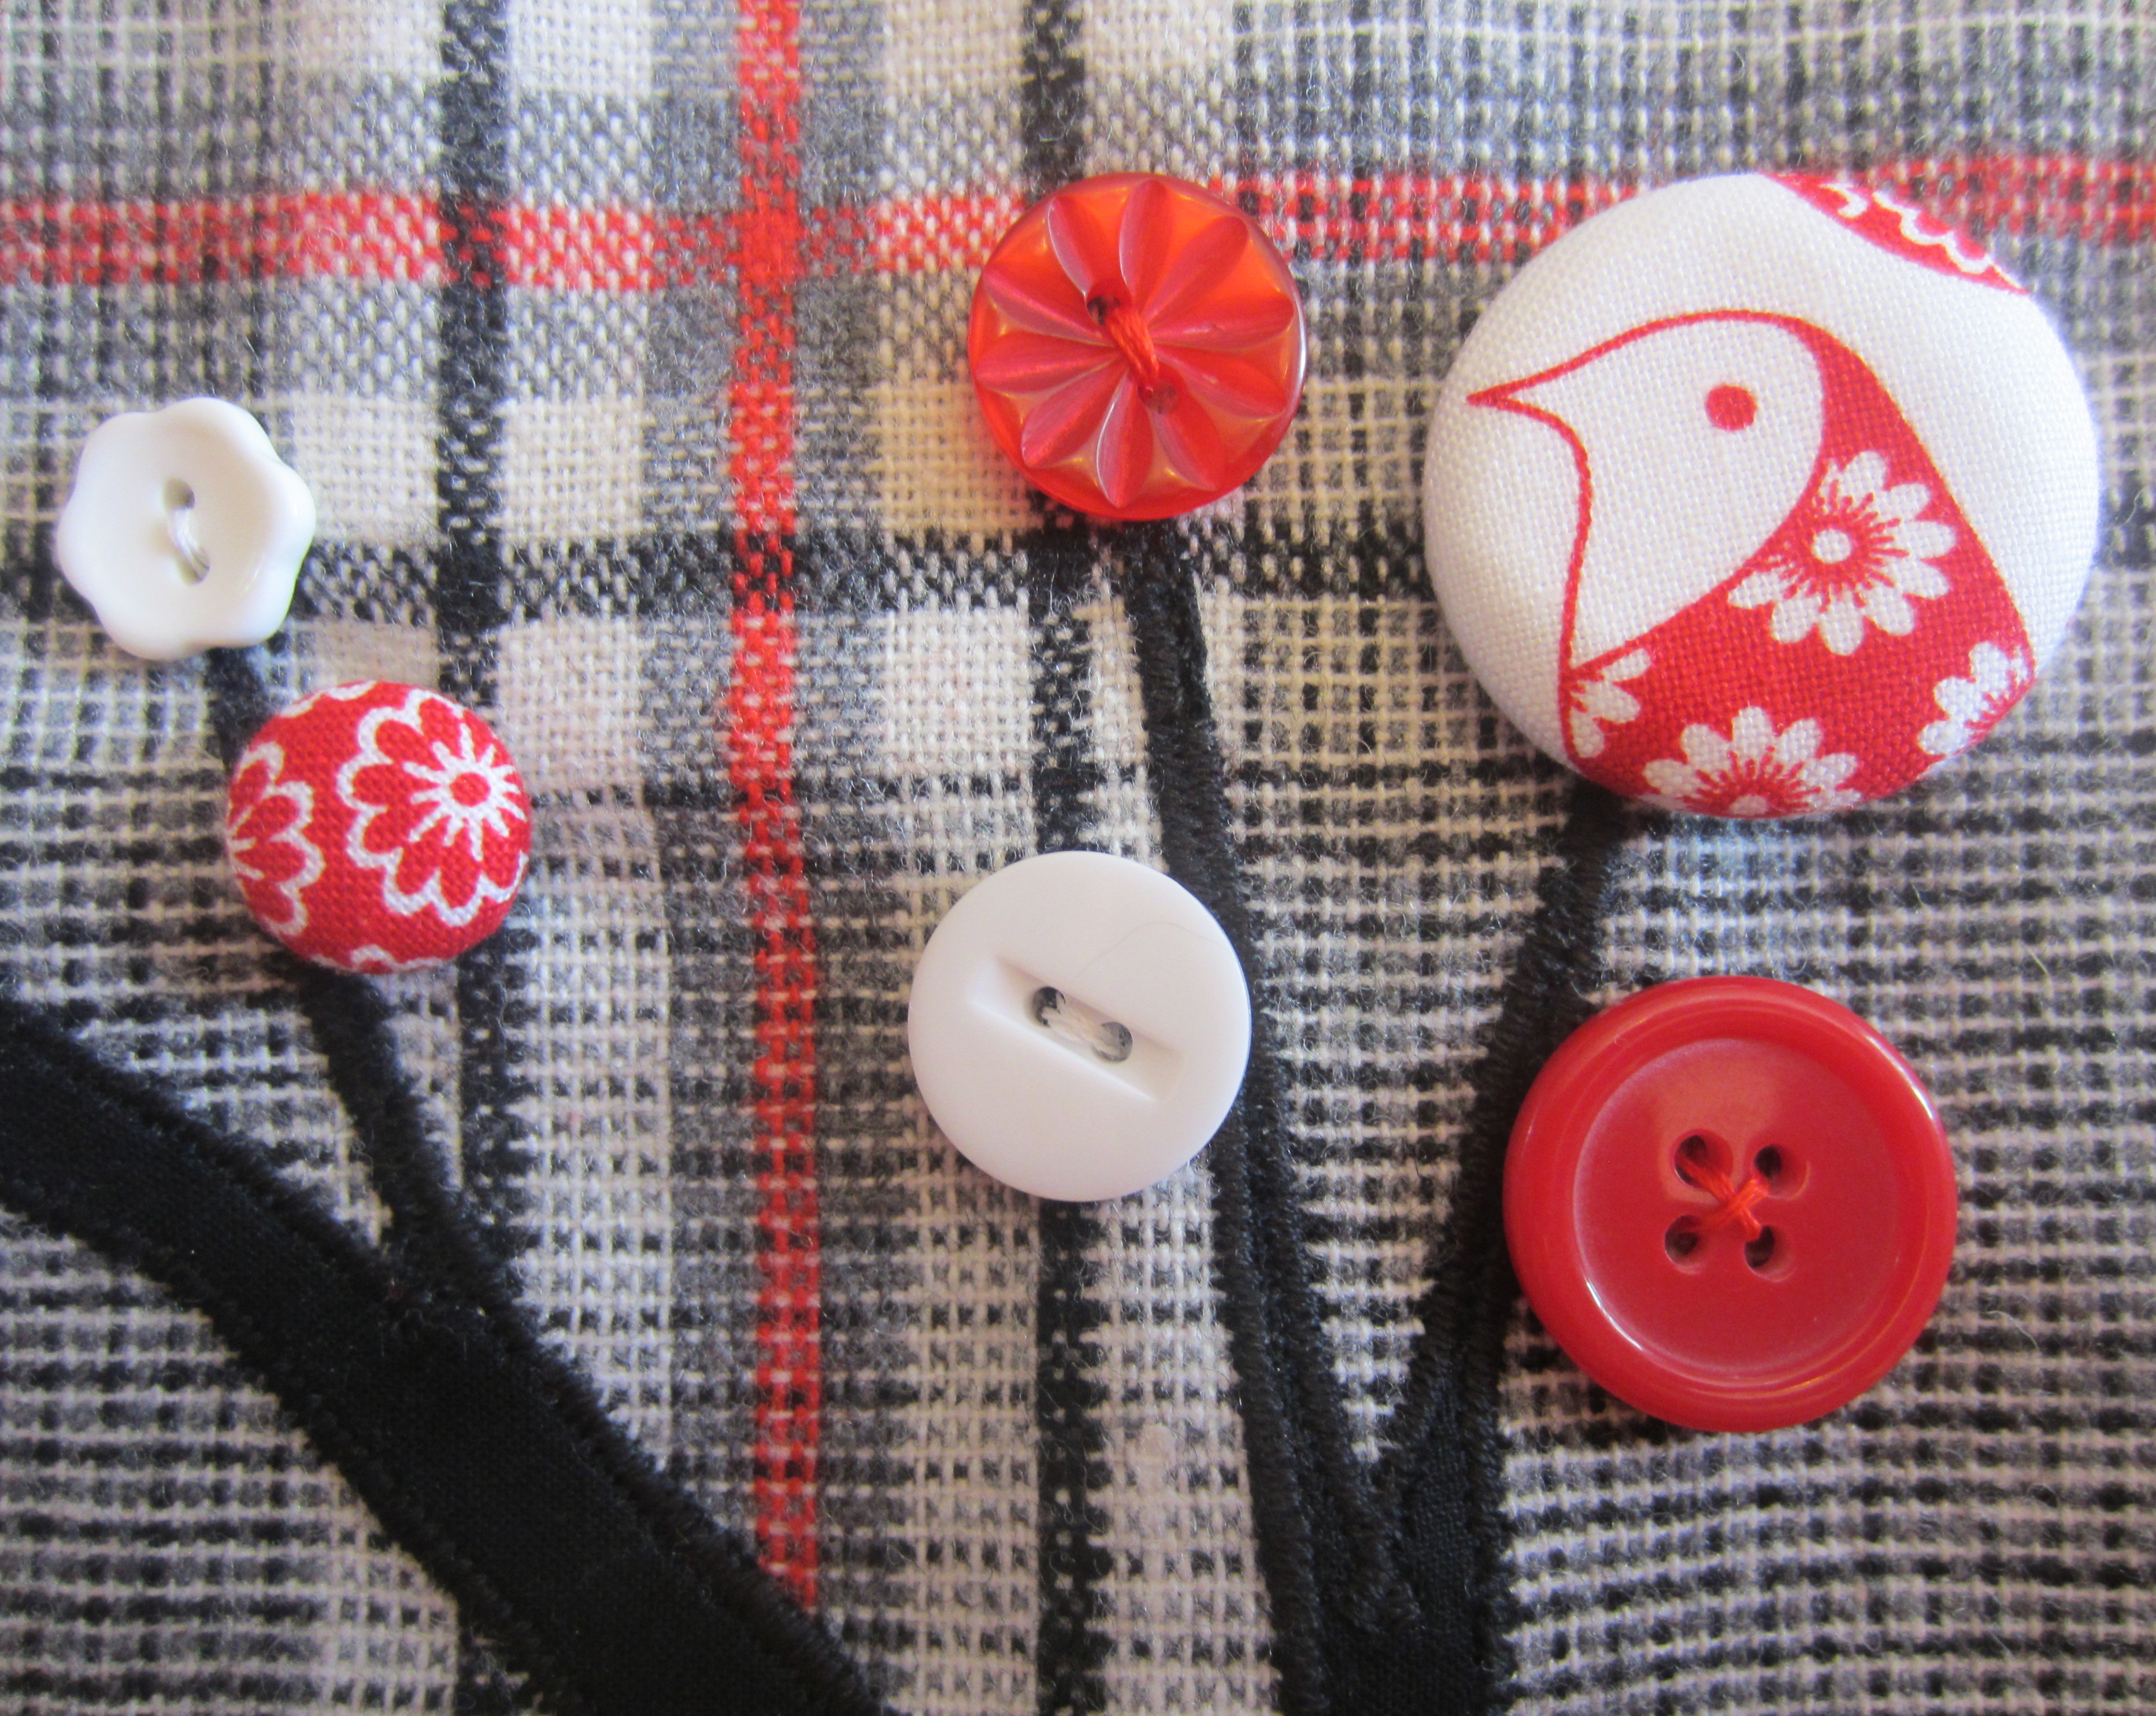
Yay for another thrift store deal! I wanted to make some covered buttons to showcase a bit of the adorable lining fabric on the outside. You can cover buttons in your fave fabrics and turn em into hair ties like these too!
IMG_1394

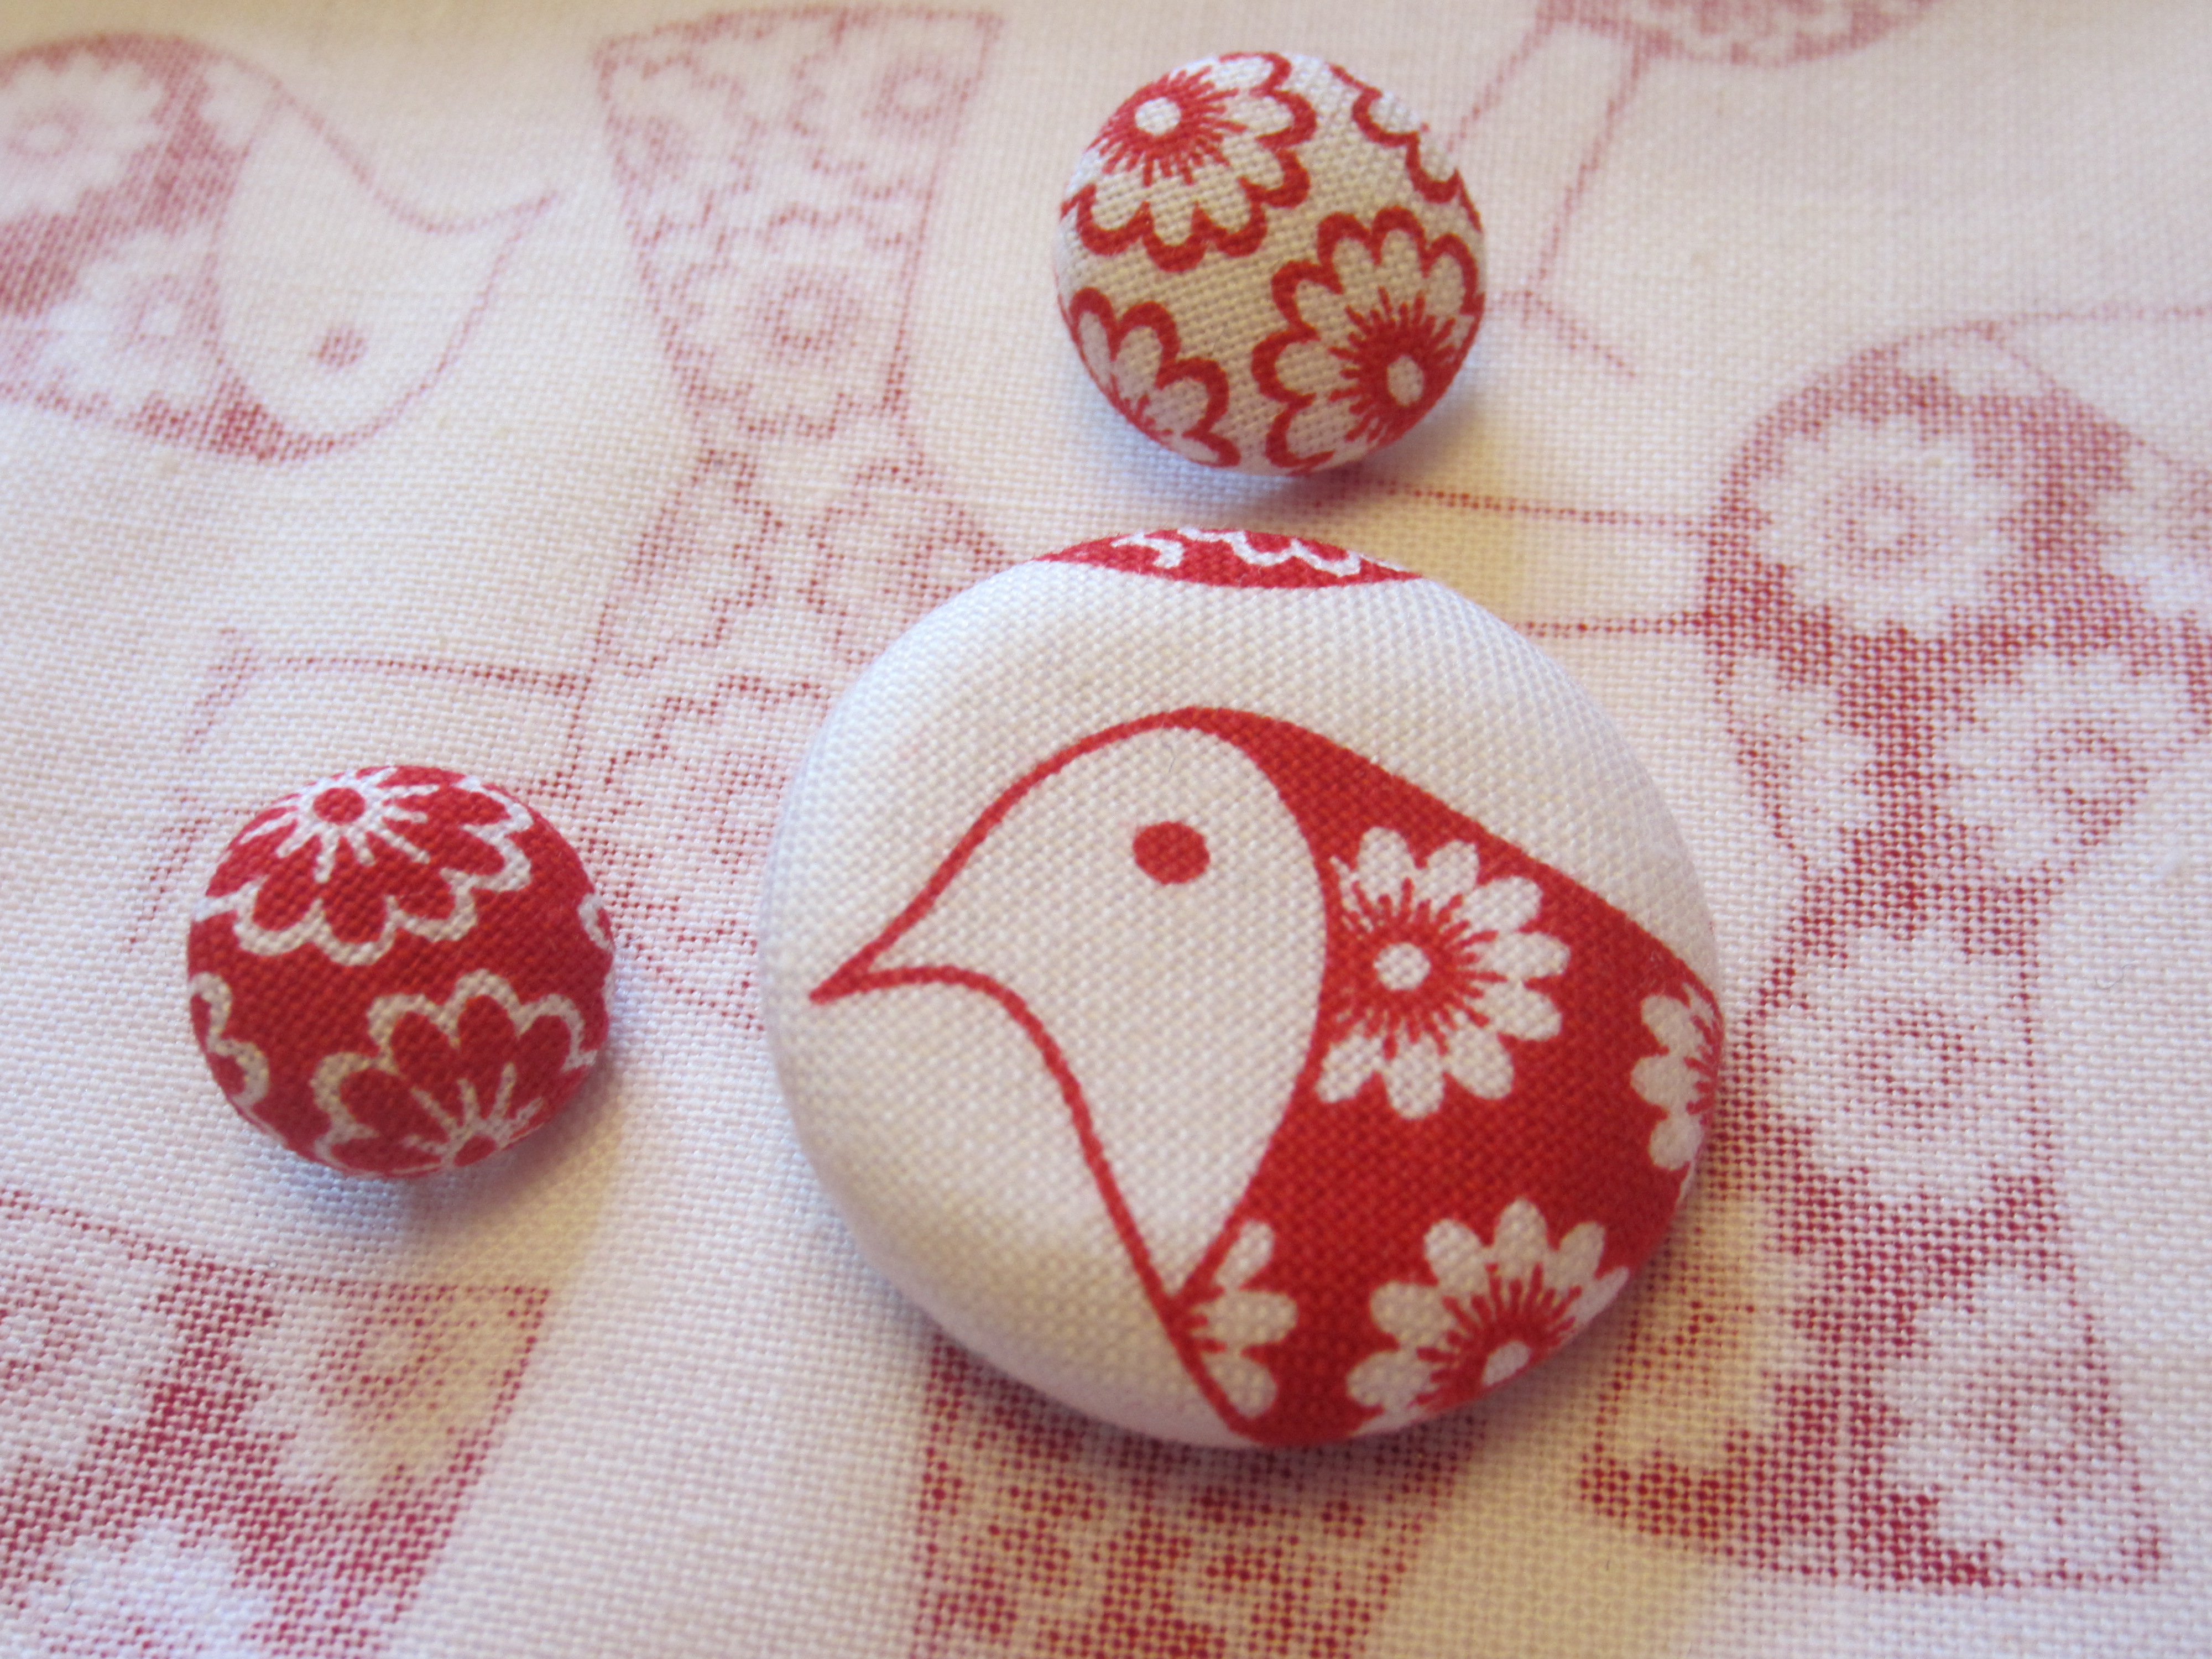
Aren’t they perfect?!?!? I could just stare at this photo all day. In fact, I did! I started writing this post 24 hours ago and finally snapped out of my button-staring-trance just now! Woah.

IMG_1396

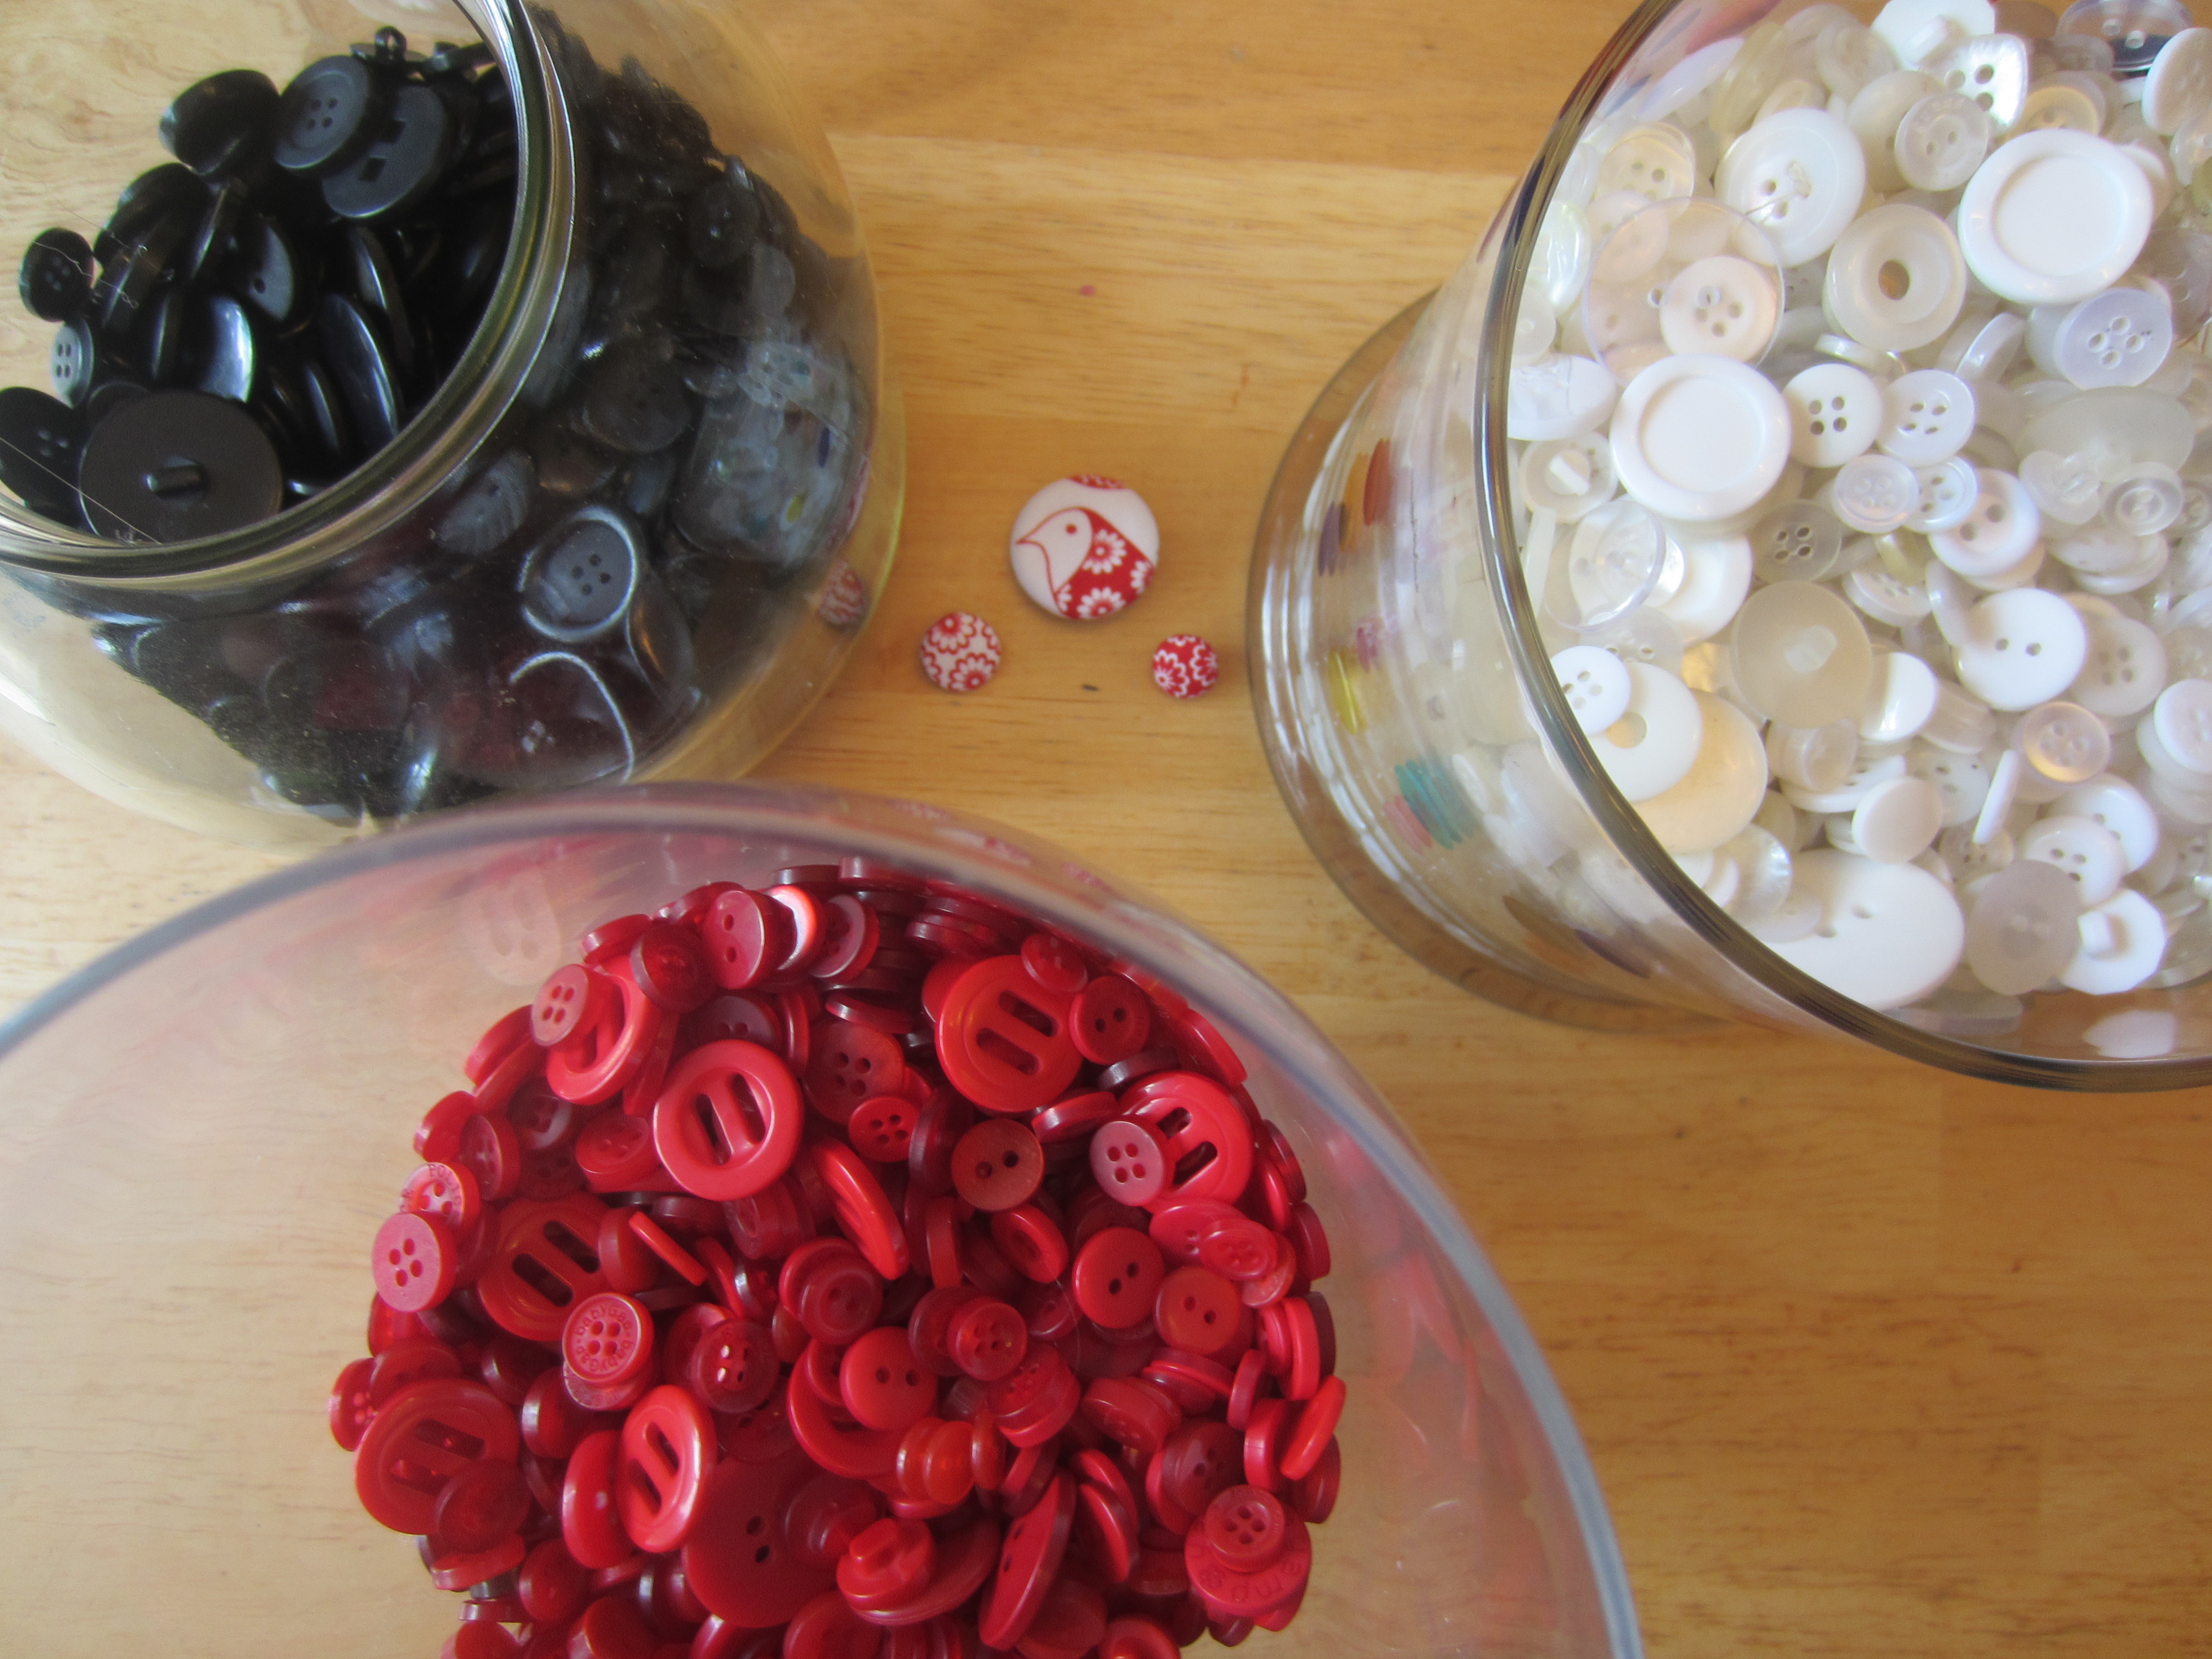
I used a nice assortment of coordinating buttons to embellish the branch and laid them out to find the perfect placement.

IMG_1398

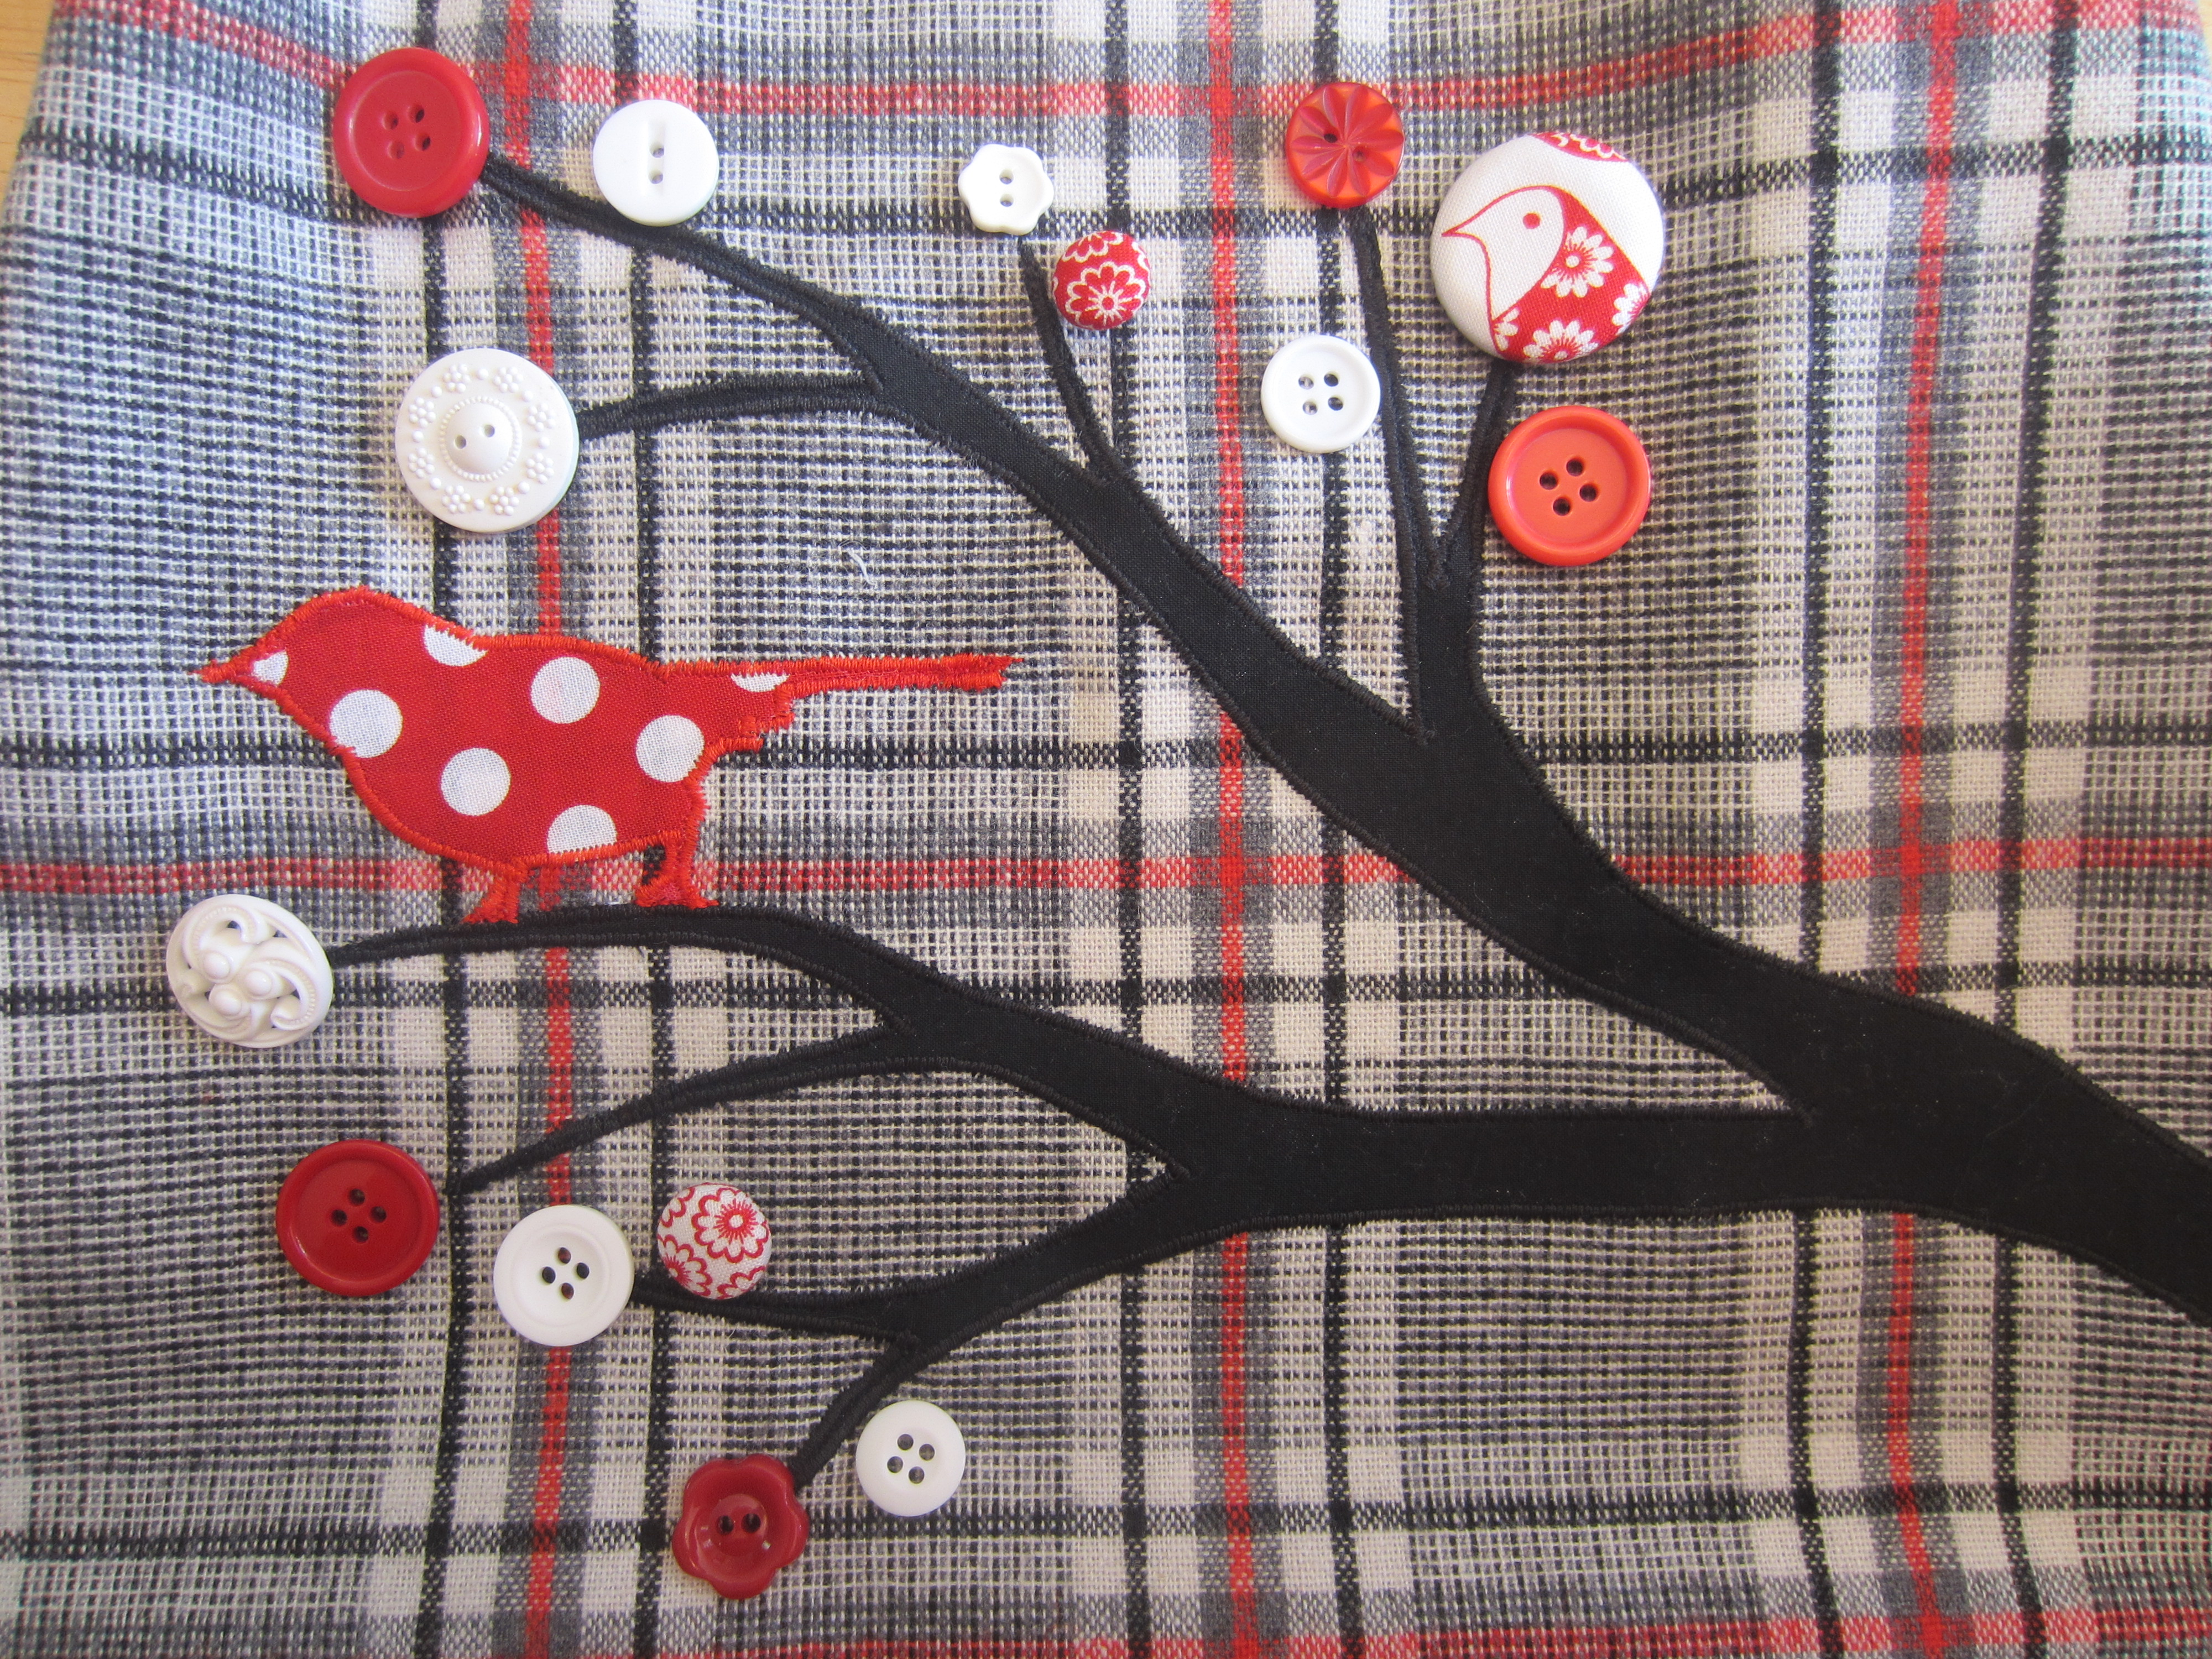
And then I sewed ’em firmly in place:
IMG_1400

All the pretty buttons ❤

***Side note- my 5 yr old son just ran up to me, ripped off his shirt and said “Mom! Check out my pecs!” Haha…

IMG_1401

When you sew the lining, make sure to leave a 3+ inch opening at the bottom. I always use to take short cuts with linings, and once I finalllllly, again, listened to my mom and figured out how to PROPERLY sew in a lining, it made such a difference in the finished look and quality! So it is worth figuring out- and in the end it is also quicker than just sewing the lining separately and  adding it at the end.

IMG_1402

I’ll do my best at explaining how this works- First, take your sewn and right-side-out main pouch and shove it inside the sewn, in-side-out lining like this.

IMG_1403

See what I did there? I hope all you like-minded visual learners are appreciating this mile-long tutorial!

IMG_1405

Sew around the top of the bag like this- and don’t forget to use those pins!!!

And now- the magical part!

IMG_1407

Pull the main part of the bag through that opening that you left in the bottom of the lining like that!
IMG_1408

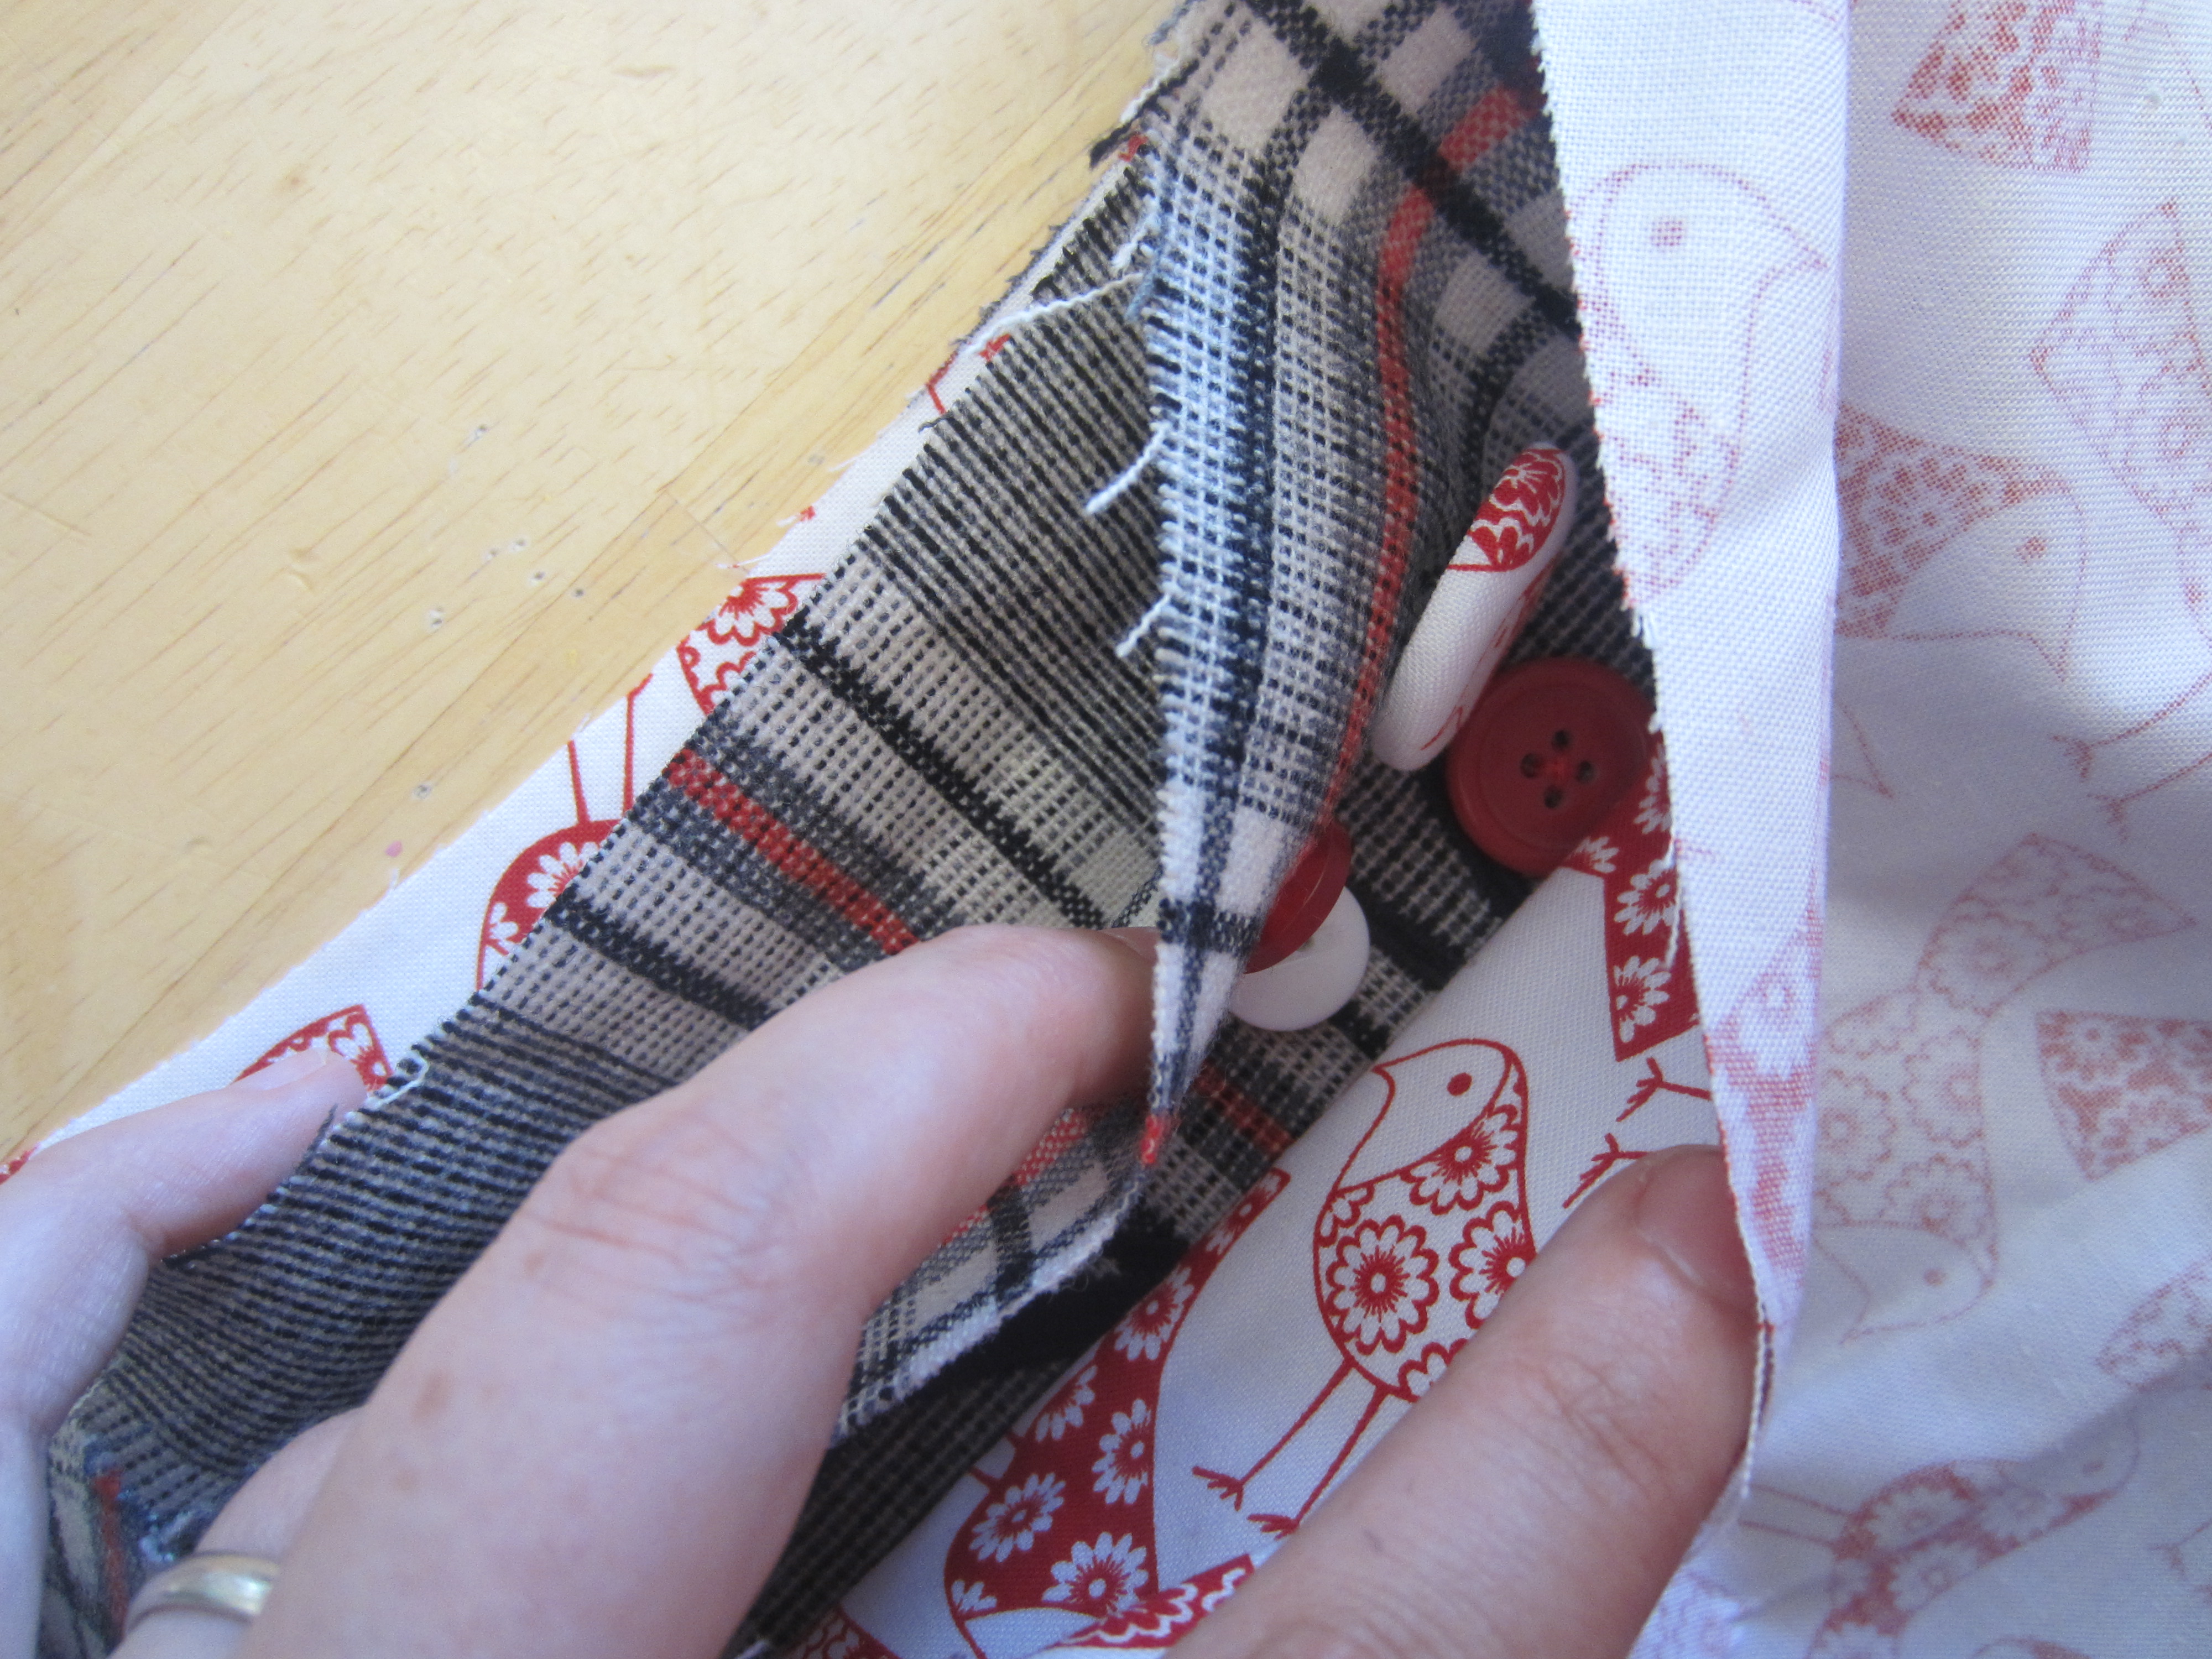
To close up that hole, just tuck in the scragilly ends (oh BACK OFF, spell check squiggles! “Scragilly” IS a word.), and then do a straight stitch to close it up.

IMG_1409

Voila! Push the lining where it goes and now you have a fully-lined pouch!

IMG_1410


If you don’t have arms, you can leave it like that, but if you do have arms, you can make a strap:

IMG_1404

Again, I didn’t use wadding like the original pattern maker did, because I was using this thicker material. Check out her pattern for strap details!

To attach the strap, place it in the line of fire as you are topstitching around the top of the bag. I hope that makes sense.

IMG_1412

And there you go! But I missed something! I told my hubby “Oh dang! I forgot a closure! How am I going to do this?!” and he pointed out how silly it is to have a purse covered in buttons, none of which are functional! HAHA.

IMG_1413

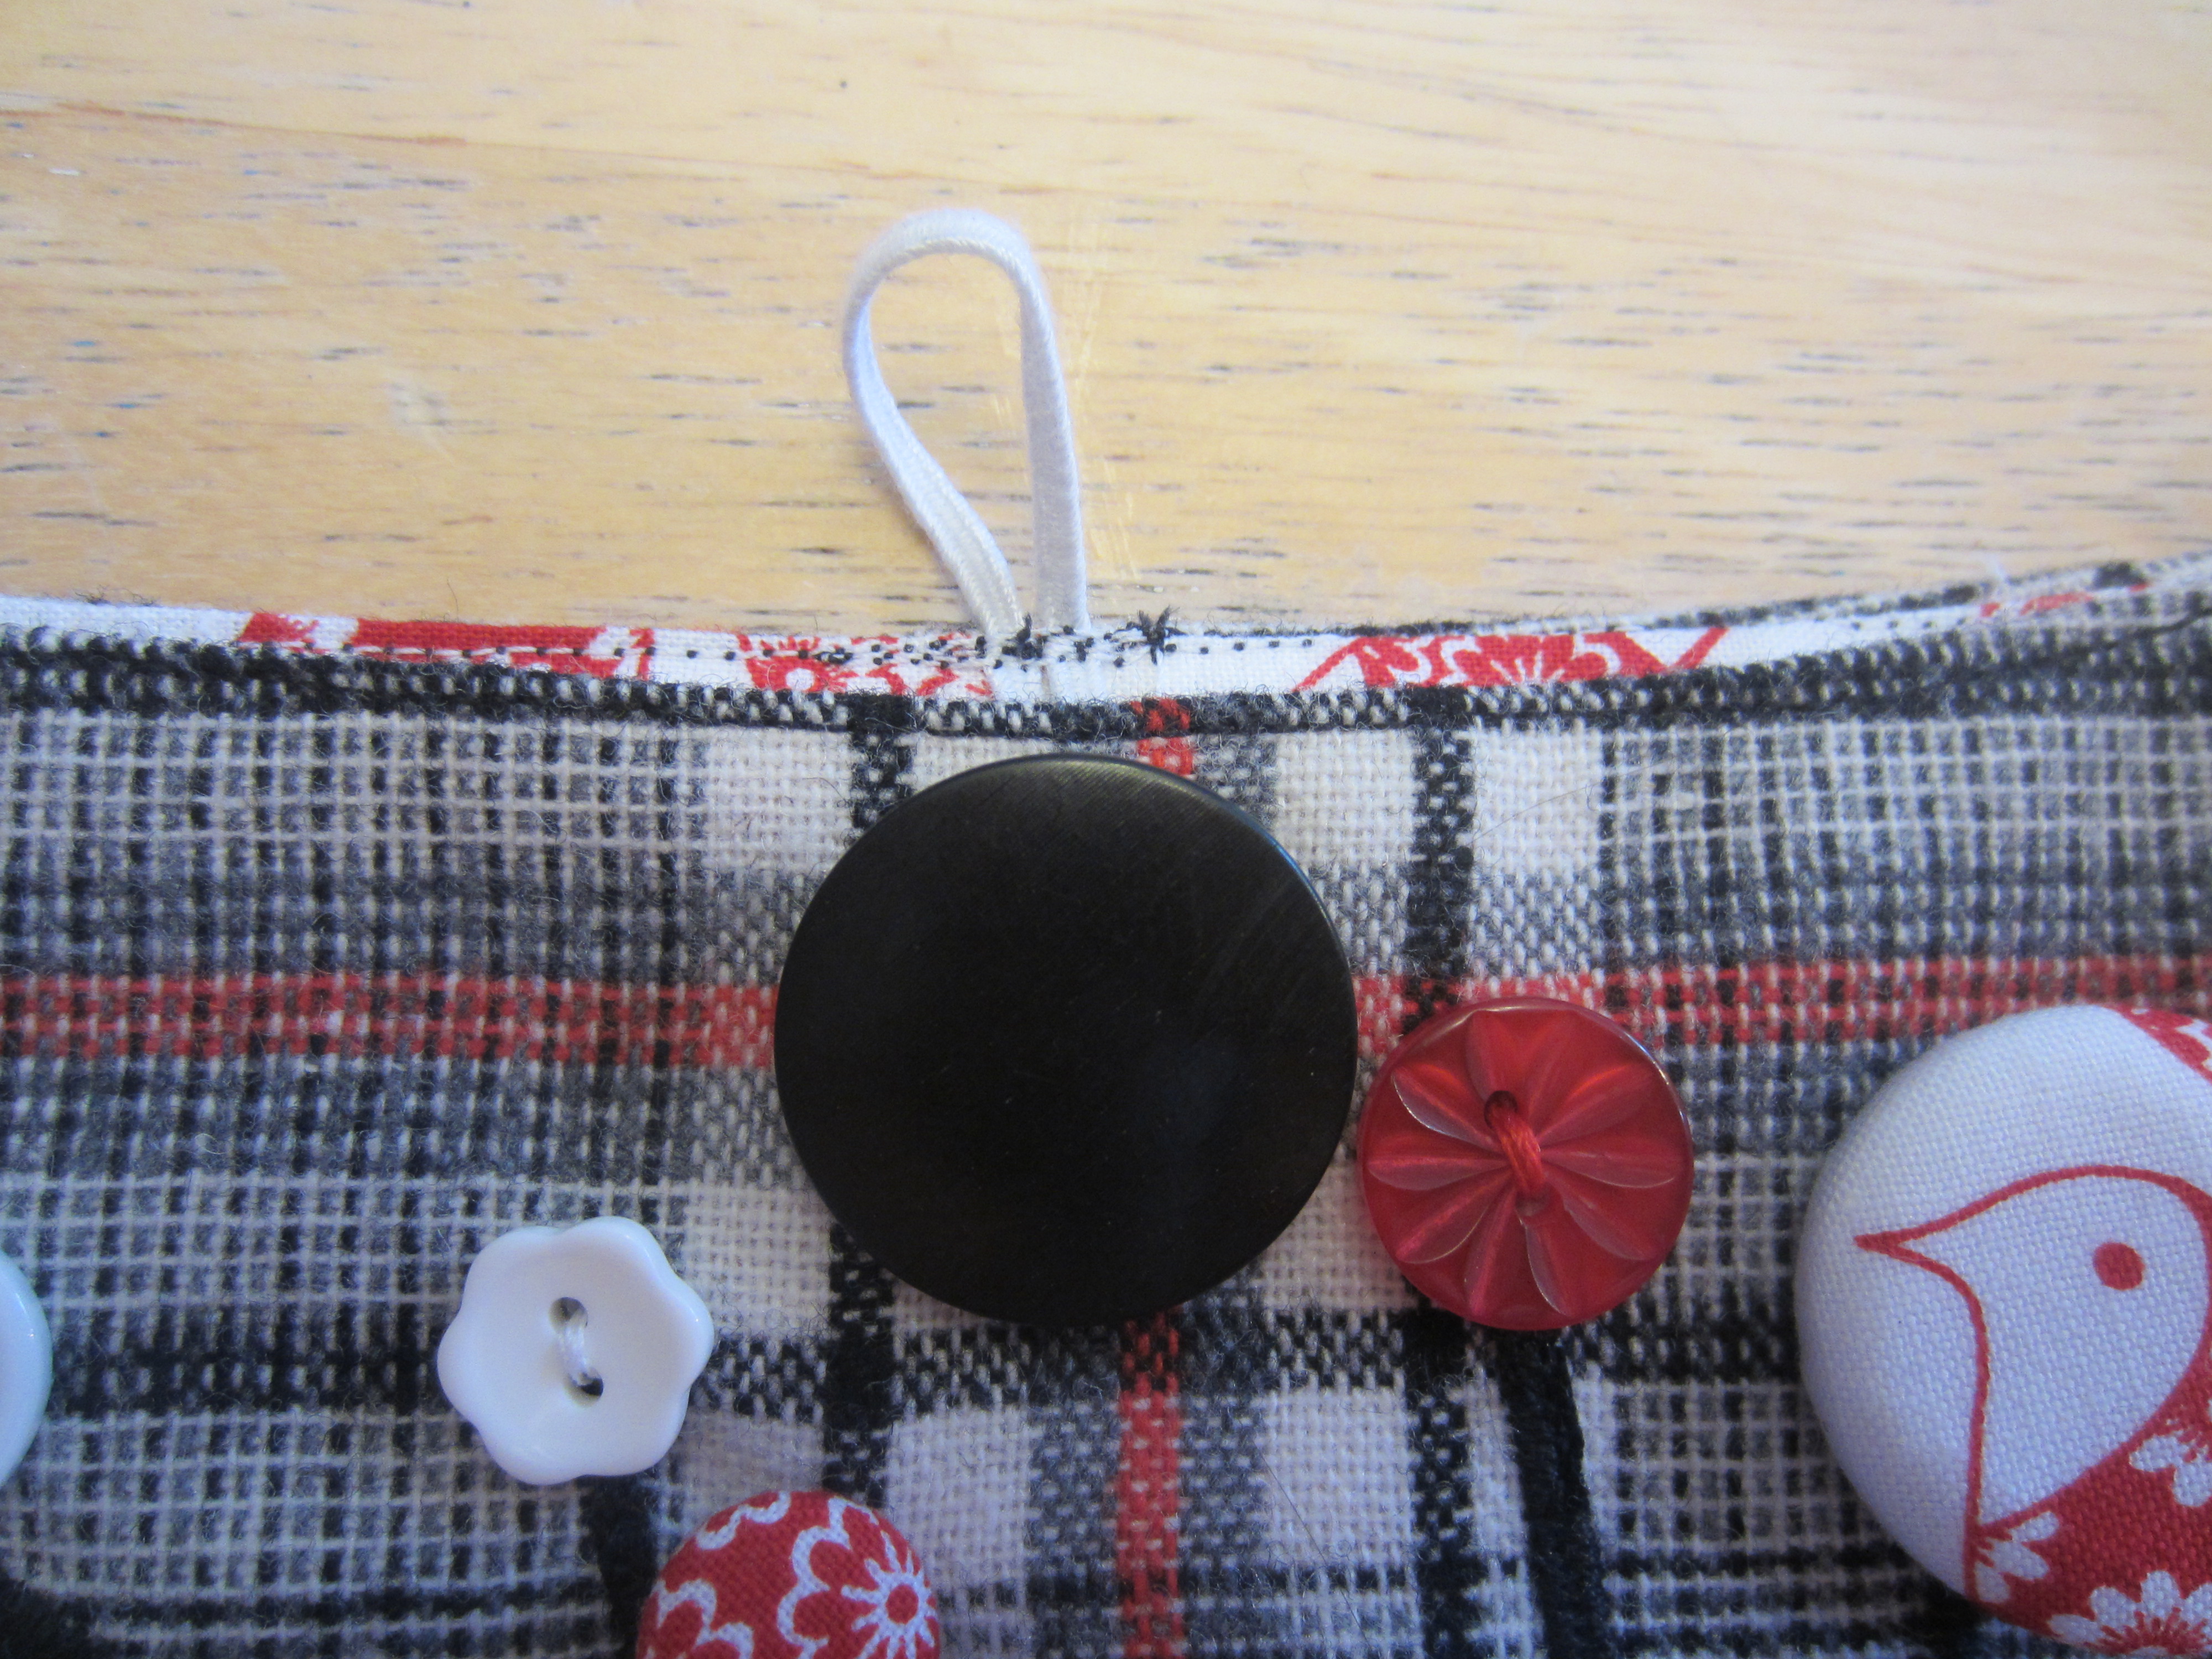
So I added a useful button and some elastic.

IMG_1421

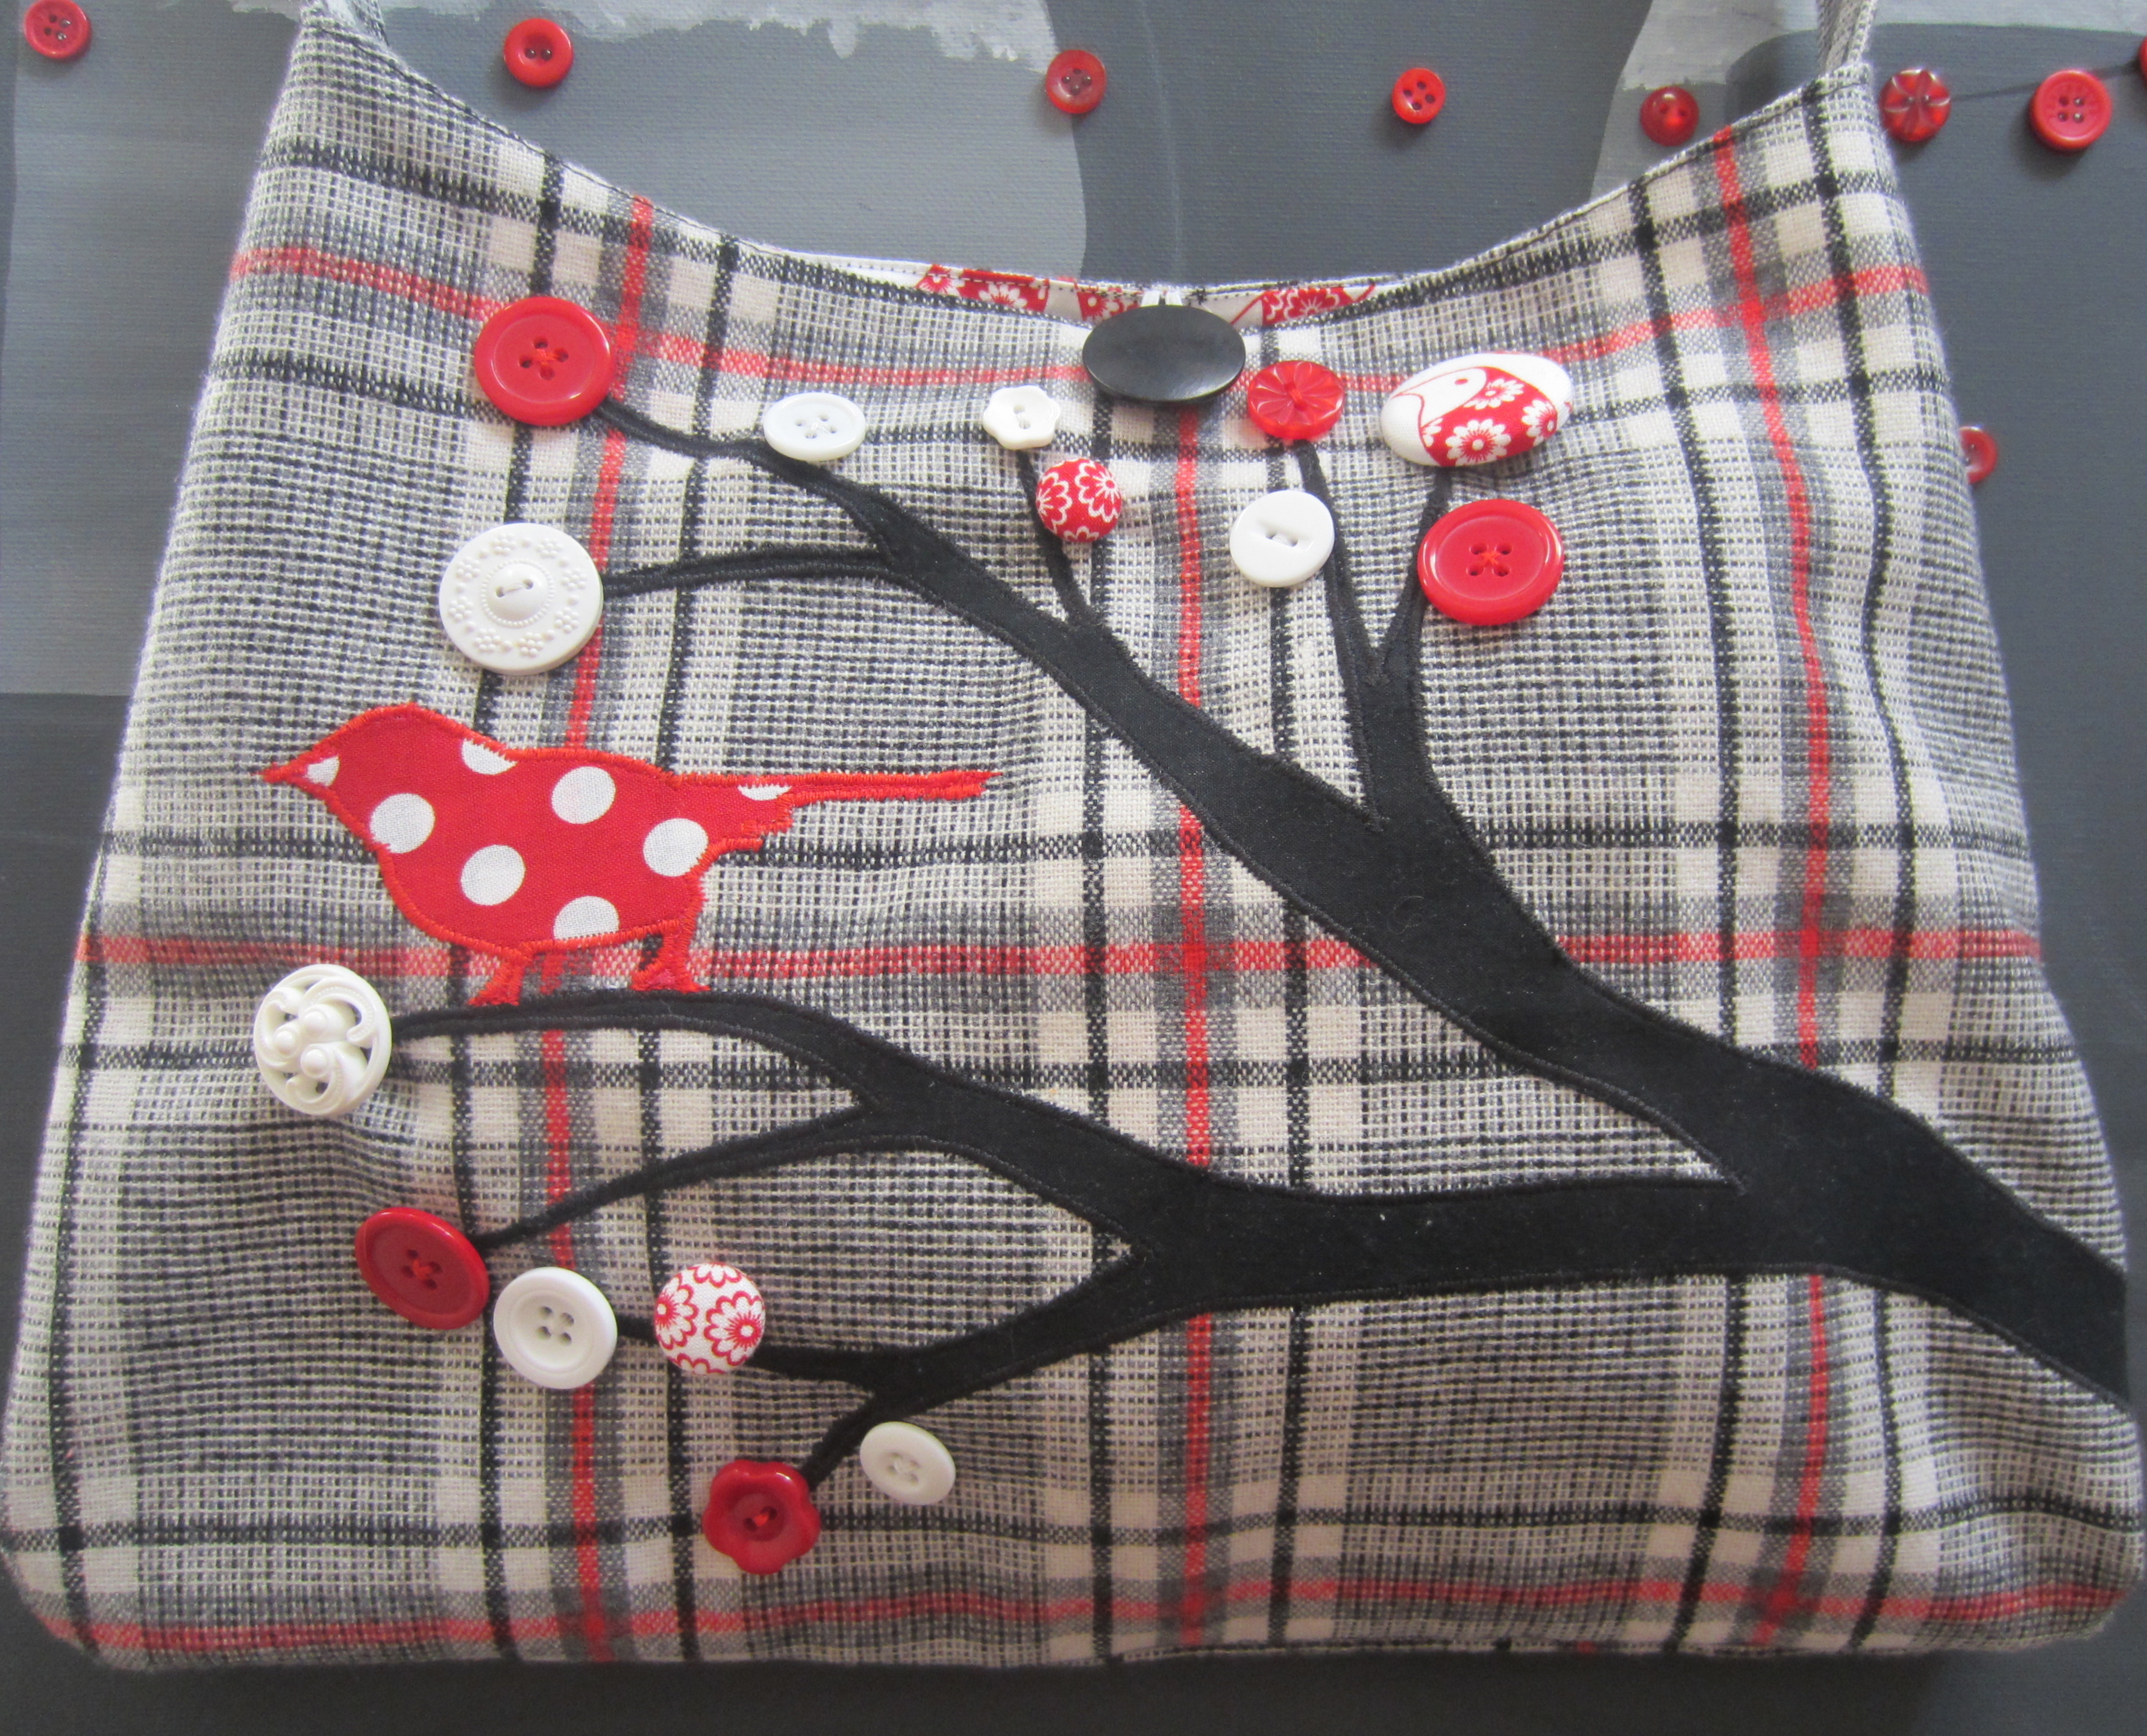
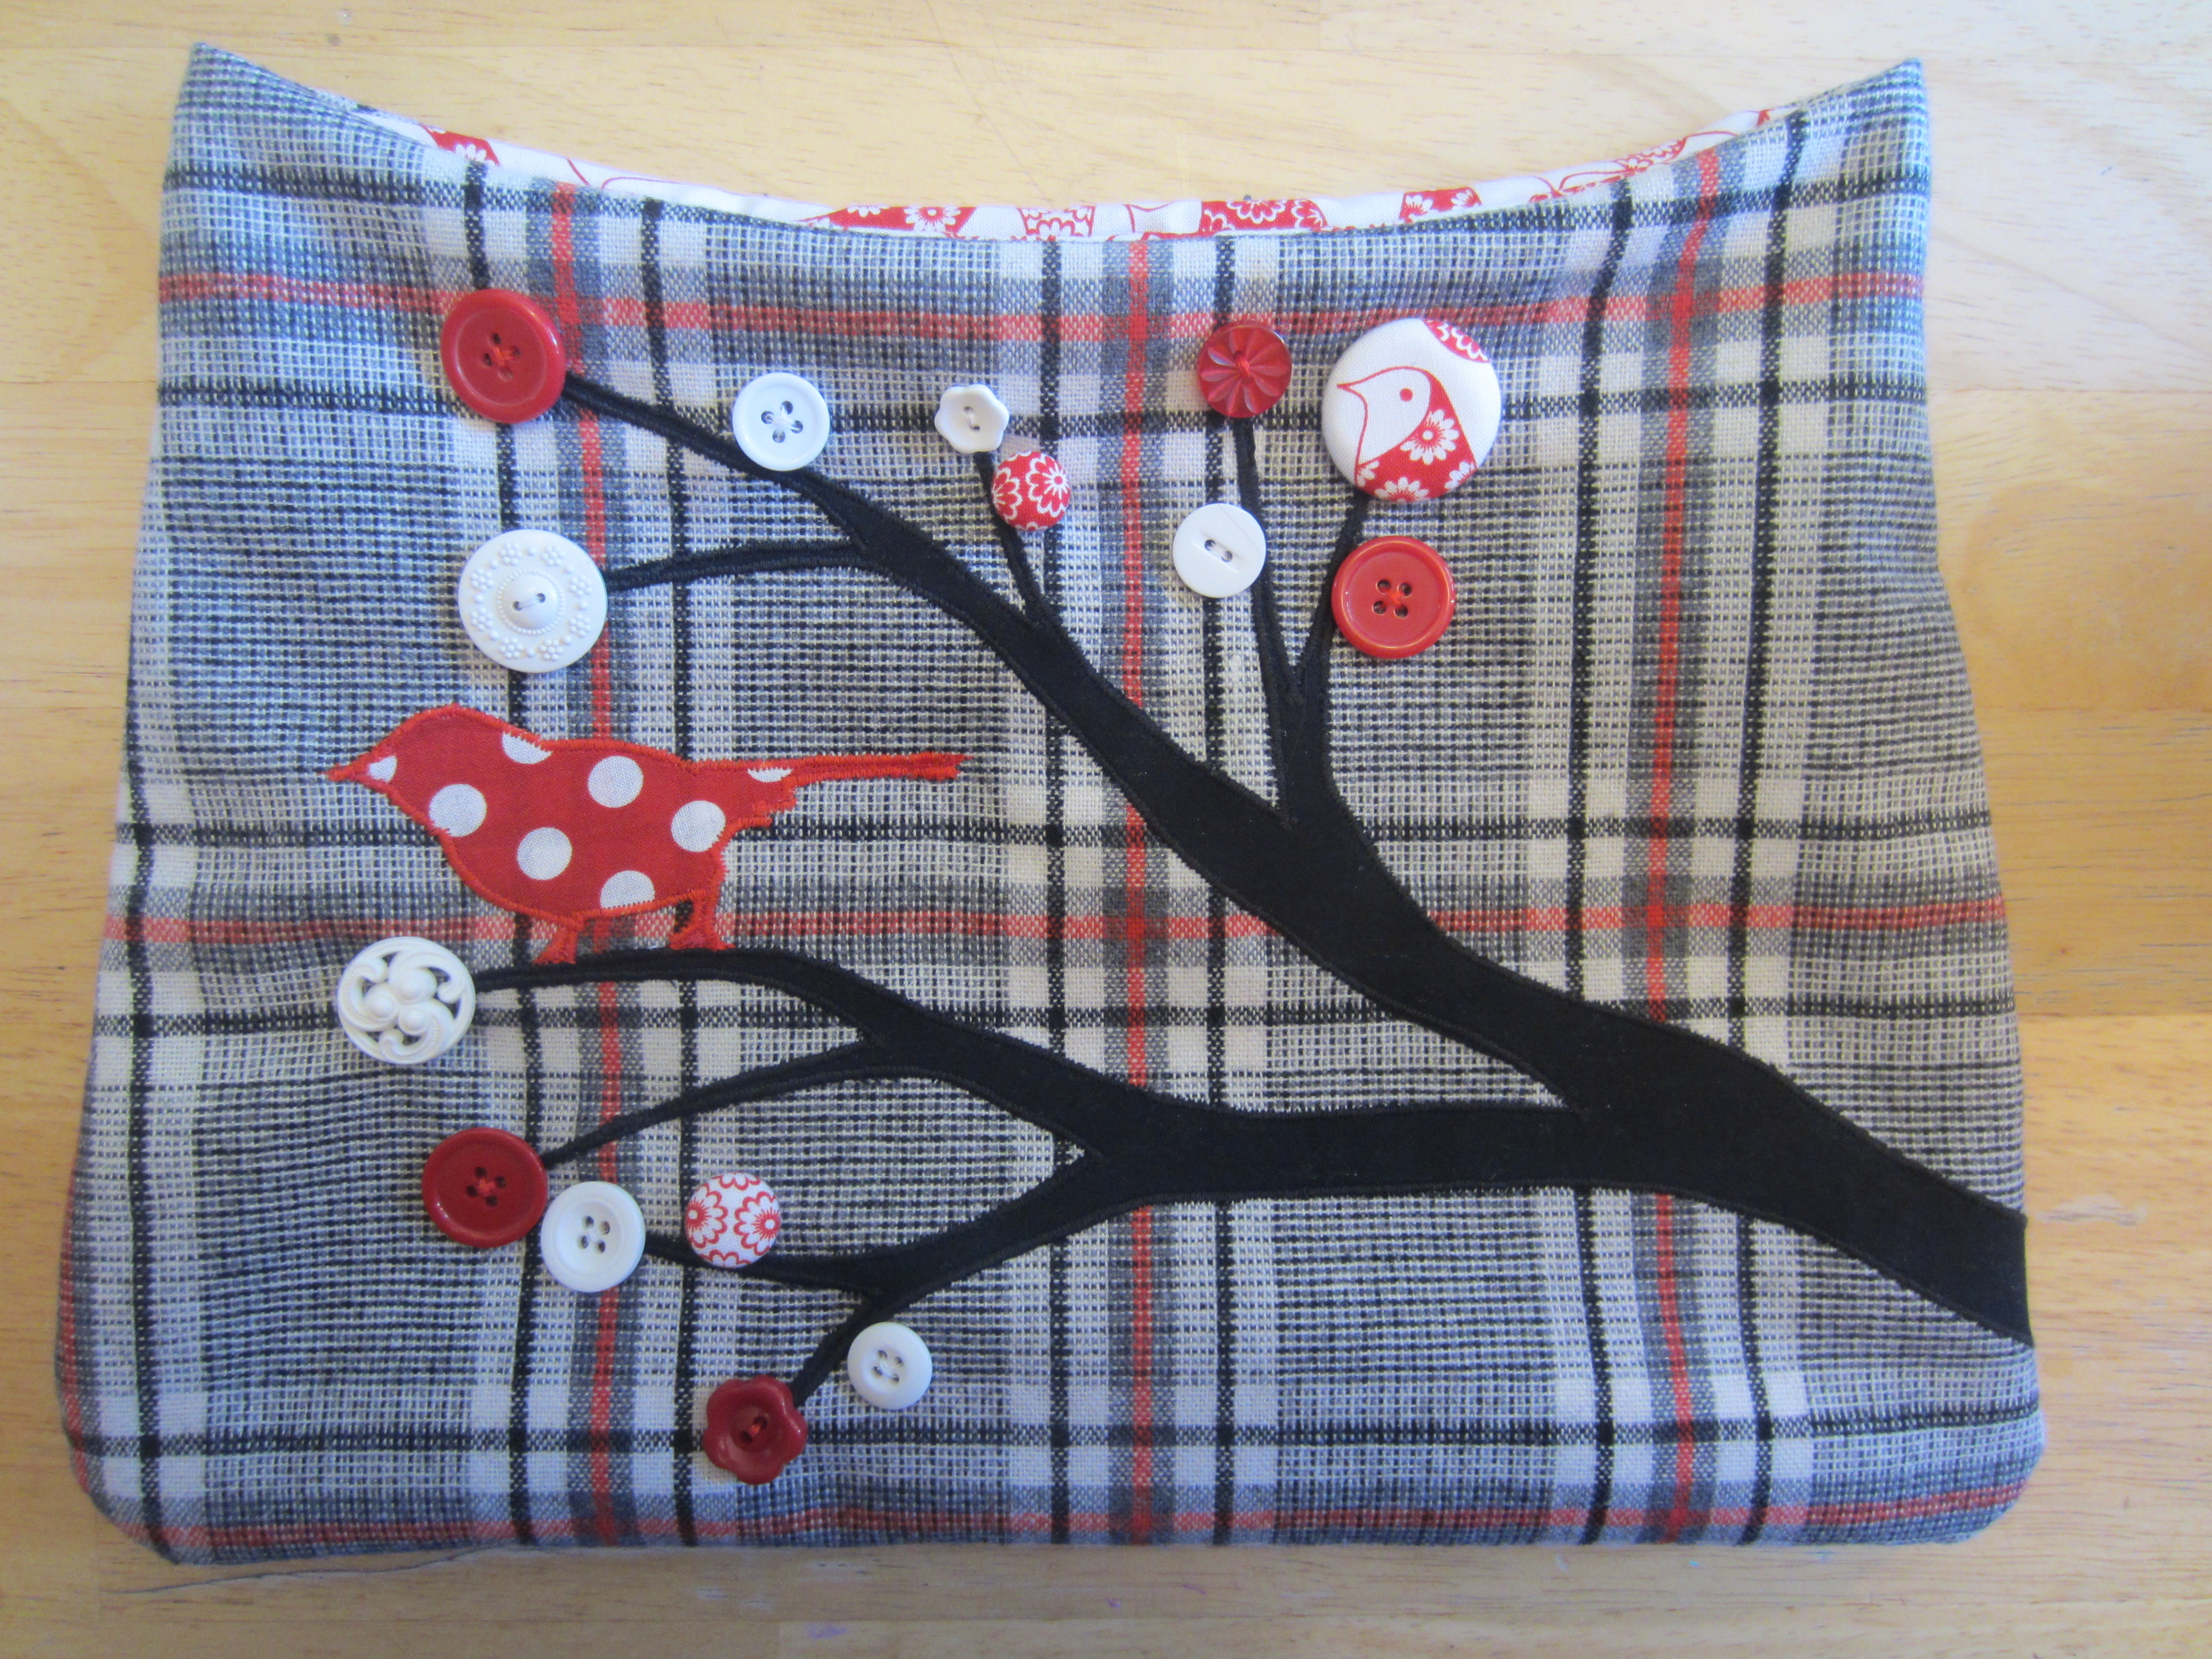
Up close and personal. I was SO happy with how this bag turned out. I’ll tell you a secret. I originally was making this purse as a surprise for my daughters 9th Bday which is coming up. That’s where I got the motivation to finally make this thing. But as soon as it was done, I decided I needed to keep it!

SO I AM! Is that horrible of me??

IMG_1425

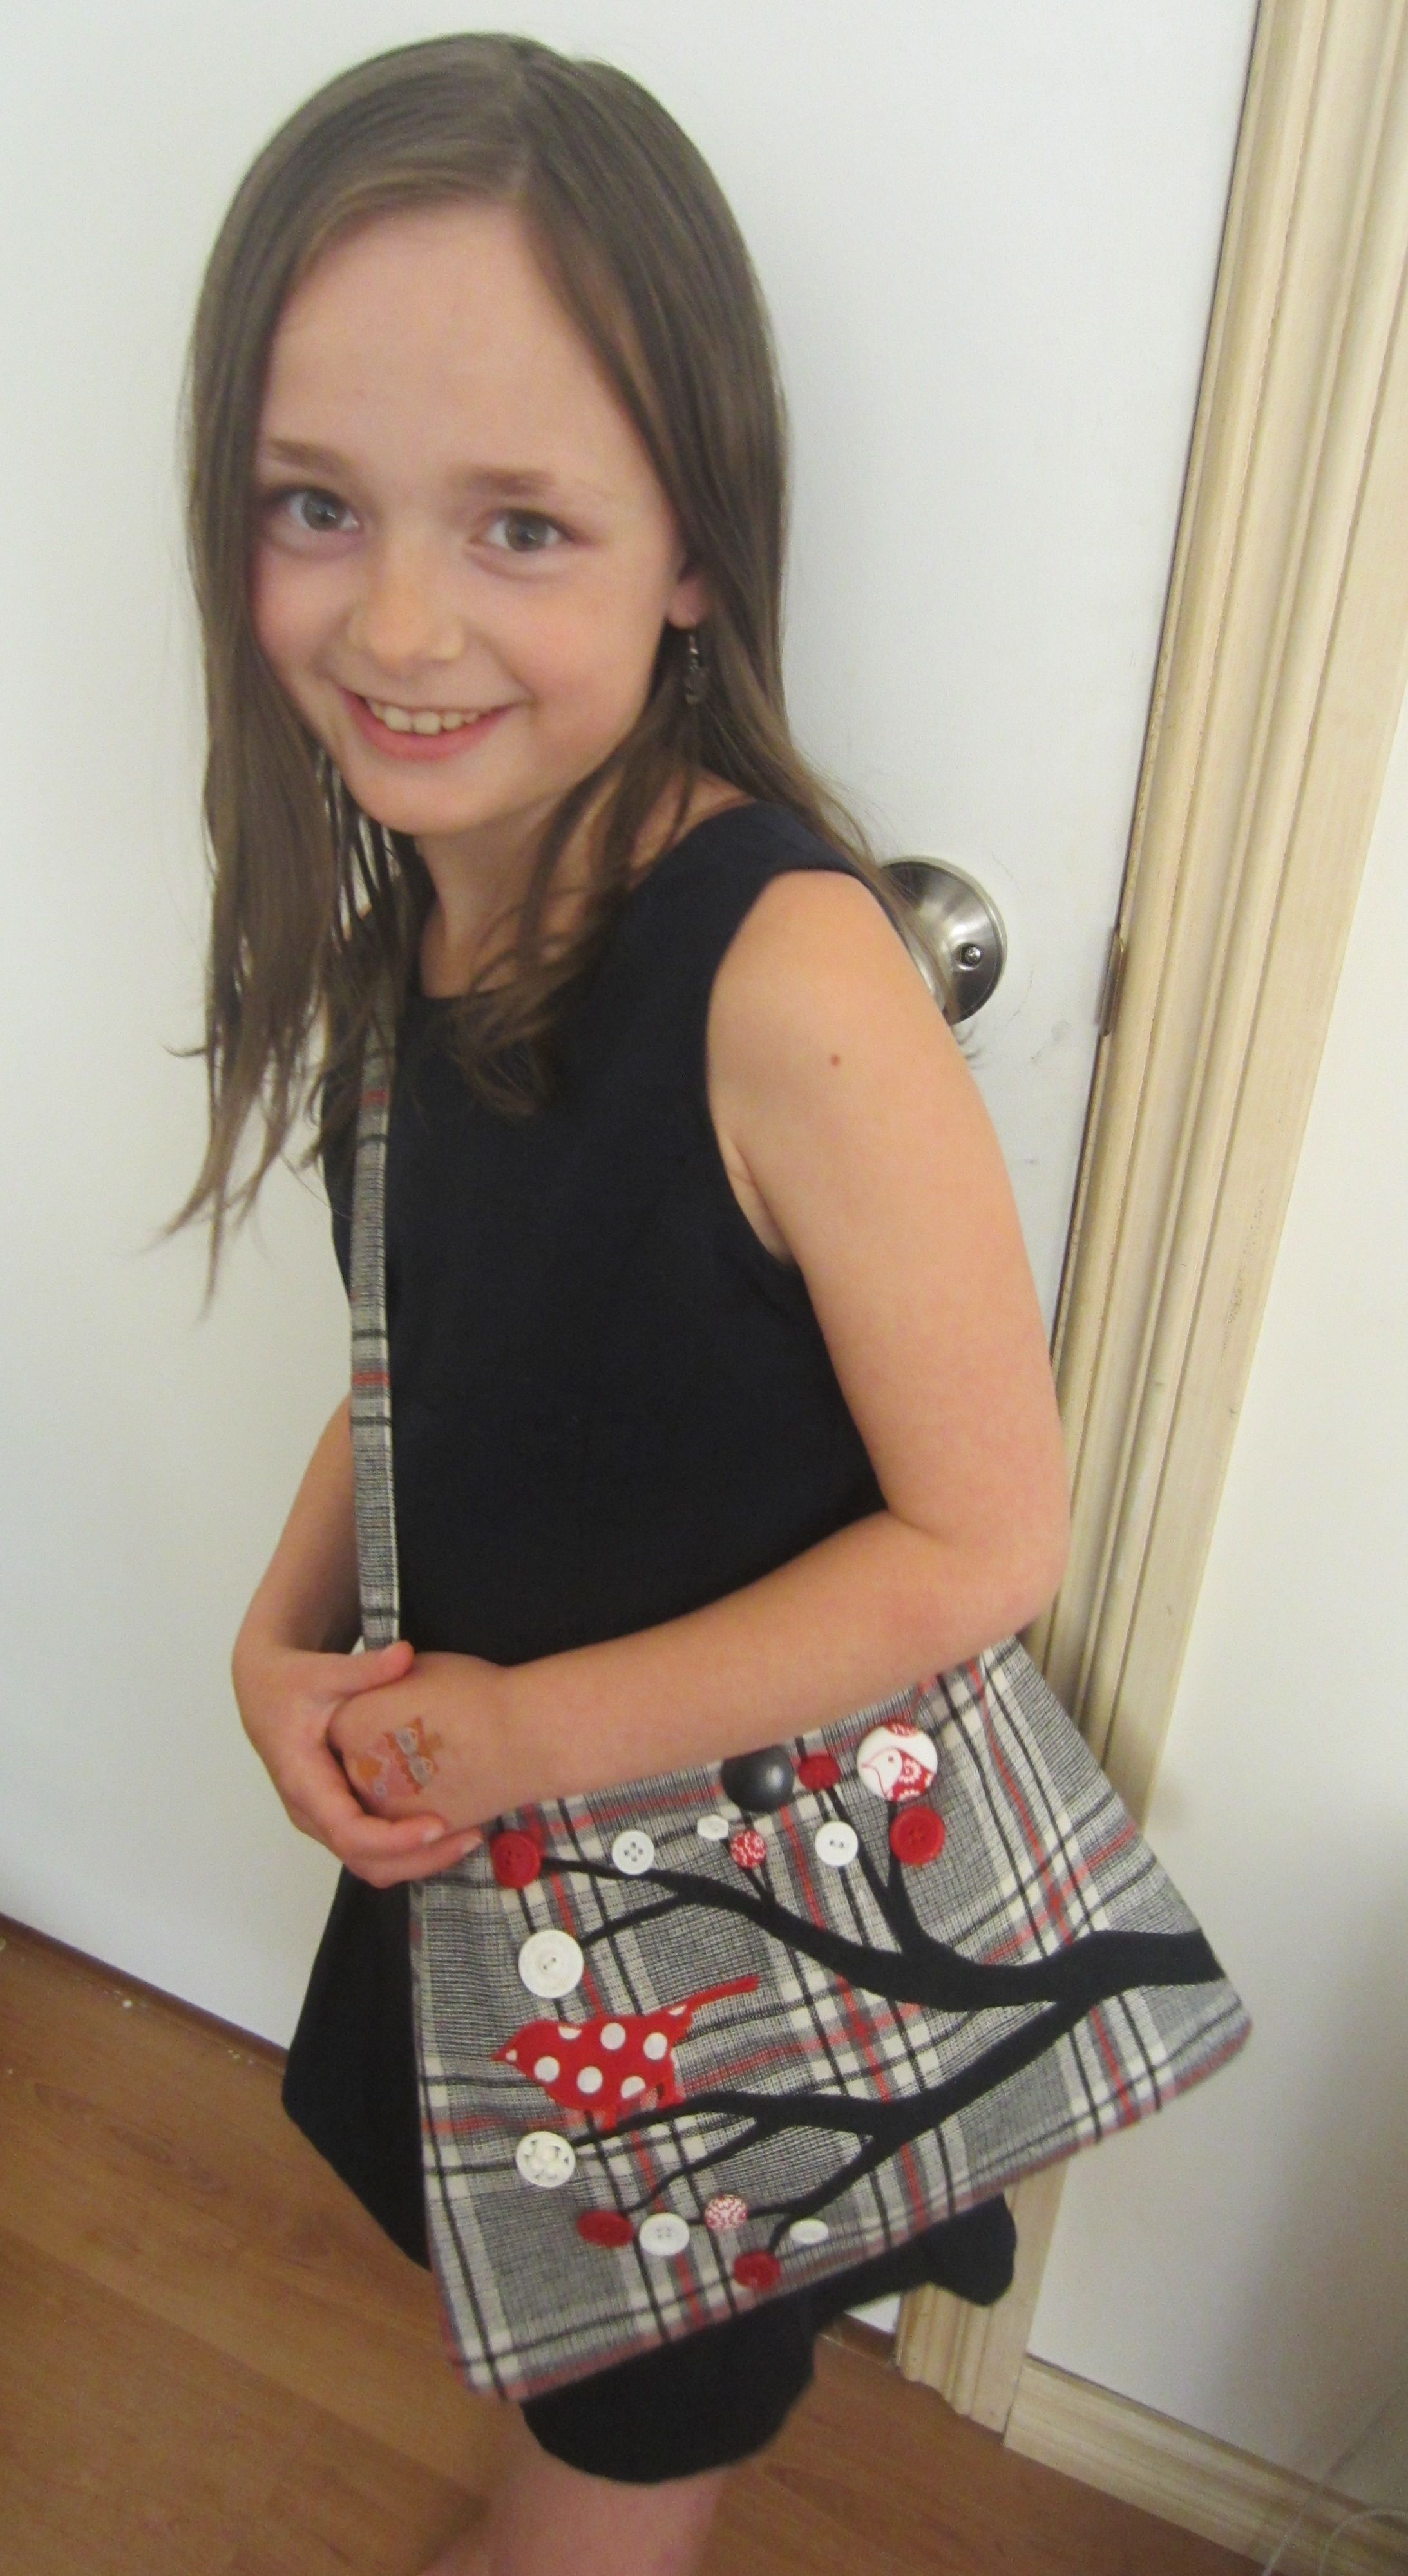
At least I let her model it? Heh?

I know I’m rotten, but these aren’t even her fave colors, so I will make hers another time.

IMG_1433

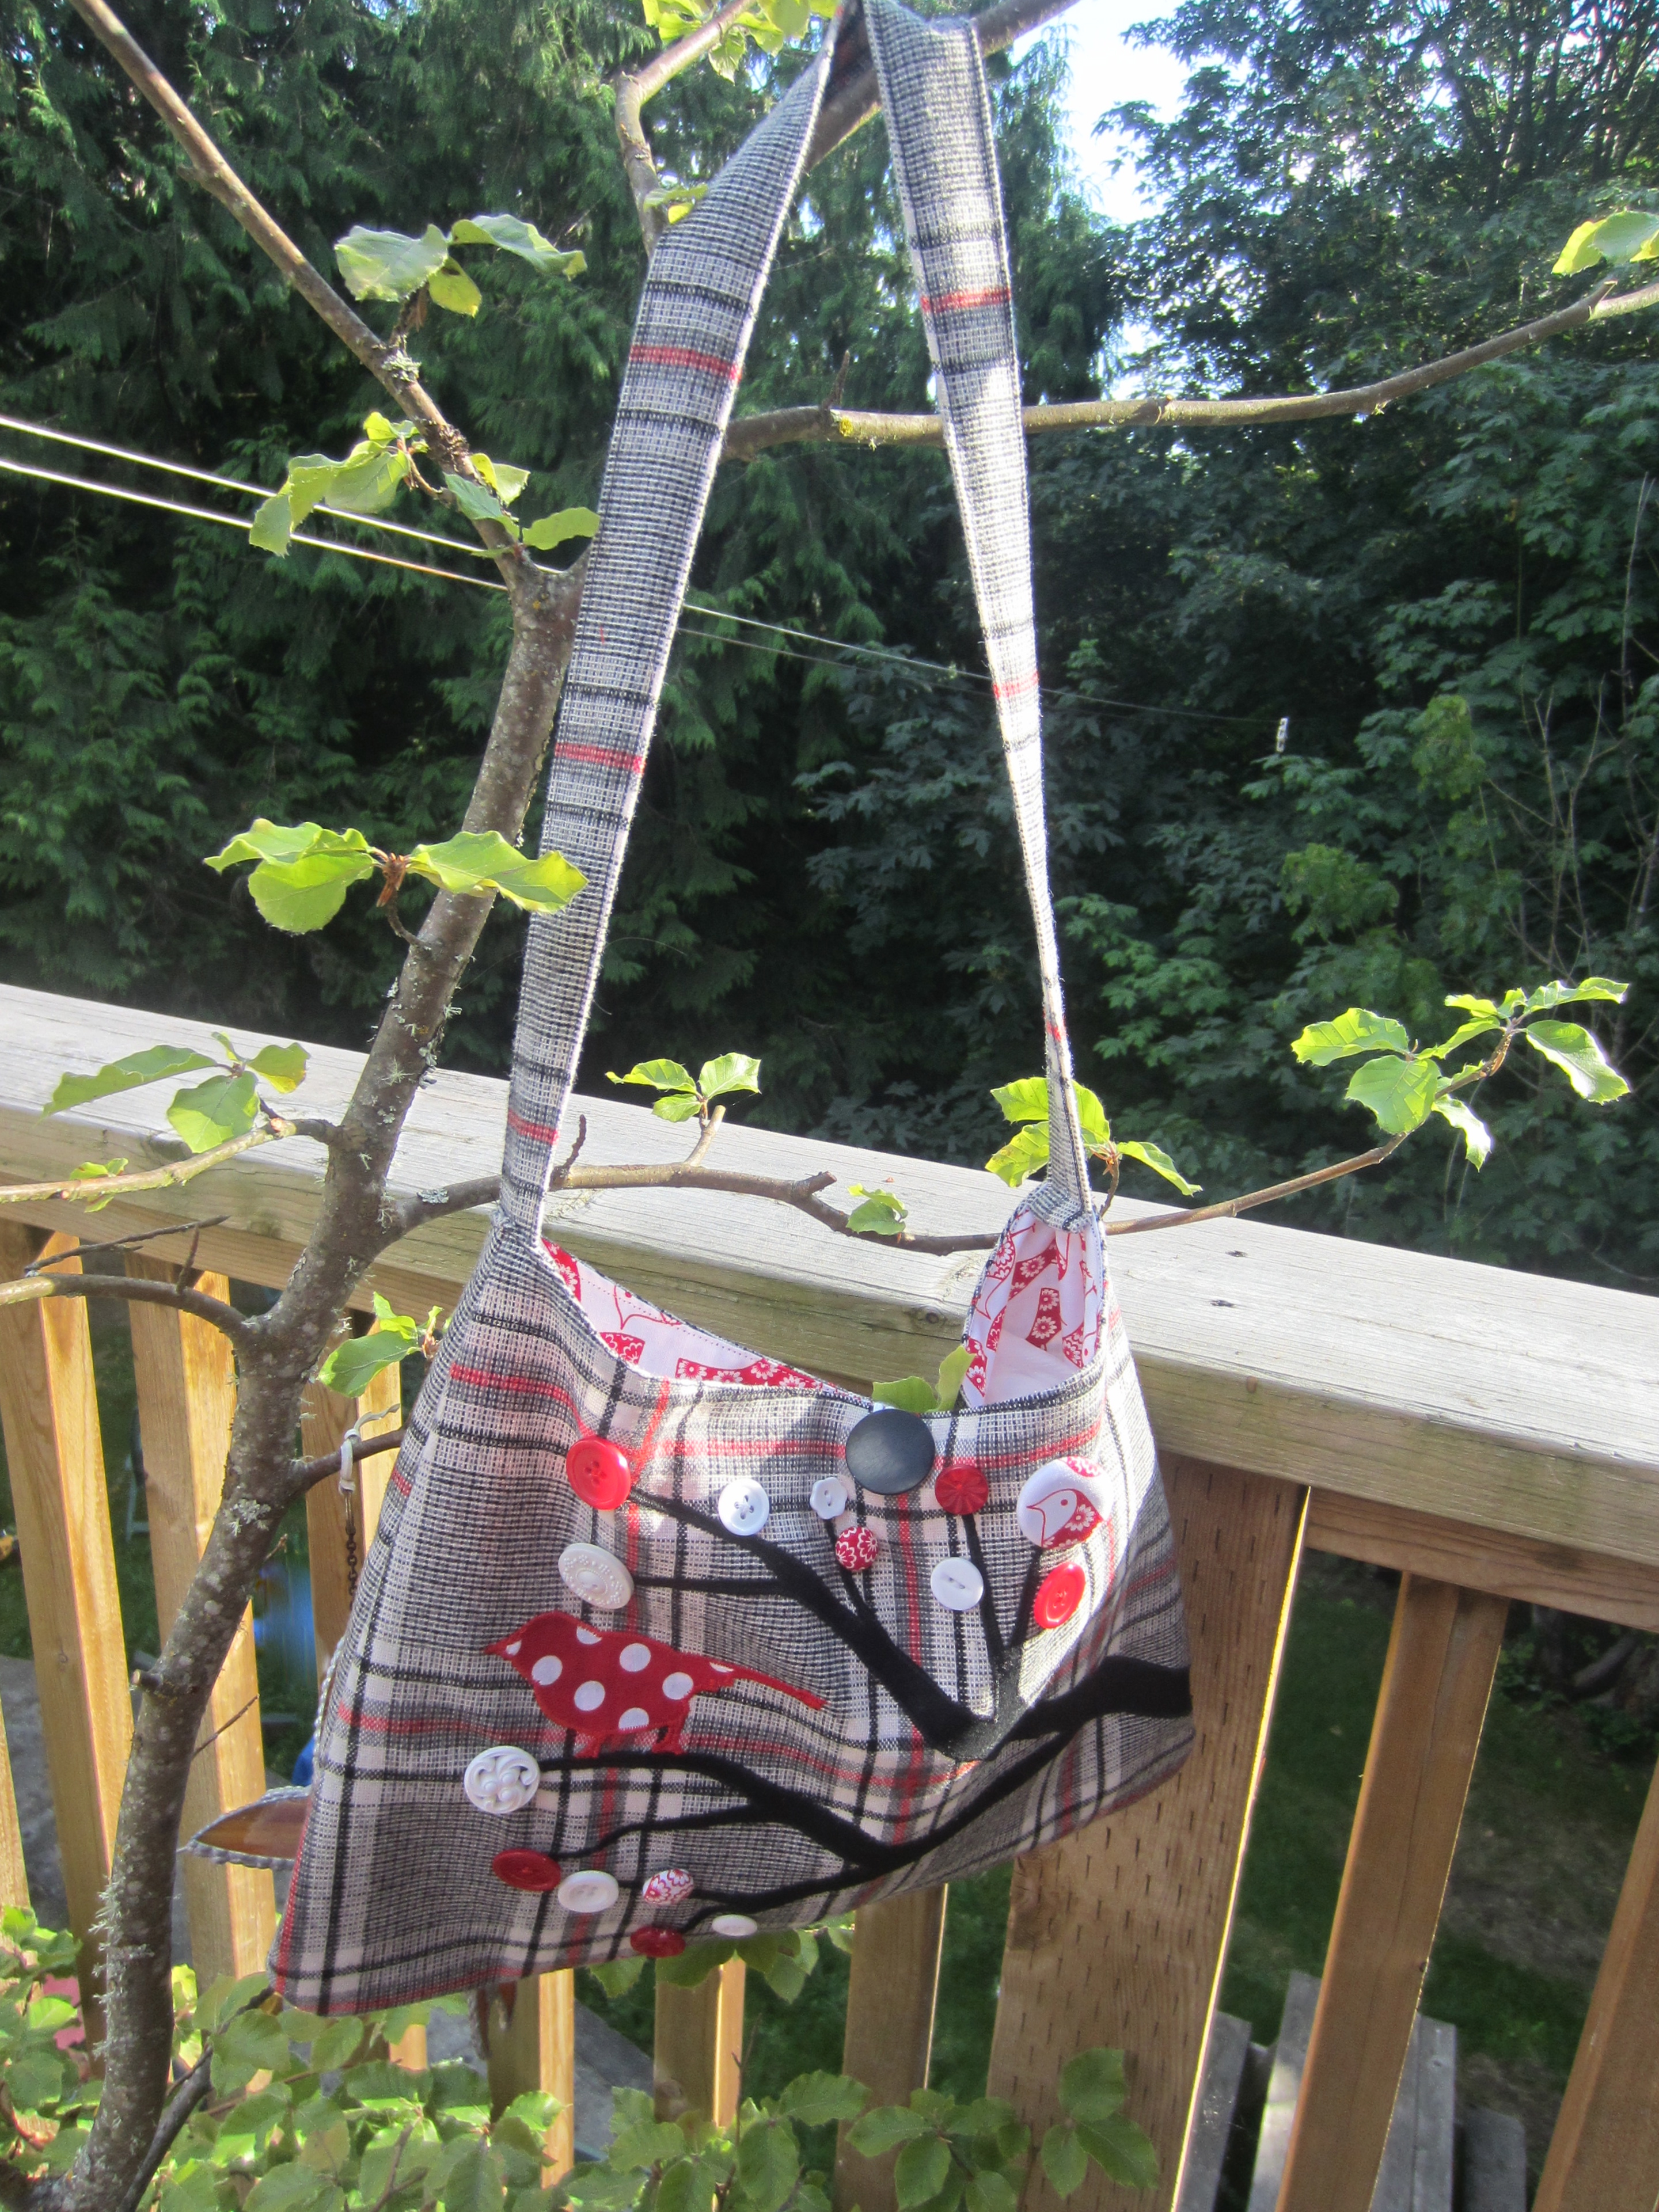
And here it is hanging from a tree.

Well, if you are still reading, I hope you enjoyed this tutorial with random inserts of brain spills. I sure have enjoyed writing it! Maybe I’ll try harder to get on here more!

Thanks for reading and PINNING! Yes- look into my eyyyyes

pinitAK! That makes my eyeballs shake! So on that note,

Happy Purse-making, and Eyeball-shaking!

~Dot


Posted in Button Art, Craft Tutorials, Showing Off!, Thrift Shop Thursdays | Tagged , , , , , , , , , , , , , , , , , , , , , , , , , | 17 Comments

Clothes Line Picture Frame (For Mother’s Day!!!!)

It’s almost Mother’s Day!

Mother’s Day is pretty close to my mom’s birthday, so that means I can cheap out and do a combined present!  This year me, and a few of my siblings (the more useful, or procreating ones) gathered our favorite photos of our kids (I almost wrote ‘our photos of our favorite kids! HAHA) and I created this:

IMG_0920A nifty picture frame! I’ve seen these all over the interwebs and I knew it would be the perfect present for my mom! It’s so easy that I just figured it out on my own- so there is a chance that there is a better tutorial online, but it probably isn’t as funny as this one, so don’t bother searching. Heh.

Let’s get to business! You only have a few days to make one! Although, I’m sure you could use this as a gift for anyone. Who knows? Maybe your mom isn’t the best, and you don’t want to make her a sweet display to show off her 13 grandchildren. Well, if that is the case you should go to family counseling  make one for yourself.

IMG_0909All you need to create this cool display is a big, empty frame (which you can find at any thrift store for cheap!), some string (I used some pretty white and green cotton, but you could use hemp or twine), some mini clothes pegs (which you can get at any craft store), some hot glue, and some cute pics of your ugly kids. I don’t know why I needed to say that. I’m sorry. That was out of line.

The first thing I did was I marked the spots that I wanted to hang my photos- I used a pretty big frame for this one, and I wanted 4 rows of 4×6 photos to fit. I think this would be really cute with wallet- sized photos on a smaller frame too!

IMG_0913Next I dabbed some hot glue onto the back of the frame in the marked position,  laid the end of the string on top, and pressed my finger into the scalding hot pile.

And then I came up with a safer, better way to do it! I enlisted the help of…

IMG_0914my pal, Buttons.  Buttons sacrificed his life to prevent me from burning myself again and to help keep the string tight and stable.  Just make sure the button doesn’t jut out farther than the frame does, or else you wont have a nice flat surface for hanging.

Keep using this method to attach both sides of your string to the back of the frame, making sure to keep the string tight, and pretty soon you’ll have something like this:

IMG_0916I call this piece ‘Read Between The Lines’ and am selling it for 4500.00. Paypal only, please. Just kidding, let’s move on to the fun part:

IMG_0921Use your mini clothes pegs to hang all your awesome photos, postcards, hamster clothes, etc. I made all these photos black and white and I think it looks pretty cool!

Those are some cute kiddos, hey? It would be so fun to have 13 grandkids. Reason # 34 to have a big family I’d say 😉

IMG_0920There you have it! This is one of the quickest and easiest presents I’ve ever made! I’m sure you can think of a perfect person to make one for. How awesome would it look with photos and other neat things from a vacation or honeymoon?? So many ideas!

Before I sign off, check out my favorite child:

IMG_0922Hehehehehe. >:) Just kidding, I love them all the same.

Happy Mother’s Day-crafting and white-water rafting!

Tired, but happy brain,

~Dot

Posted in Craft Tutorials | Tagged , , , , , , , , | 9 Comments

The Little Button Mermaid (With Instructions!)

I am SO EXCITED to FINALLY reveal my super secret surprise! I have been planning this project for months! Birthing a human got in the way a bit- thanks a lot, Flora, but I finished it! It is the biggest piece I have ever done, and it used up almost 1000 buttons!!! Let me introduce you to…

mermaid

IMG_1077 Some random fish-chick… who was composed entirely out of BUTTONS! CRAZY HUH?!?!!?!  I was so excited when Christie from buttonlovers.com contacted me and asked if I’d be able to create something like this. Naturally, I said ‘heck yes’ even though I didn’t know if I could. Turns out I could.  And if you follow these simple 63 steps, you can to!! Hahaa there aren’t quite 63 steps, but this is definitely a time-consuming project, and if you haven’t made a button picture yet, I’d recommend that you check out one of my more simple projects first, such as this cupcake tutorial.

IMG_1048Aren’t those delicious looking? They aren’t delicious. They taste like glue.

Back to the mermaid:

IMG_0470If you want to make an image of a famous cartoon (which is not my own design, I am purely a cartoon smuggler, all rights reserved for not me blah blah I don’t know what you are supposed to say yet, but I’m sure I will figure it out on the other side of a lofty law suit, just kidding- hopefully), you are going to need to transfer the image to your canvas, van, or whatever surface you want to button. In order to do the transfer, I printed out an image and a graph.

IMG_0472

I drew the graph over top of the image like so, and then I drew a larger graph (with the same amount of squares) onto a large piece of paper, which was the same size as the canvas I would be using. For a more detailed tutorial on how to use this graph method click here. This might look complicated but with a bit of patience anyone can do it!

IMG_0734Next, I slowly began to draw the details of Miss Mermaid onto my large graph, making sure to keep things looking similar. I started with the face details, because those are the most important thing to get right when you are wanting your end product to resemble a certain character, rather than a cheap Dollar Store knock-off. You know what I mean- dolls like those ‘Disneee Princess Girlies’ you can buy for a dollar that are even LESS anatomically correct than their $20 role models.

IMG_0735 IMG_0736 IMG_0738 There! When you have finished that step, you have to transfer the image onto your canvas. I learned a trick that helps with this step when I was a young one, and I will share it with you. This may not be the fanciest method, but it works (and it’s free!):

IMG_0814 Hold your image up to a window, flip it backwards, and scribble pencil over the entire outline like this.

IMG_0815 CREEPY! Let’s just call this homemade carbon paper!

IMG_0816 Next, place the template carbon-side down on your canvas, and begin to trace over the outlines with a pencil.

IMG_0818

IMG_0819

If you press hard enough, the image transfers nicely onto the canvas!

IMG_0820 IMG_0821

You might have to go over it again lightly with a pencil, but you get the idea.

Now, let’s add some color to this tutorial- it is starting to get gloomy!

IMG_0833 IMG_0837I used acrylic paint to quickly cover this gal in the proper colors. This step keeps any white from shining through your button holes, and it helps guide you along the straight and narrow button way. Whatever that means- you know what I mean. Post-partum brain hiccup.

NOW… the best. part. everrrrr.

IMG_0772BUTTONS

But not just any buttons. Like I said before, I teamed up with Buttonlovers.com to create this masterpiece, and they provided the buttons! (Ummm THIS sounds like the best partnership EVER!! Be very, very excited.) These buttons are from the ‘Favorite Findings’ collection by Blumenthal Lansing. You can buy them at Joann.com. (At the time I am writing this- I see they are on sale for 50% off! Snatch em up, buttoners!)

These buttons are amazing. All buttons are amazing, but these ones are perfect for this kind of craft for a few reasons:

1. They have the most beautiful and specific color choices ever! I have had an impossible time finding skin-toned buttons. Because, let’s be honest, why would anyone try to find skin-toned buttons? Unless “Flesh-toned buttons for my creepy sweater-vest” has become a popular Google search item. Which it hasn’t. Although with hipsters these days, it probably has. Actually, let me just confirm that… Nope. I guess I beat them to it.

2. They are a lot flatter than most of my buttons from other random sources. This is a really important feature when it comes to making button mosaics! It is way easier to get fine details and straight lines without a bunch of bulk if your buttons are nice and flat.

3. They are really reasonably priced! You get so many buttons in one pack! They really went a long way and I had plenty left over for future endeavors!

Okay, now that I am done raving about my fave buttons, let’s get to work!

IMG_0839 
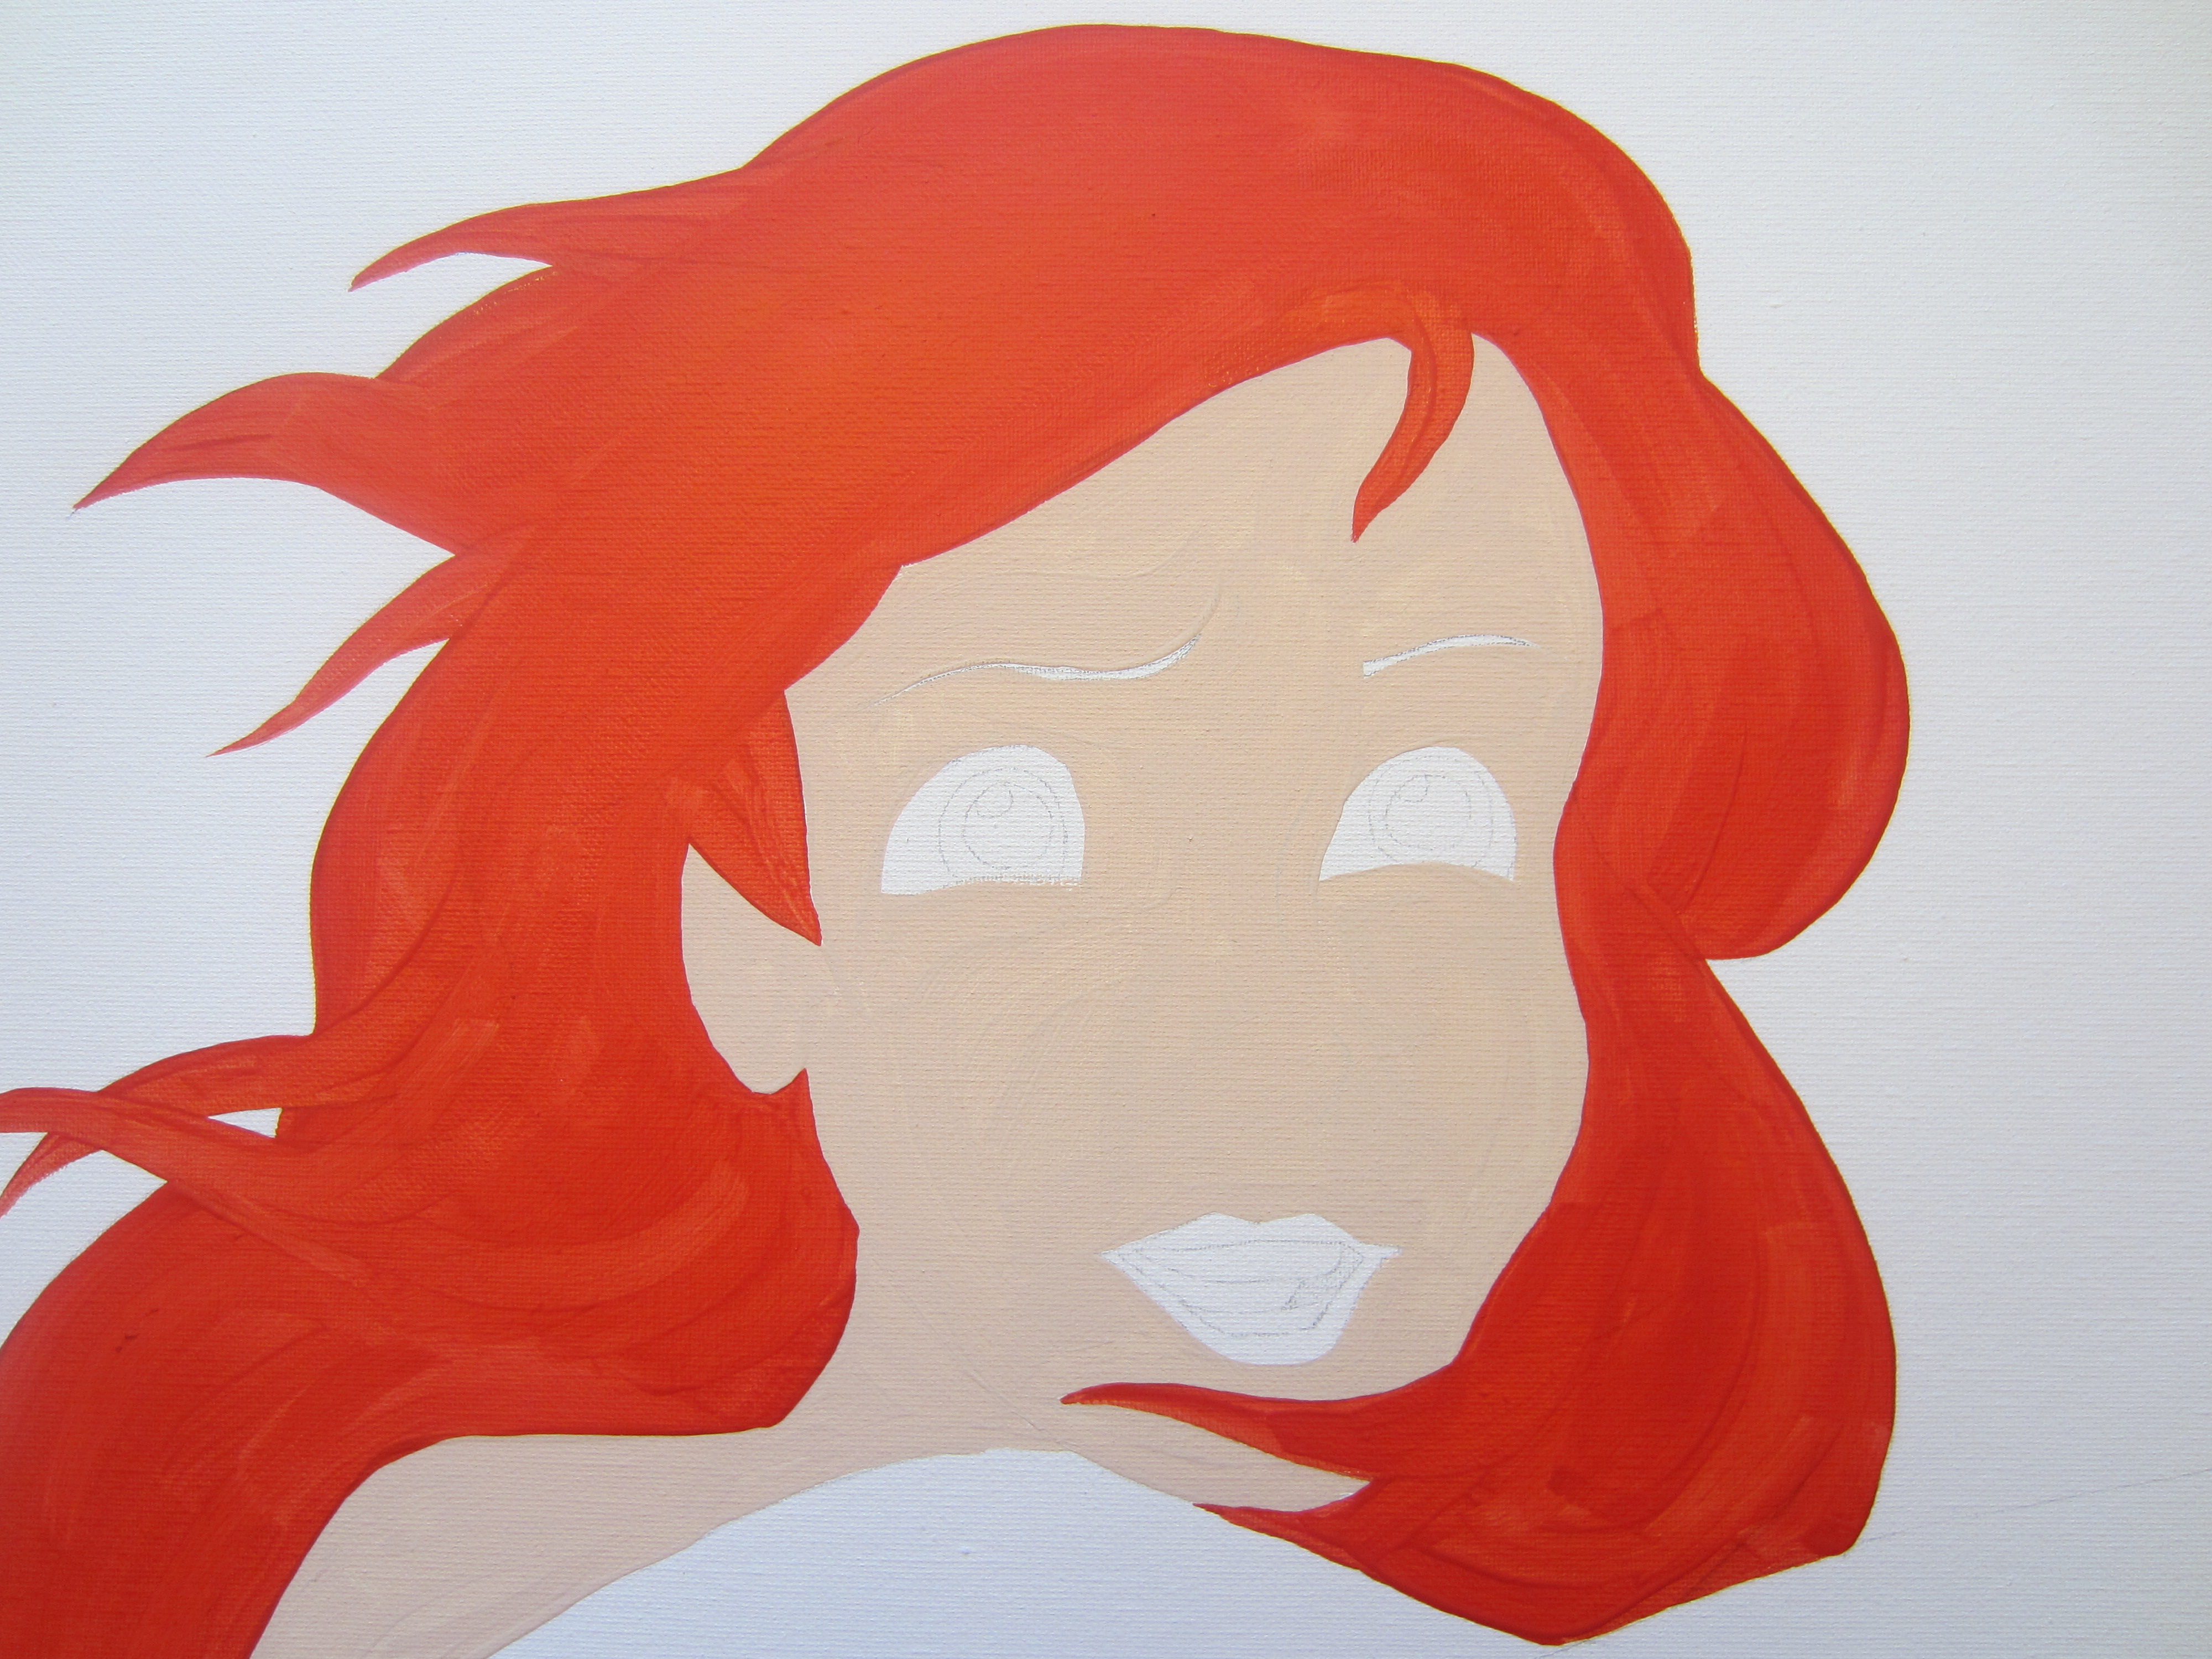
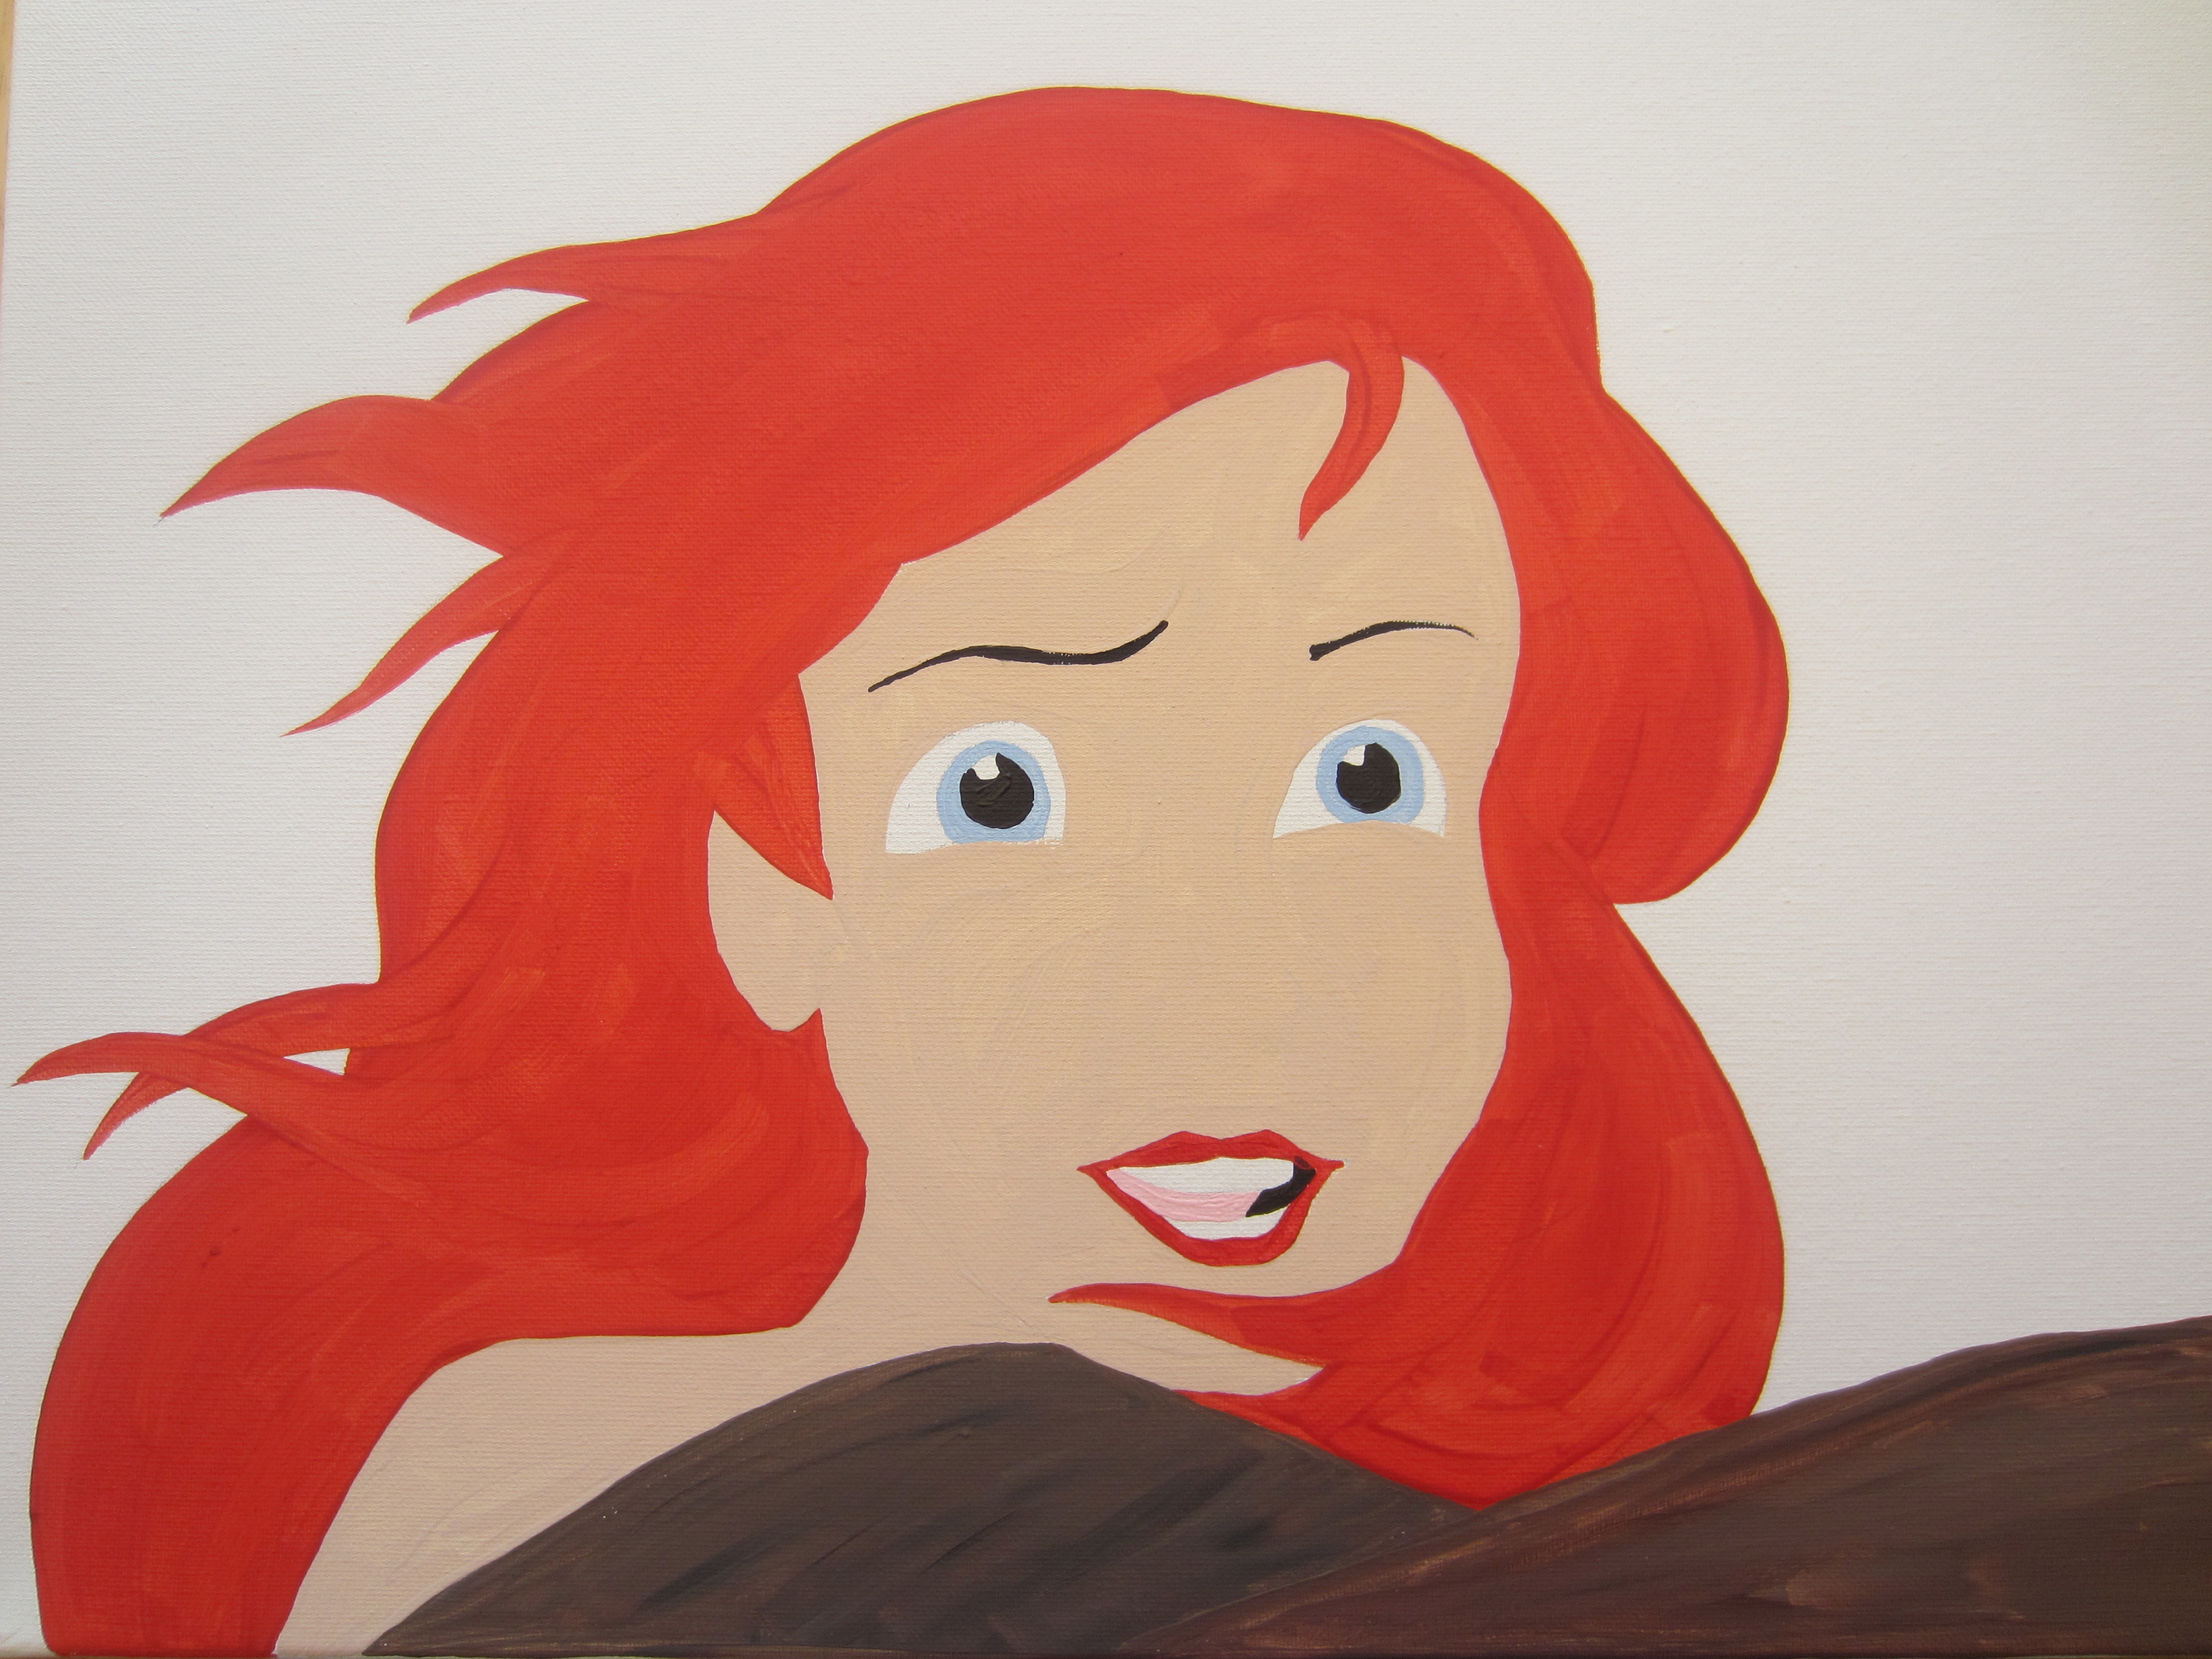
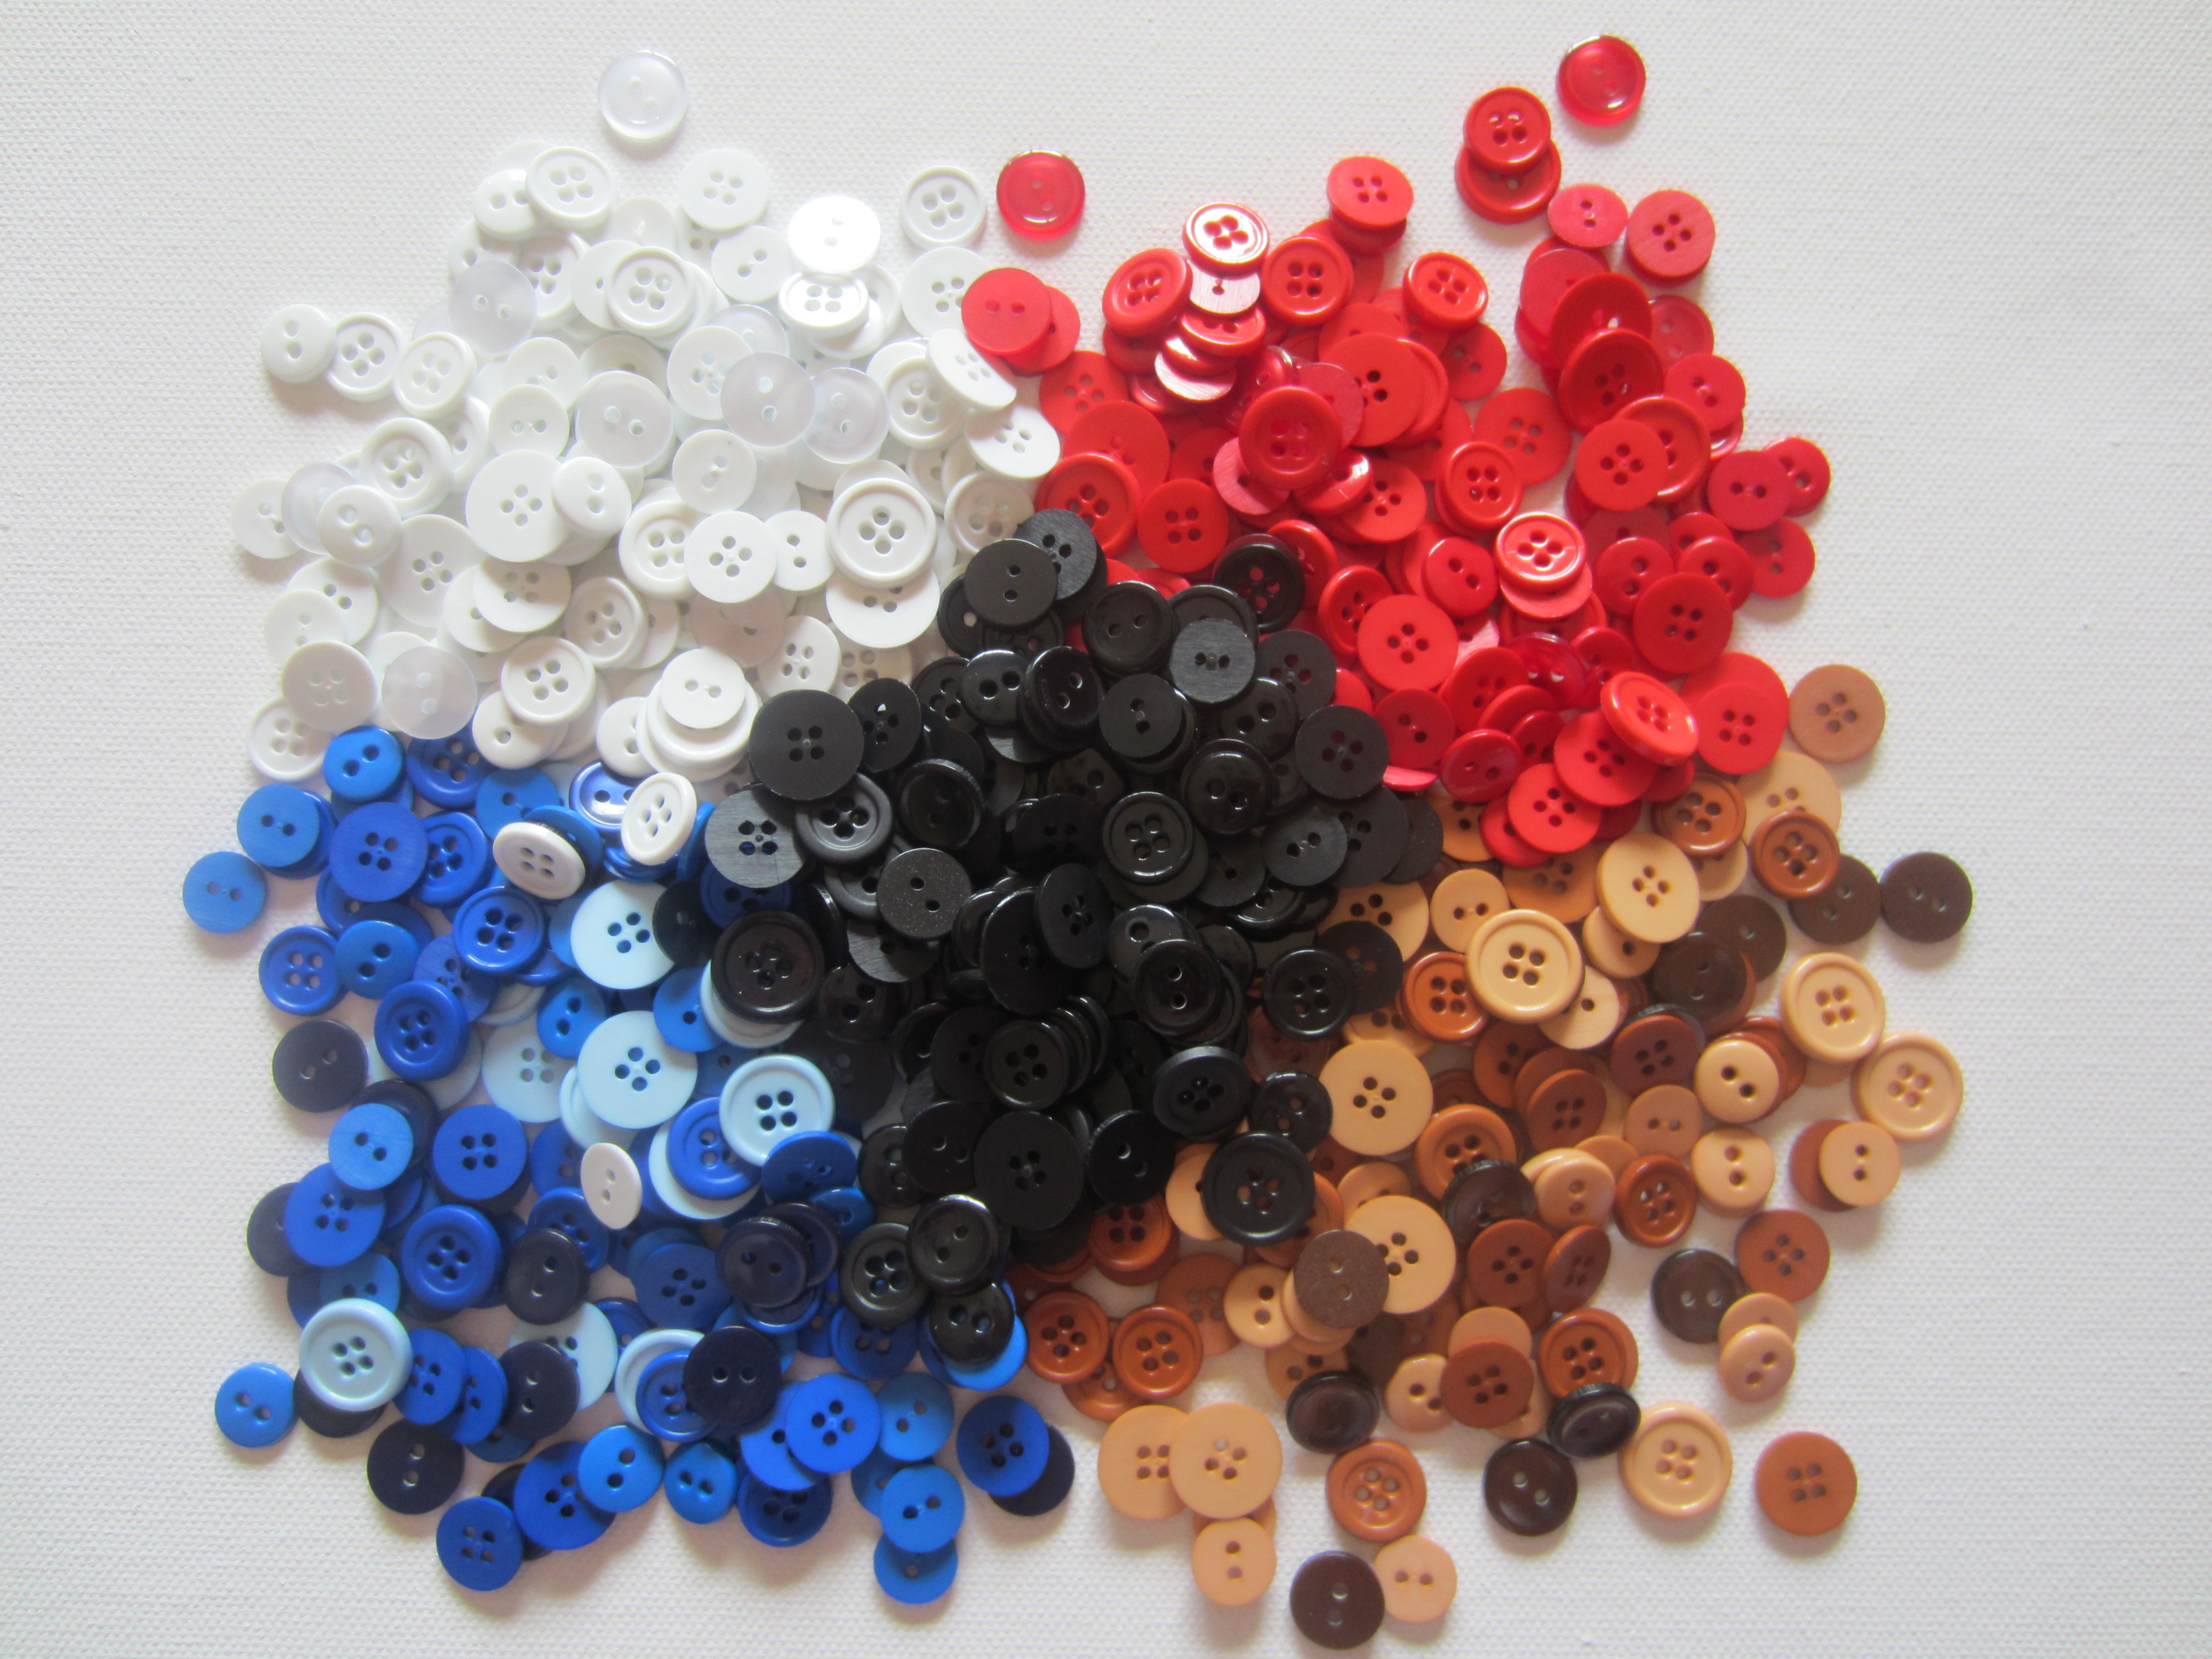
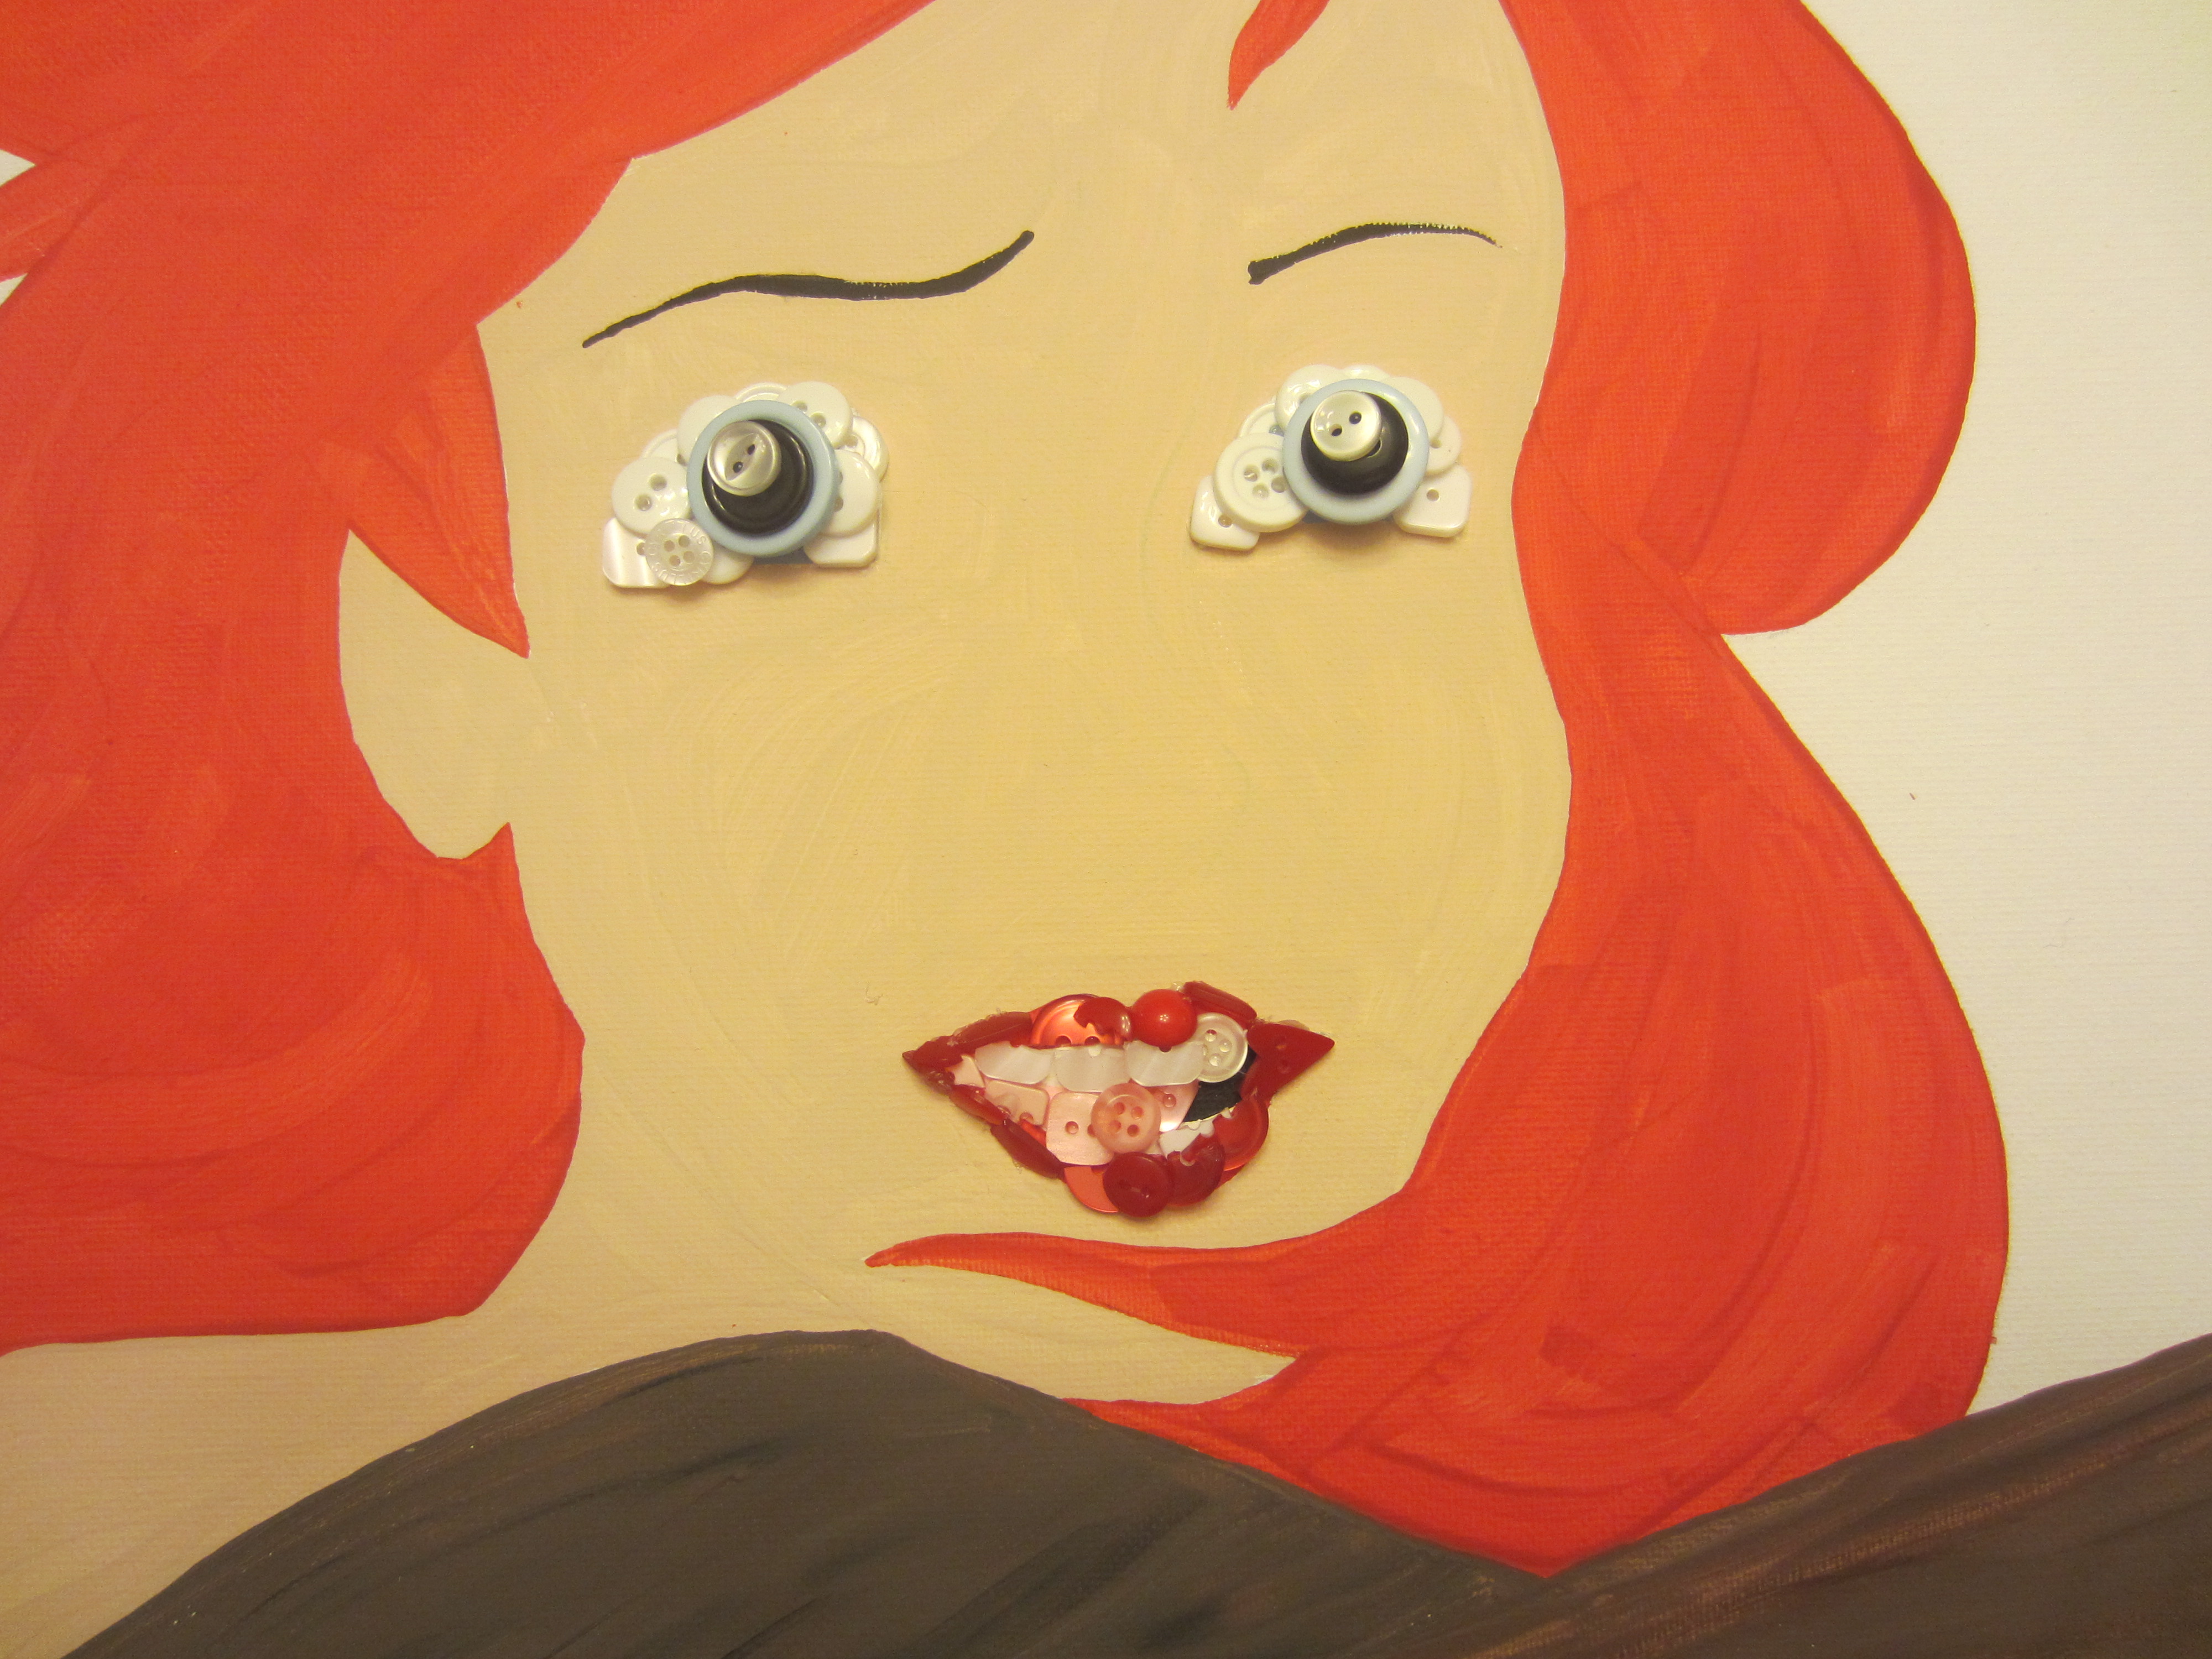
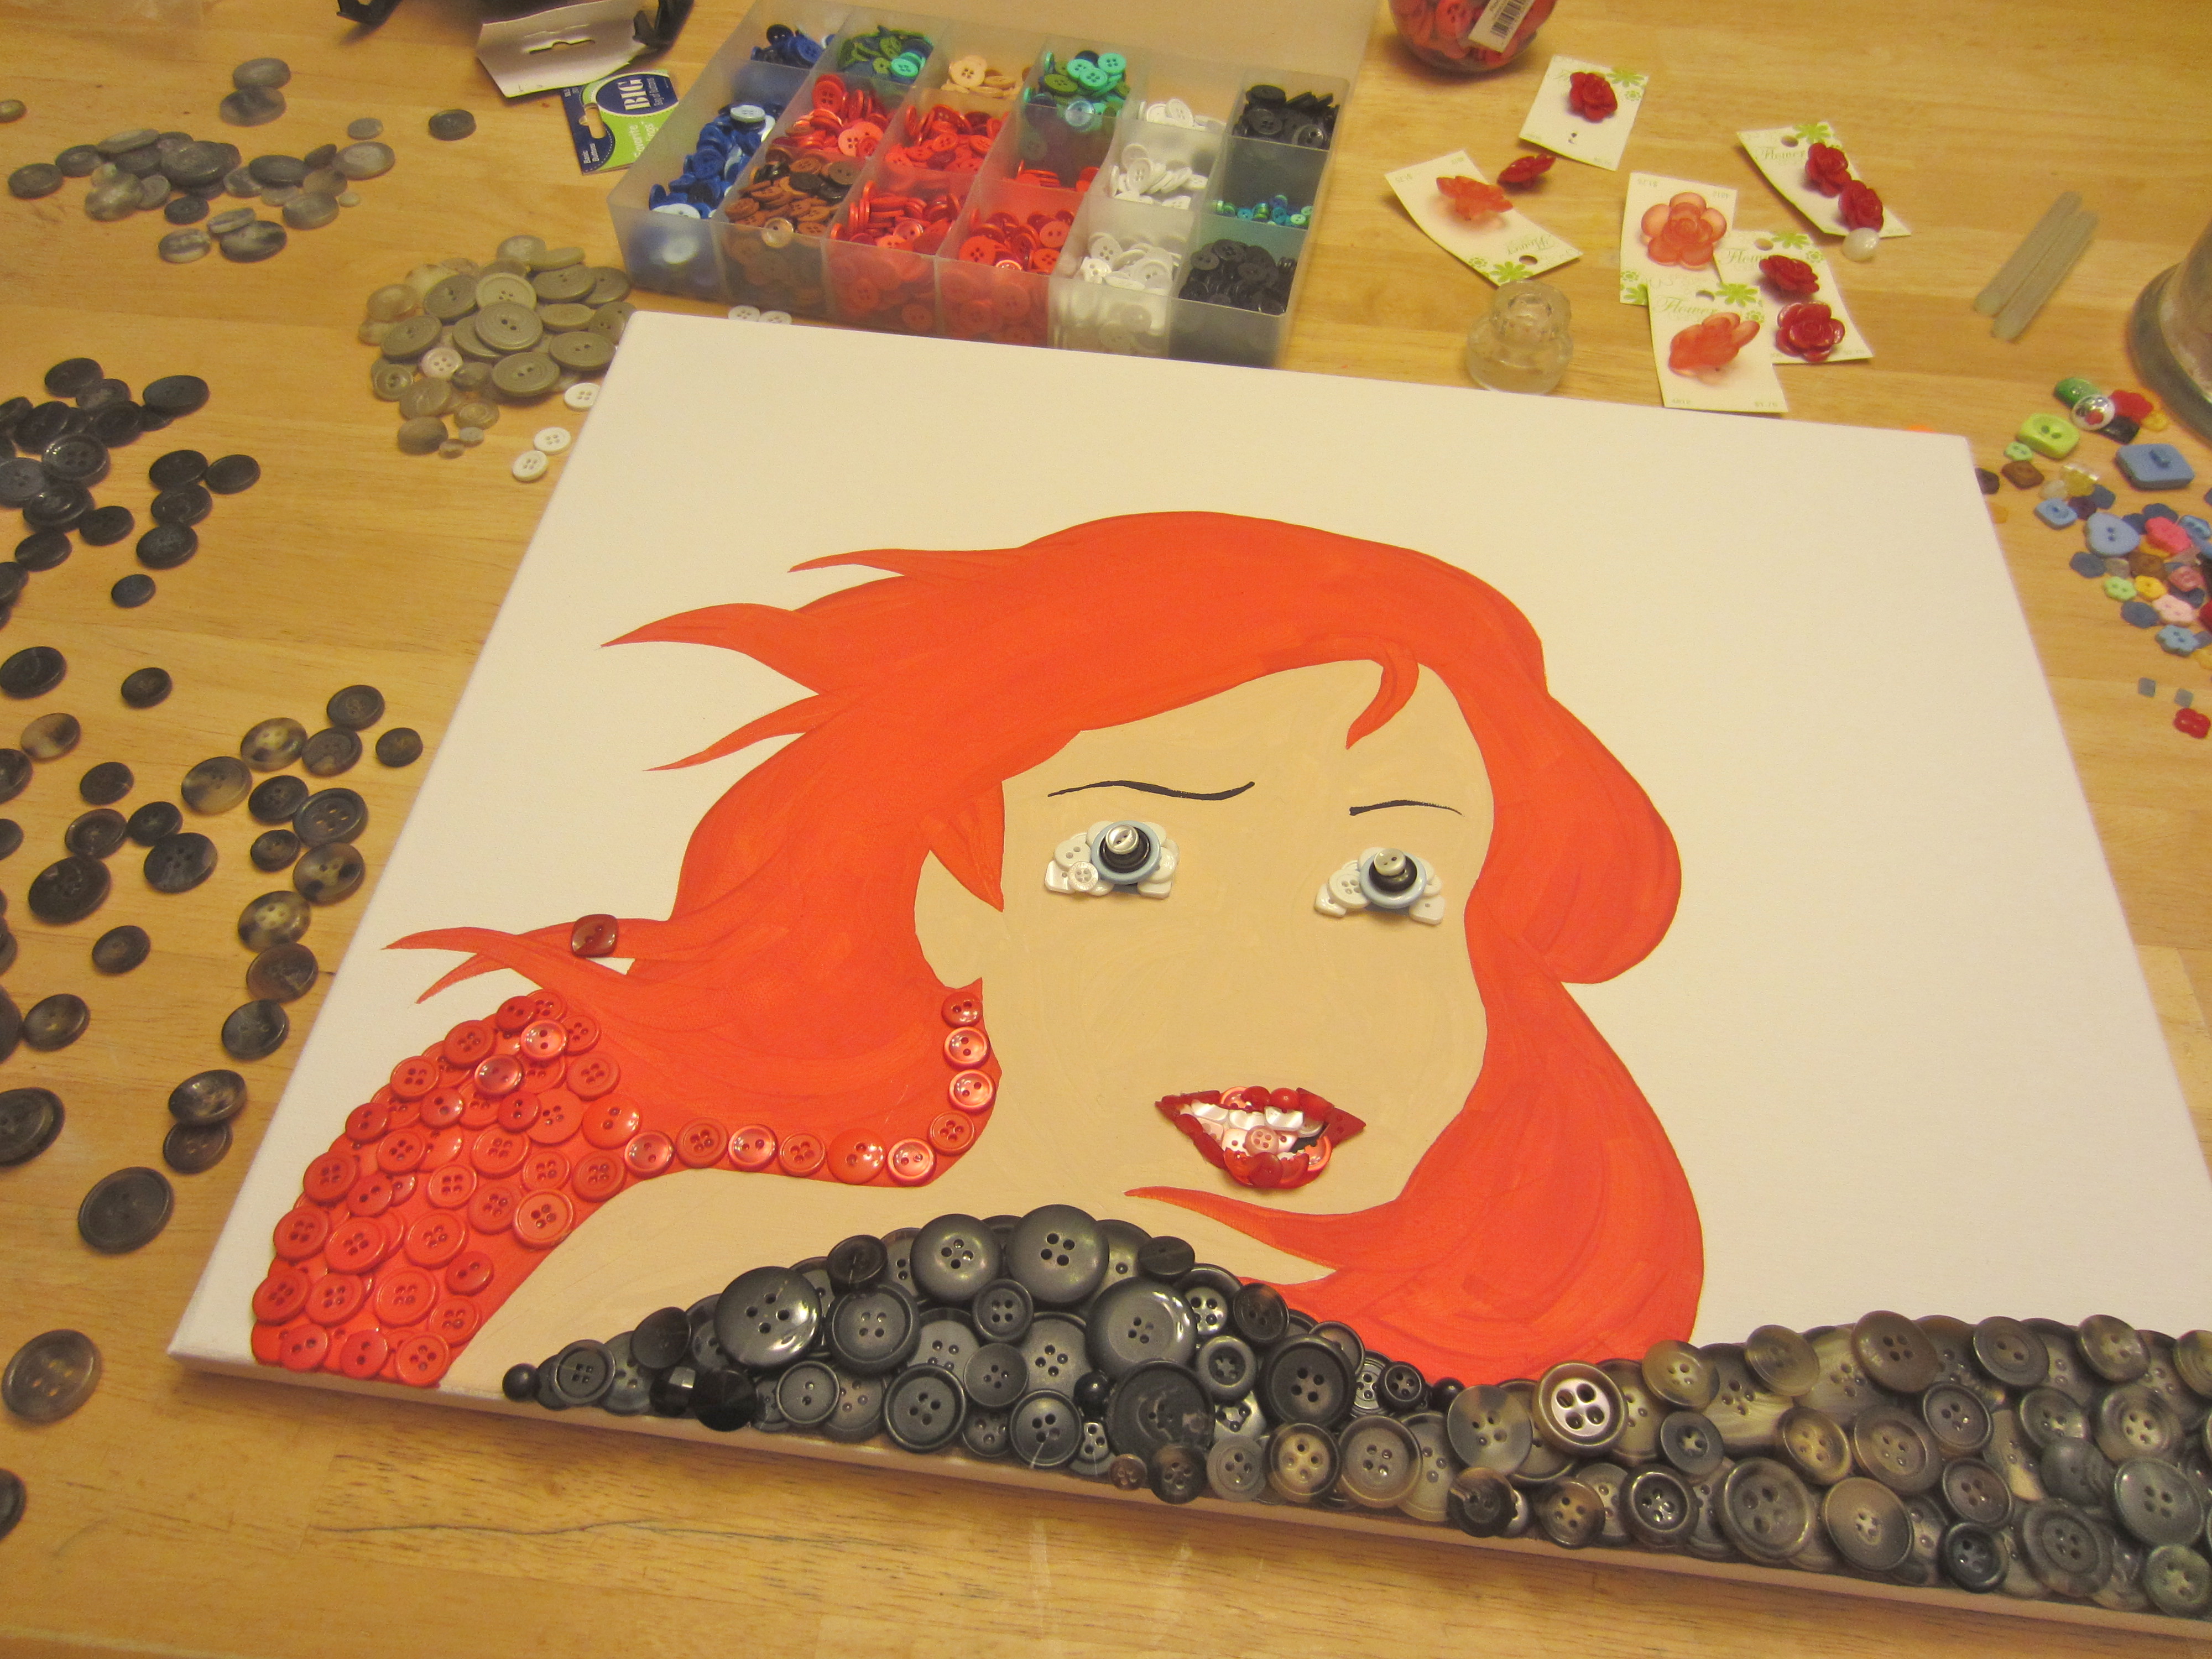
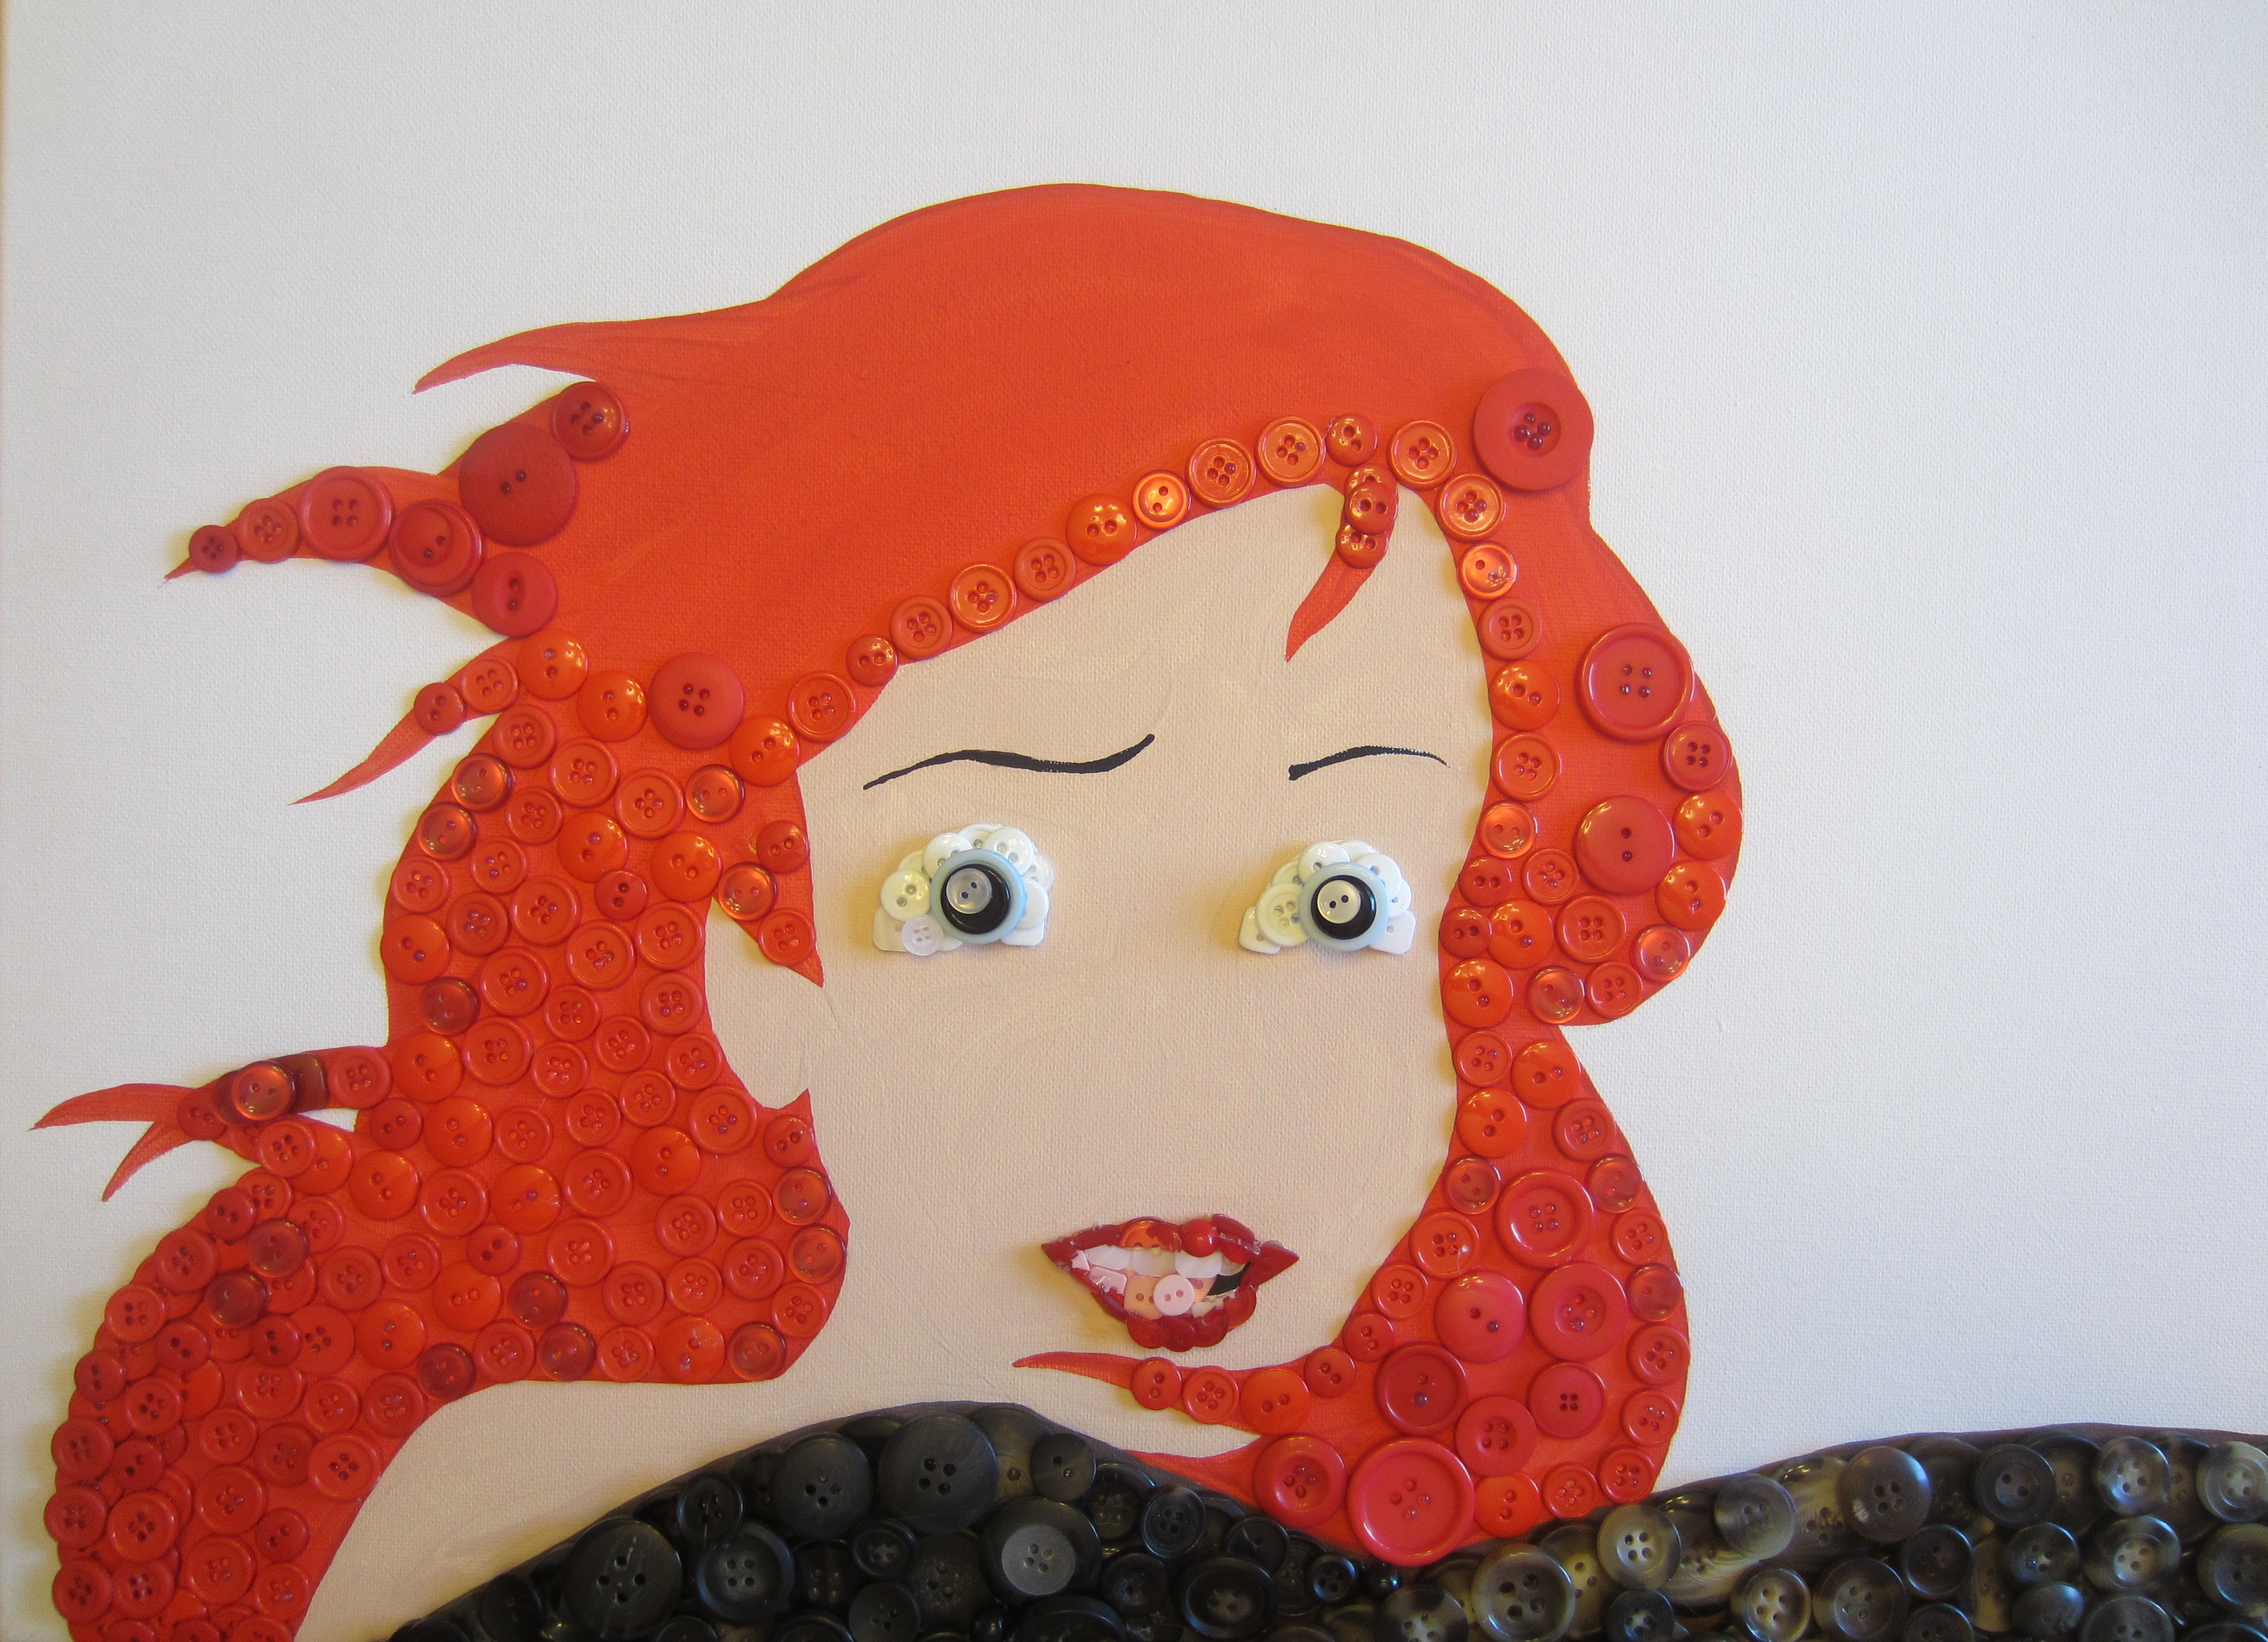
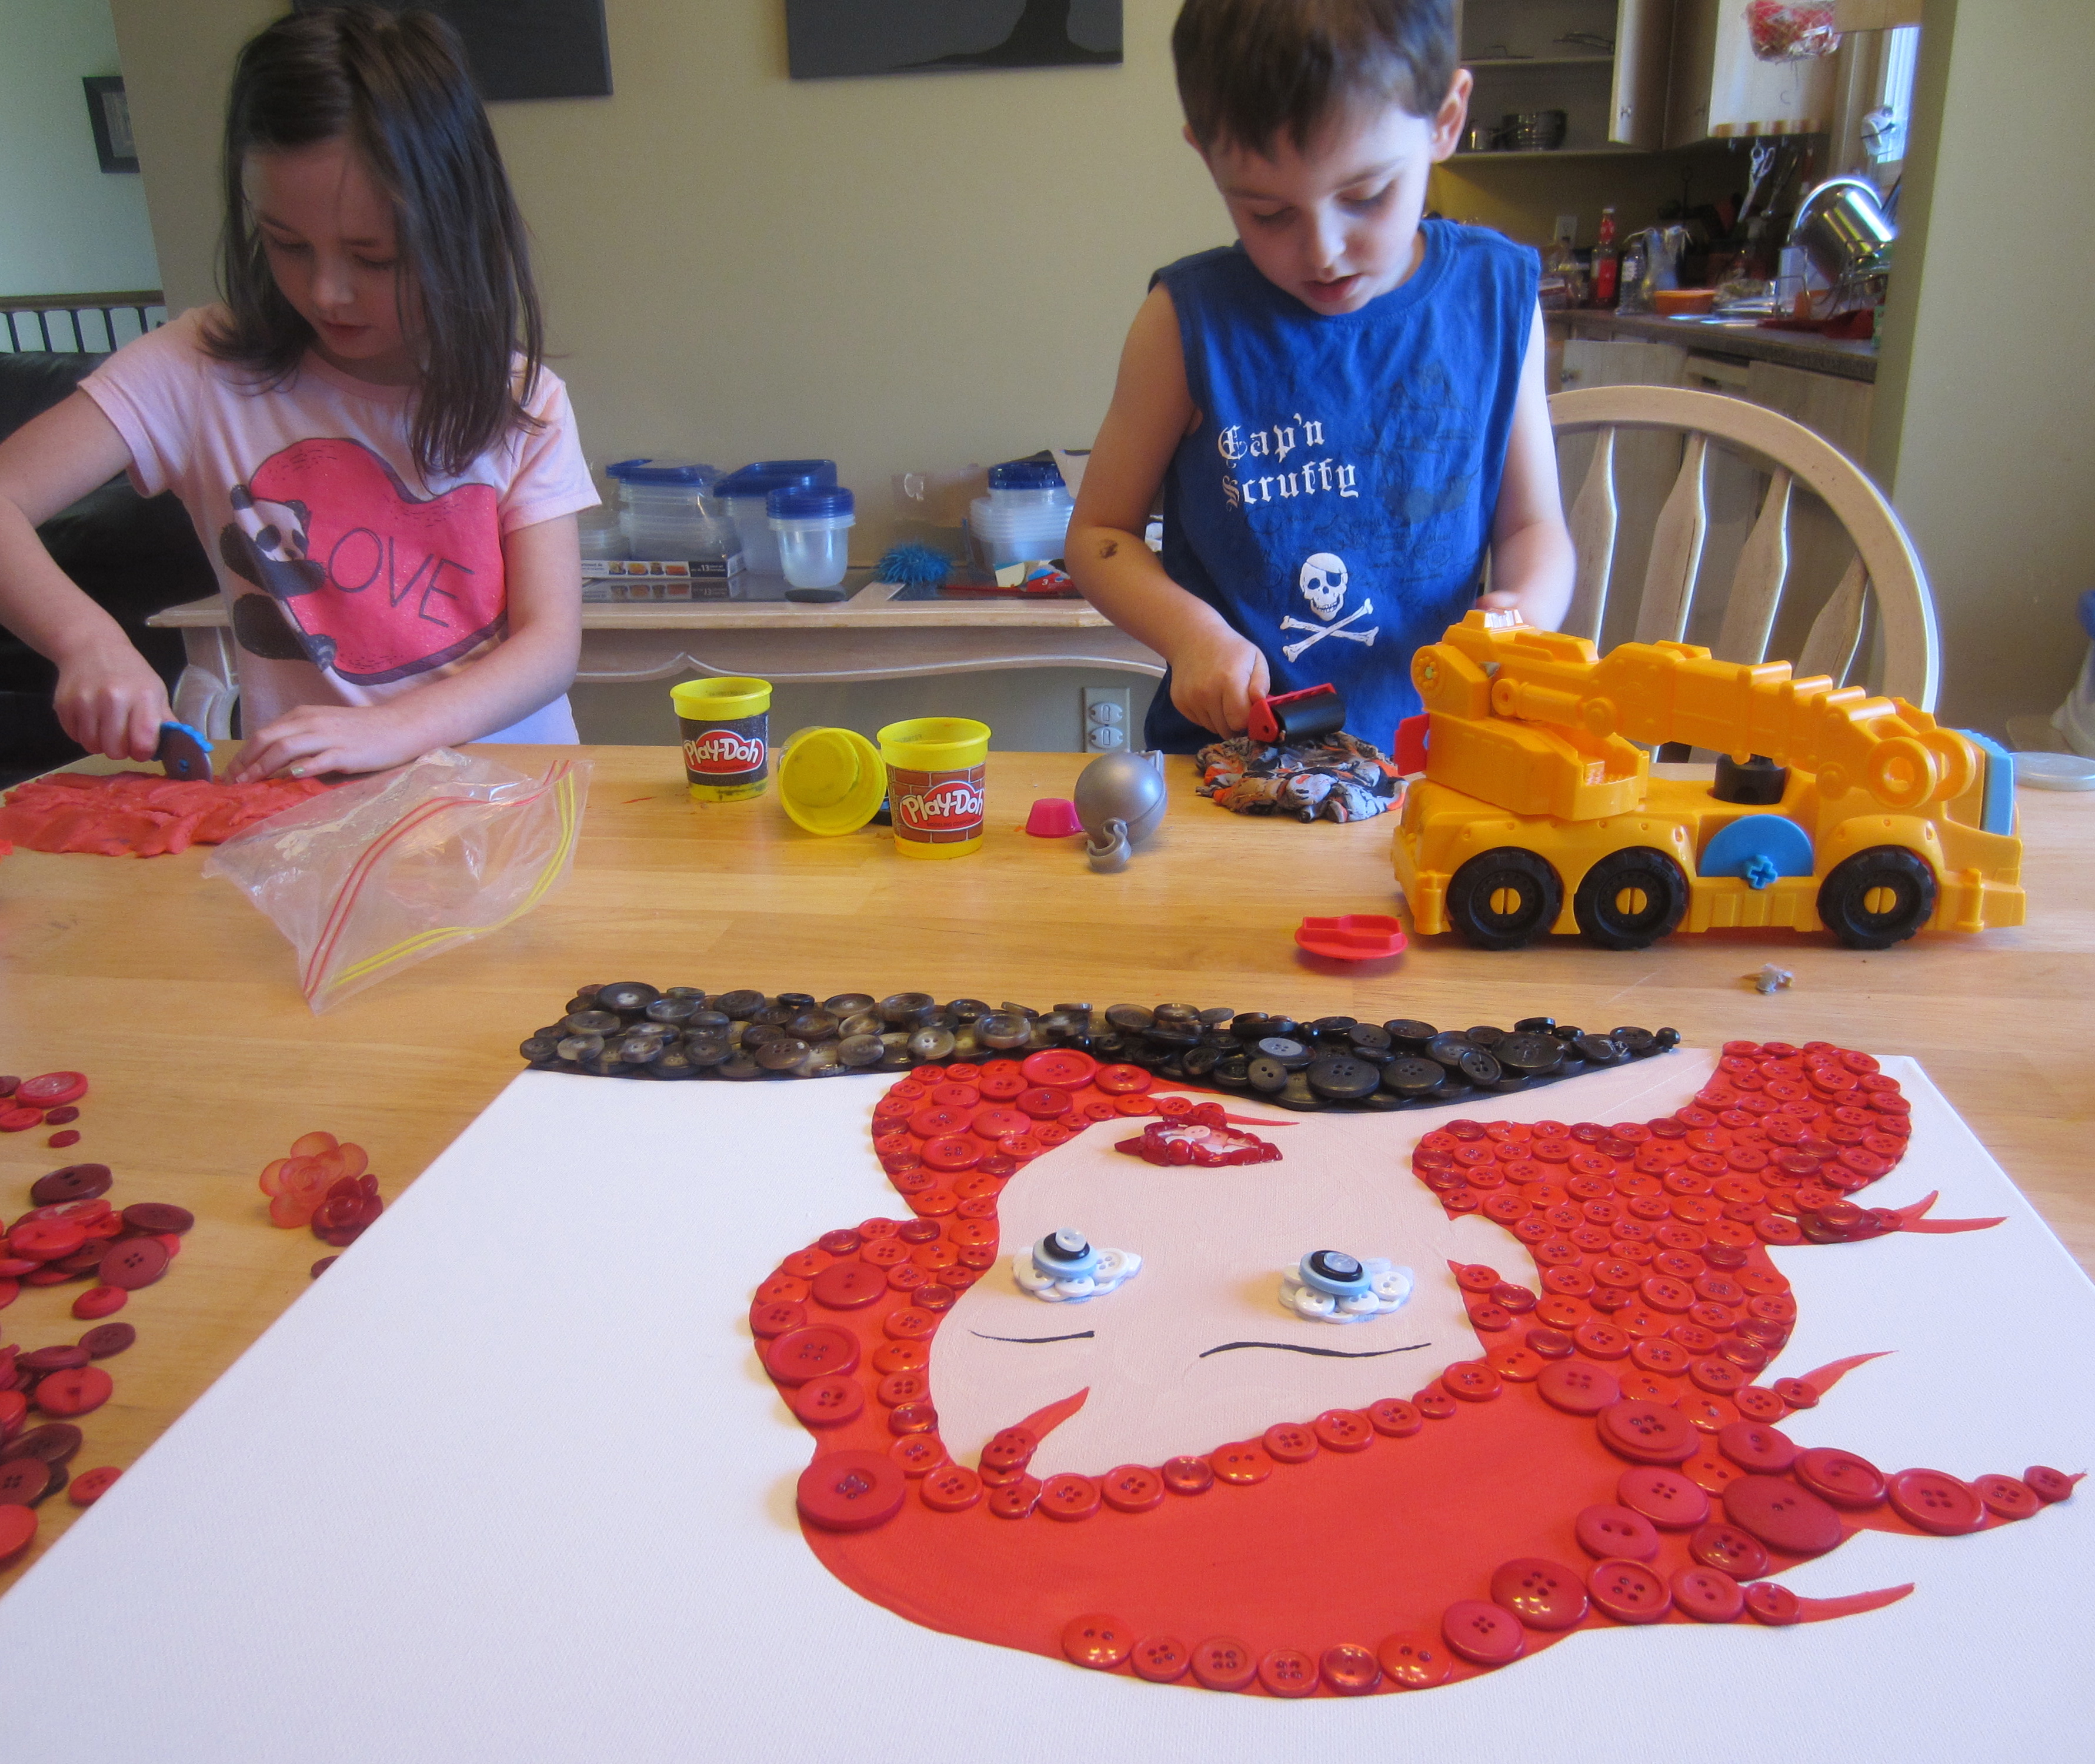
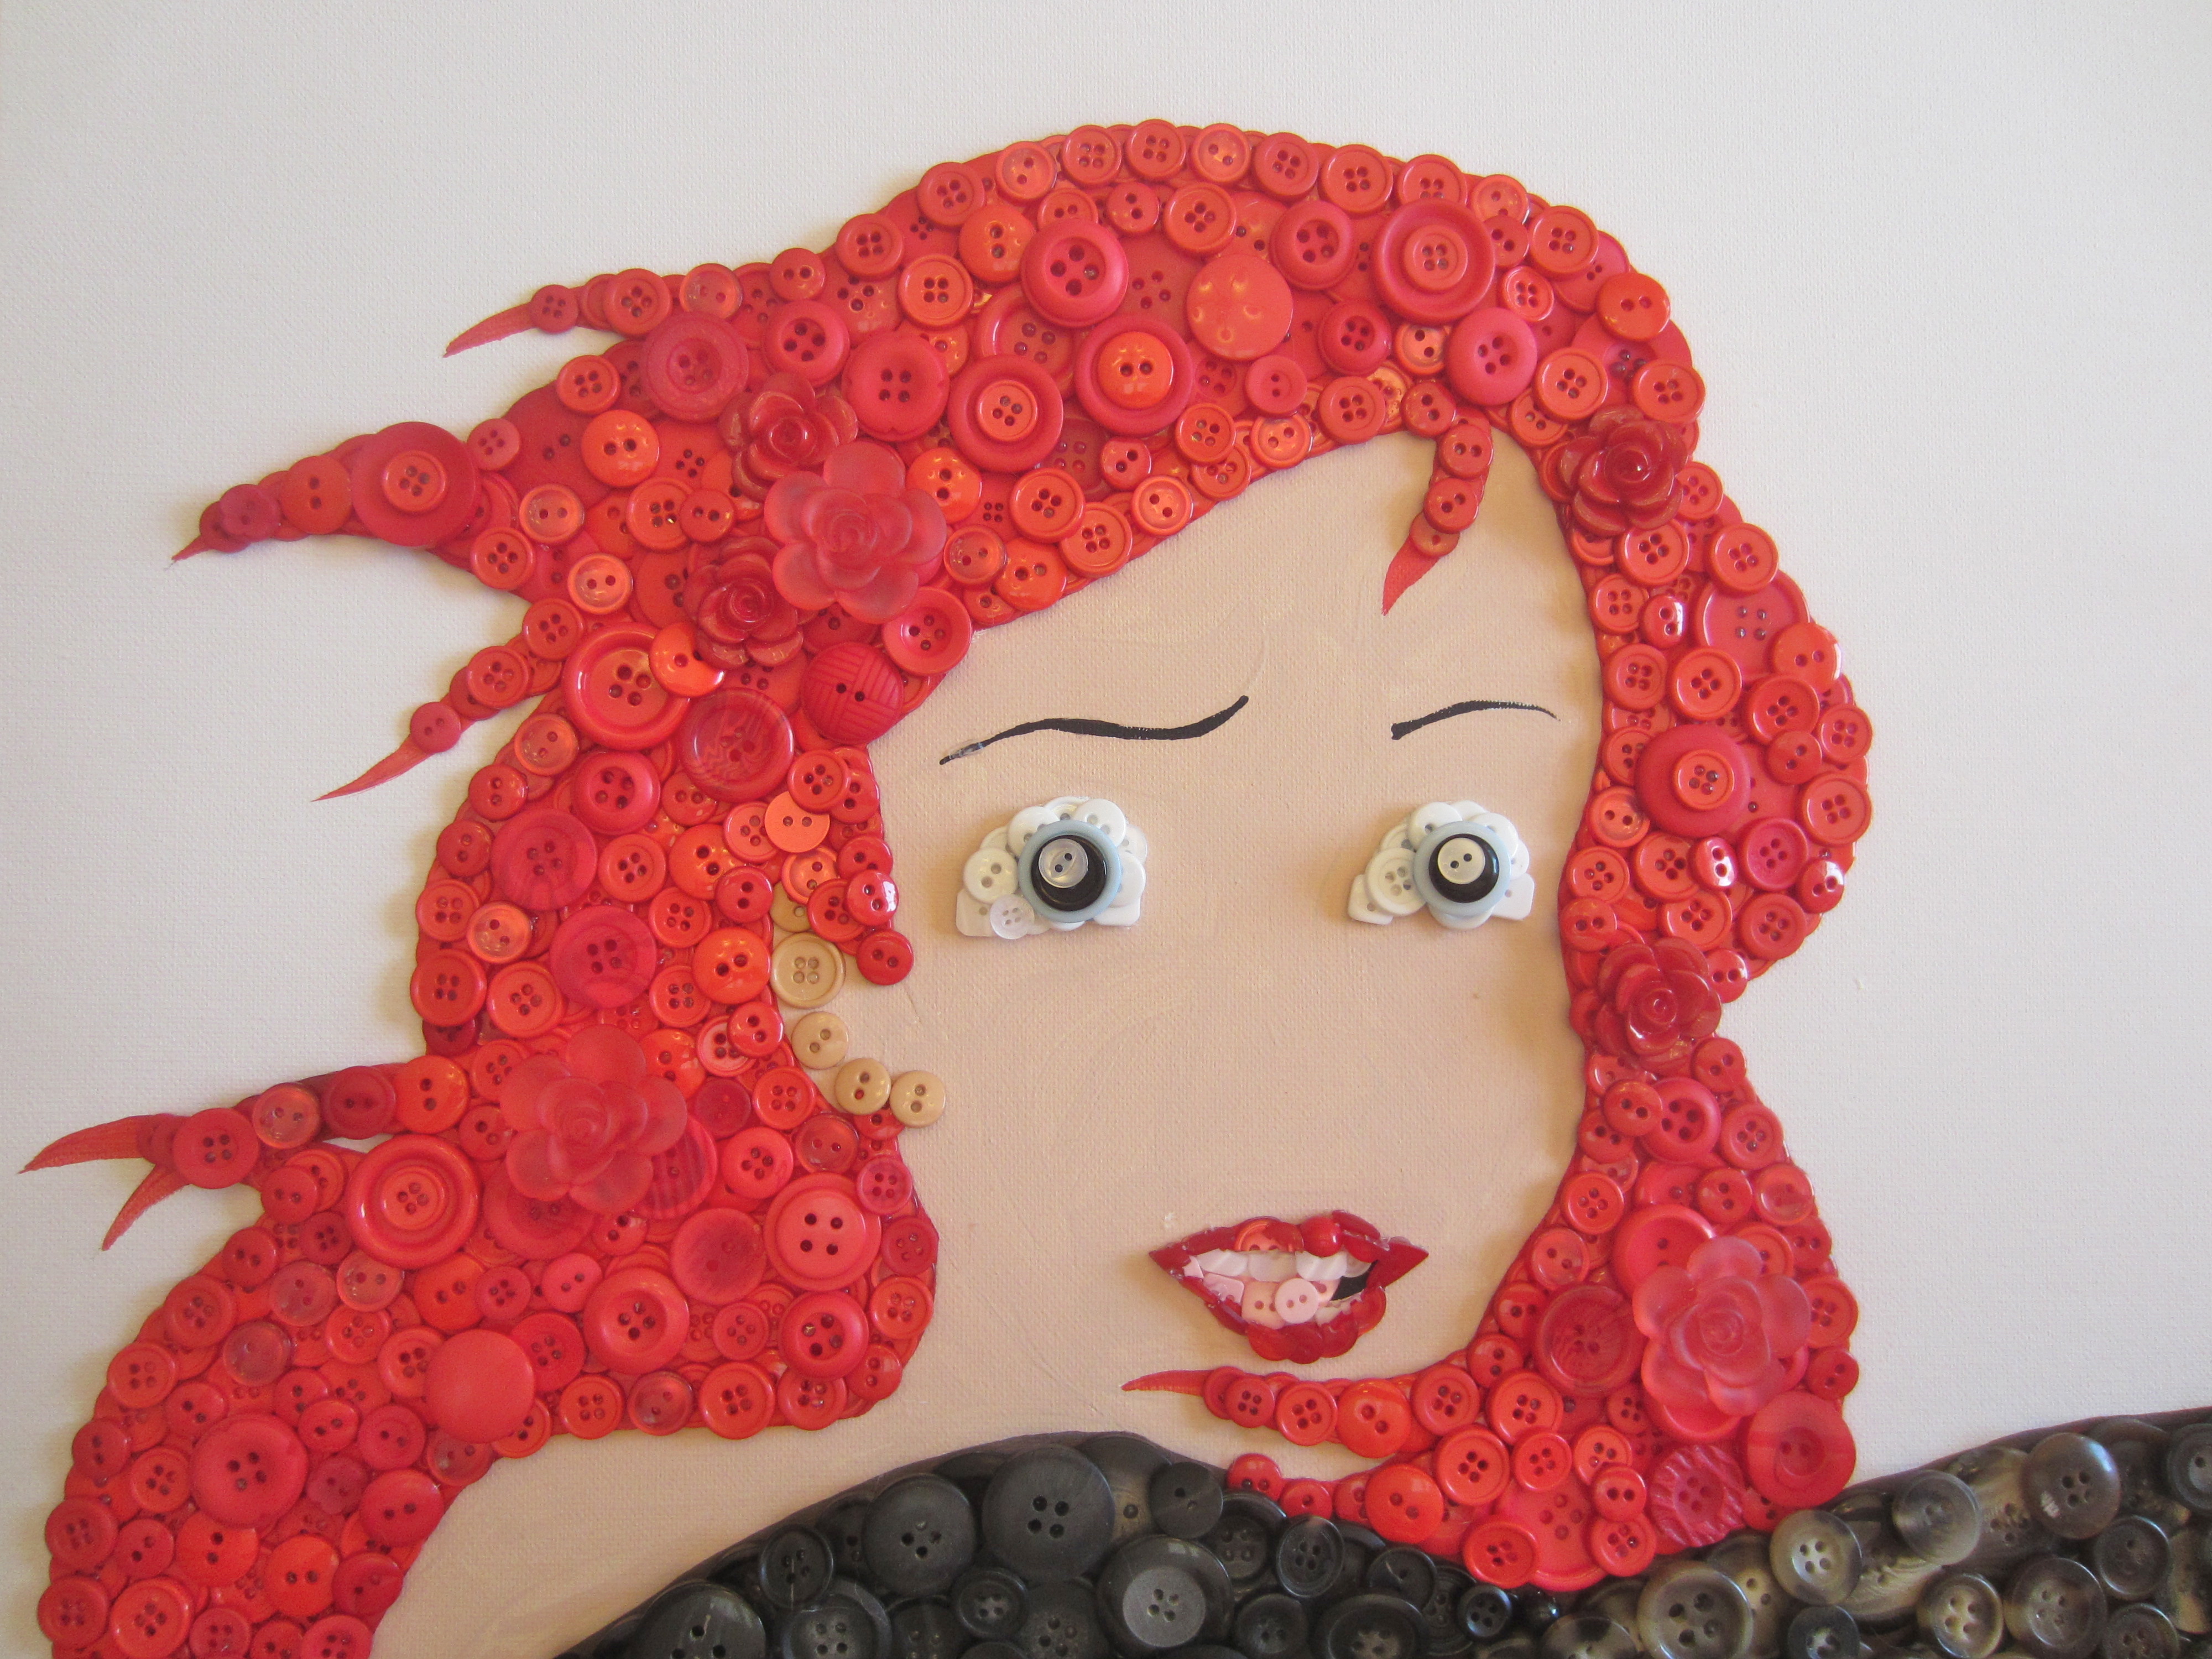
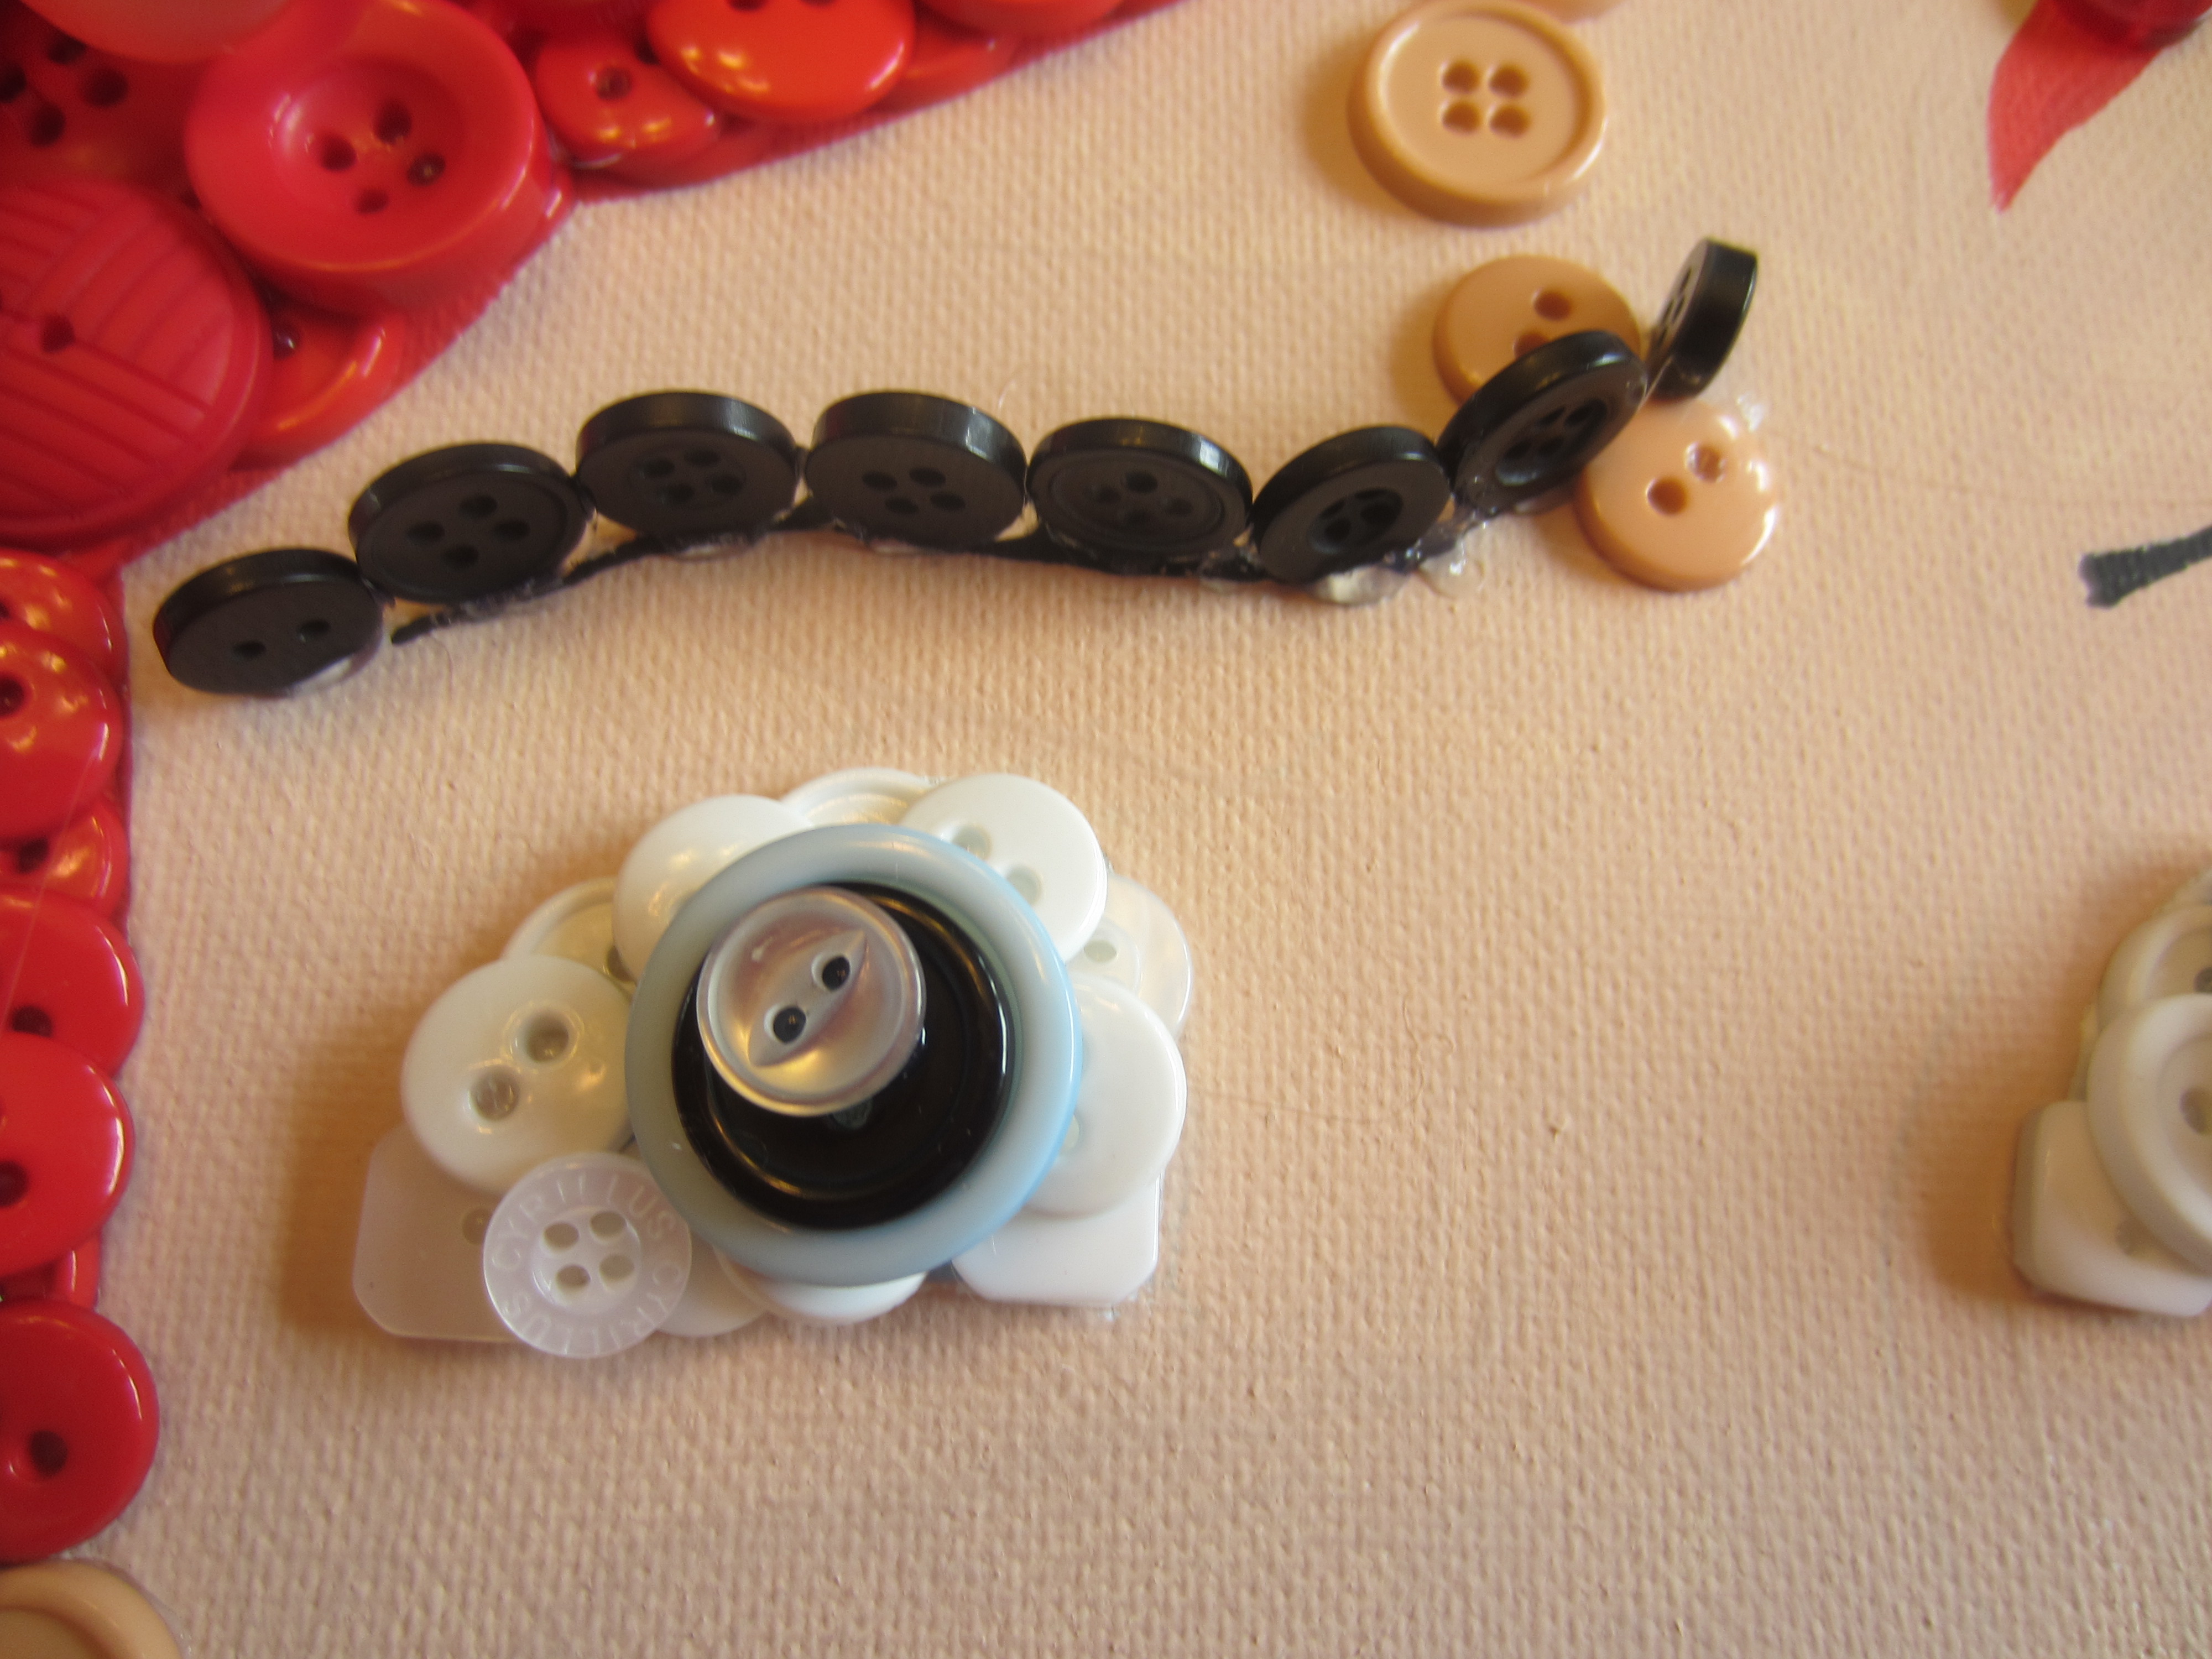
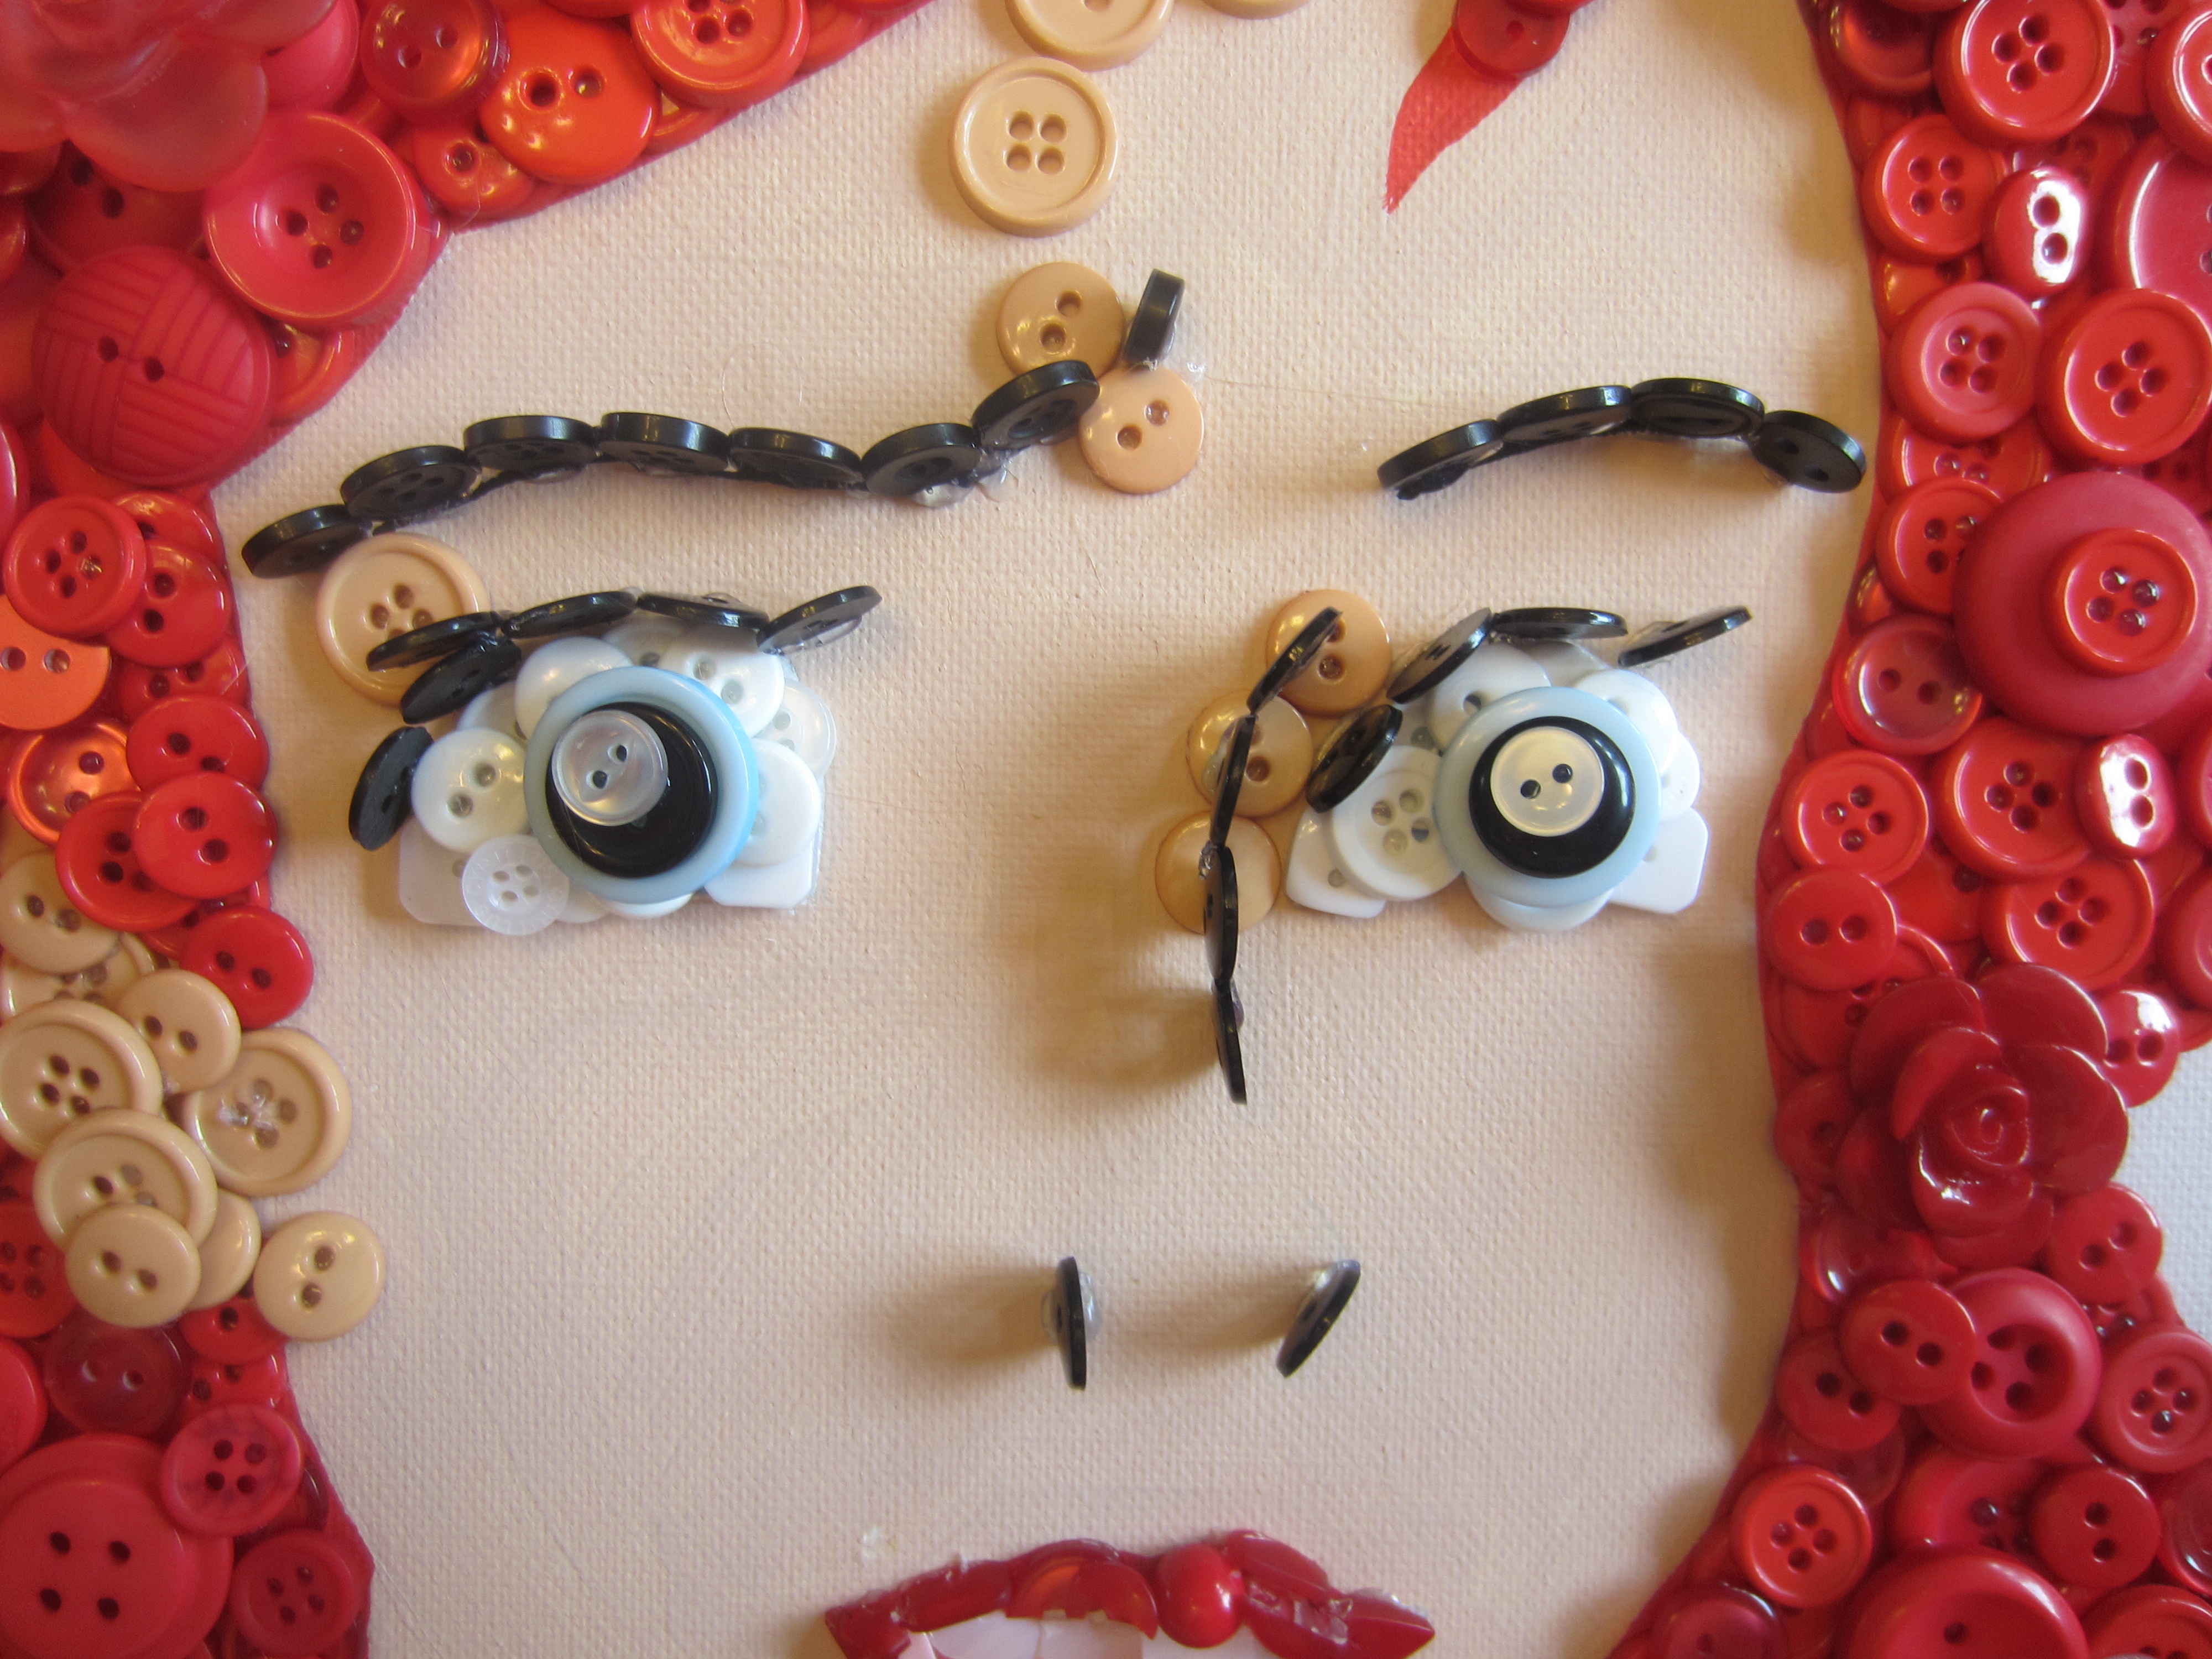
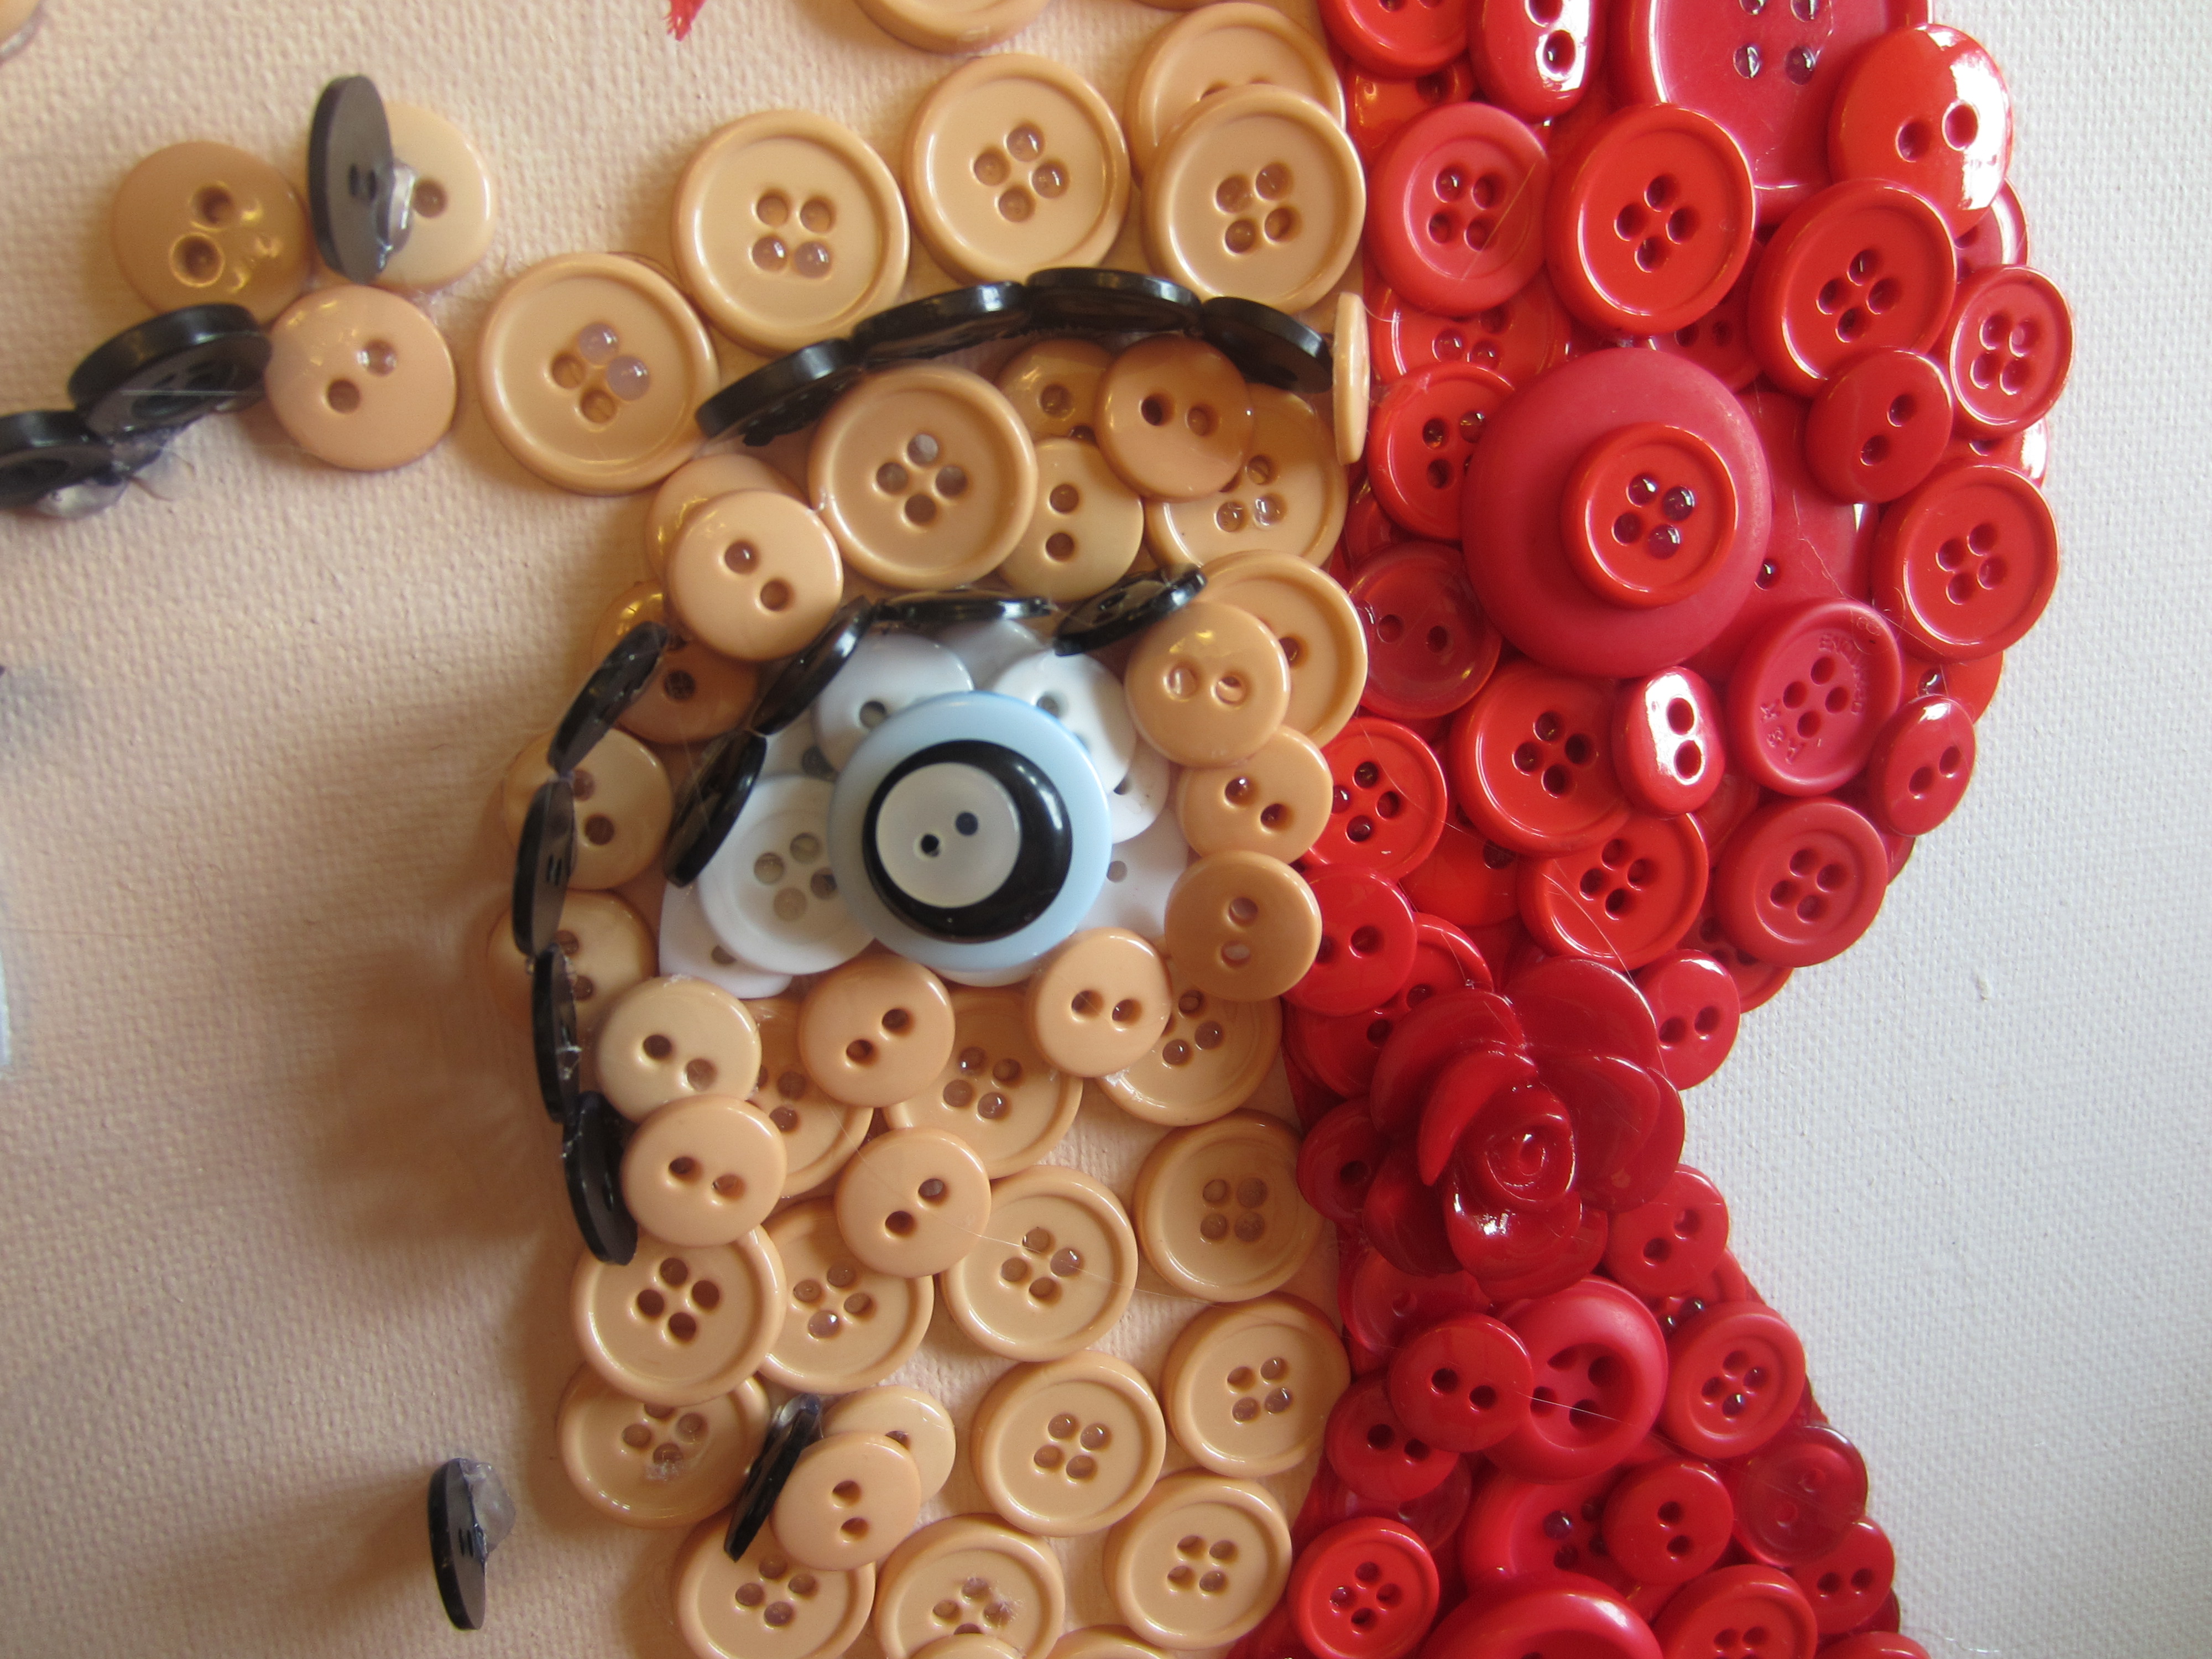
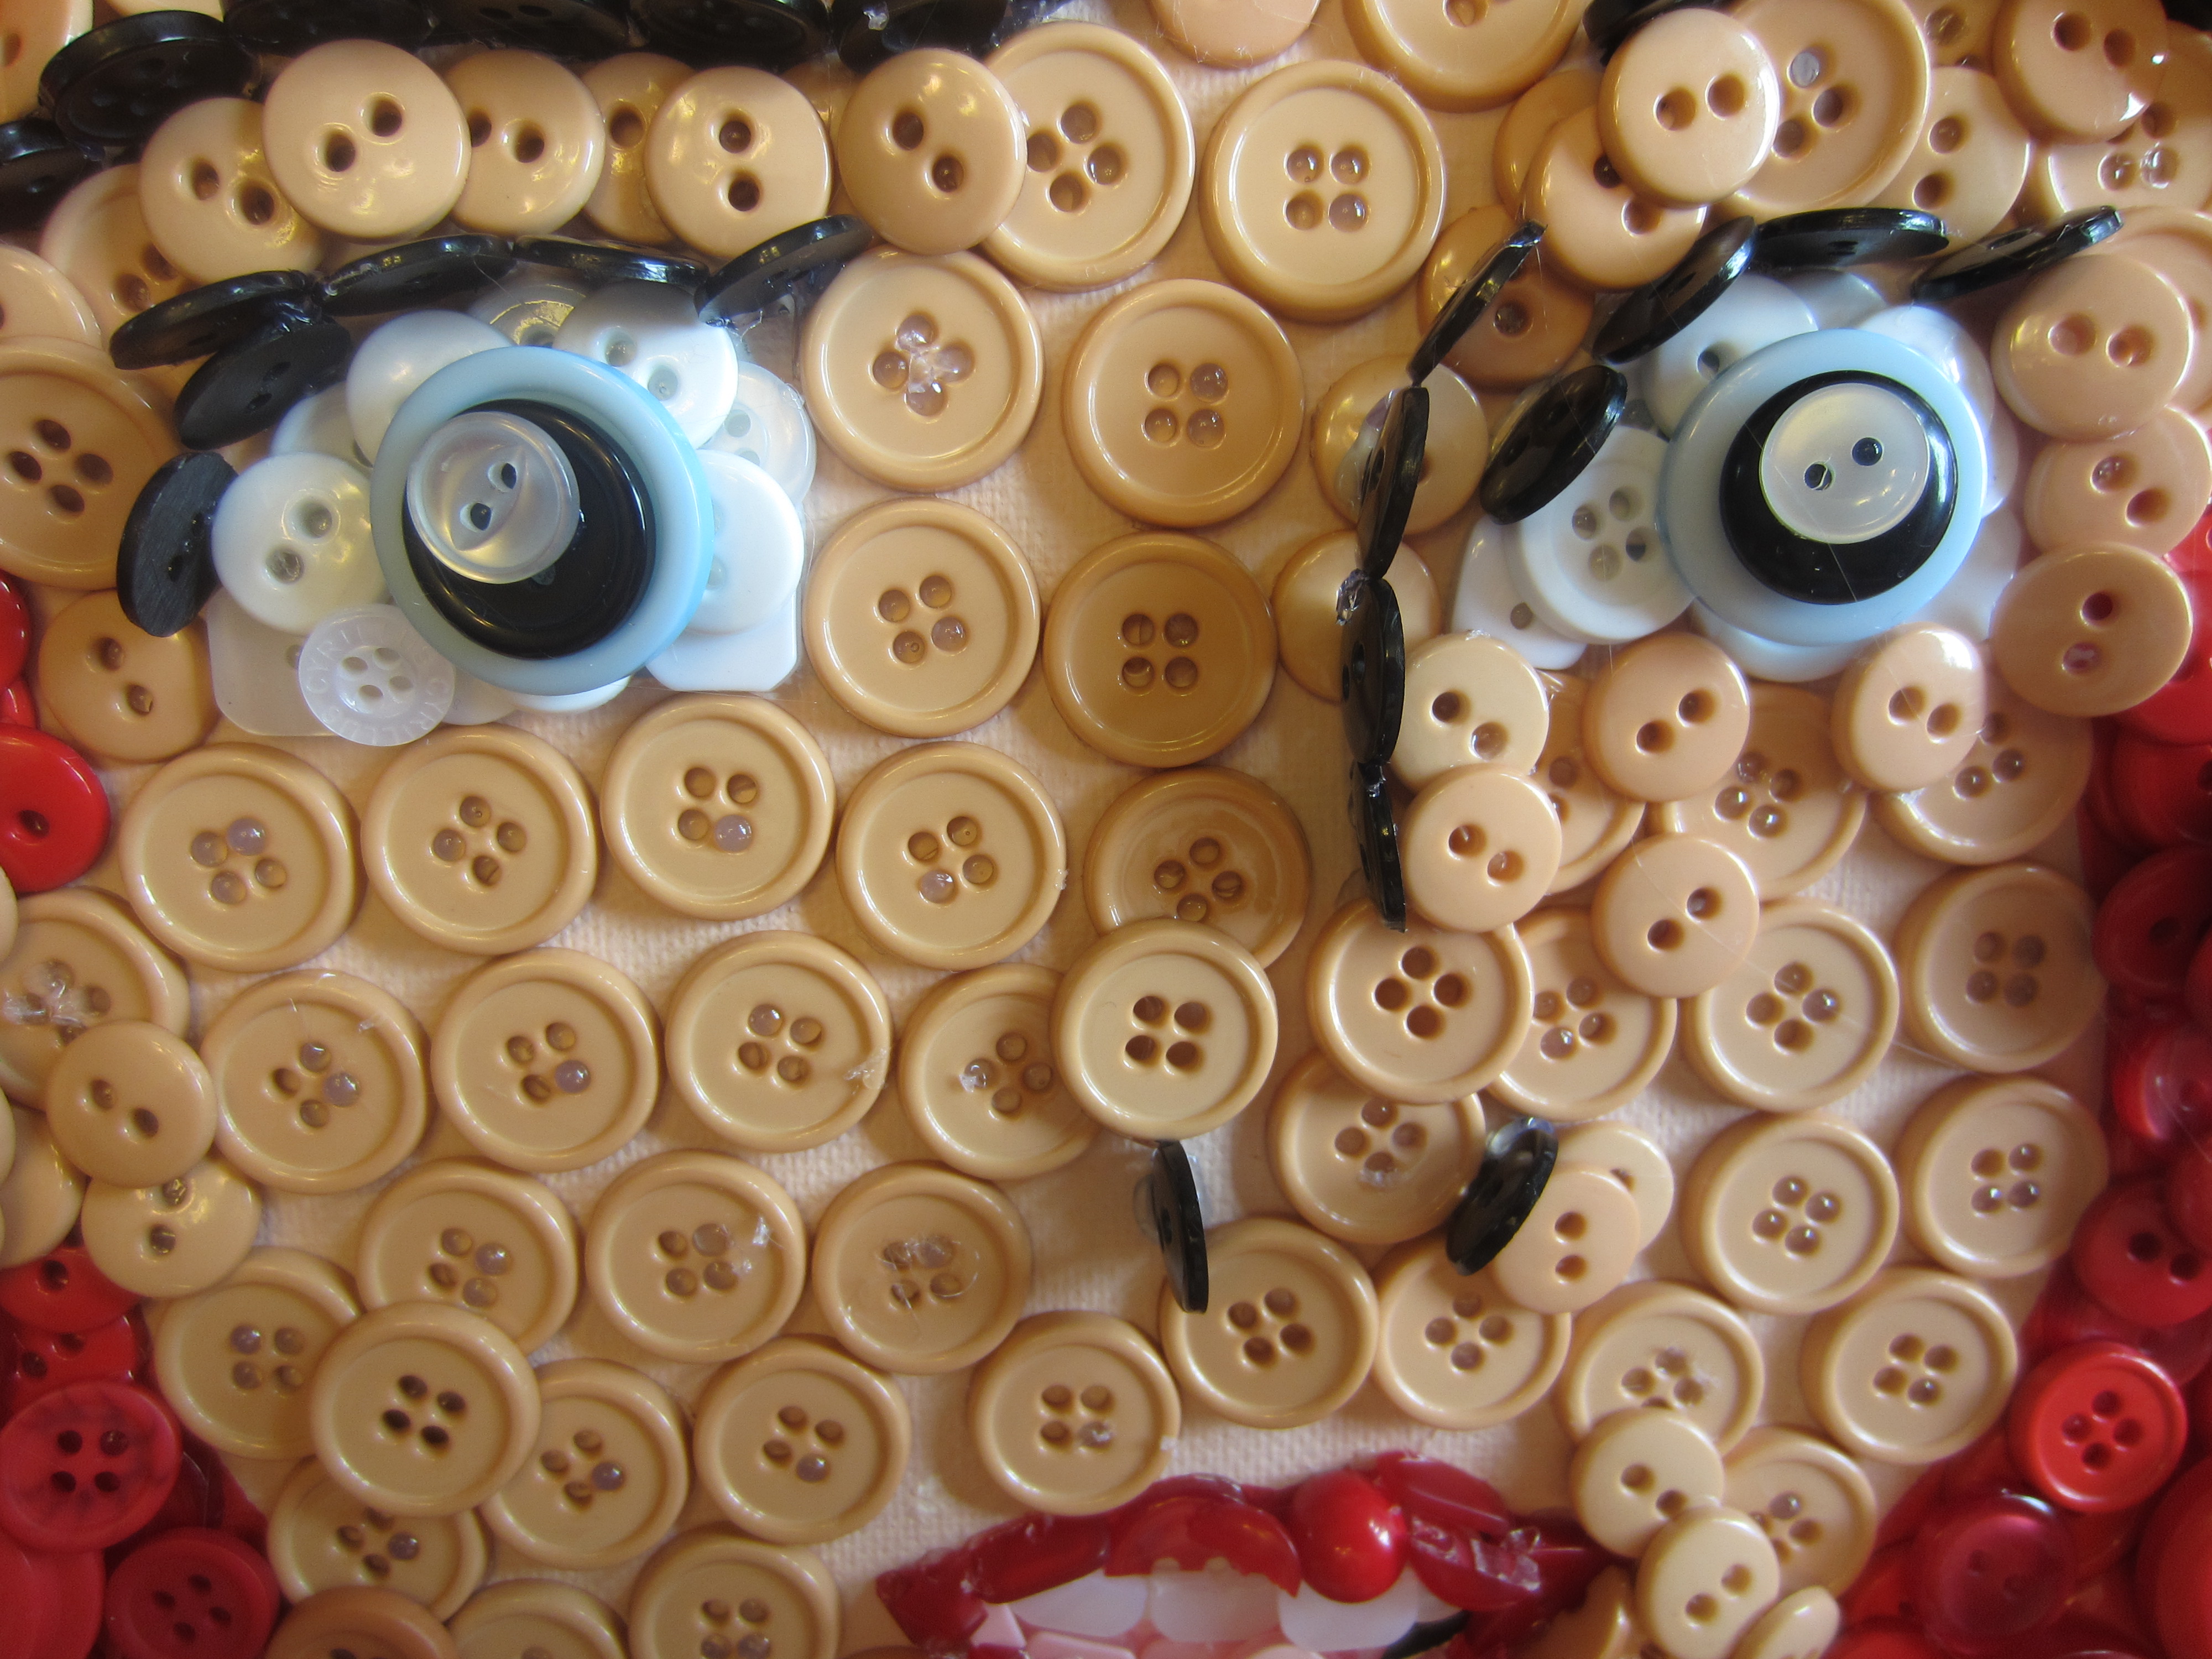
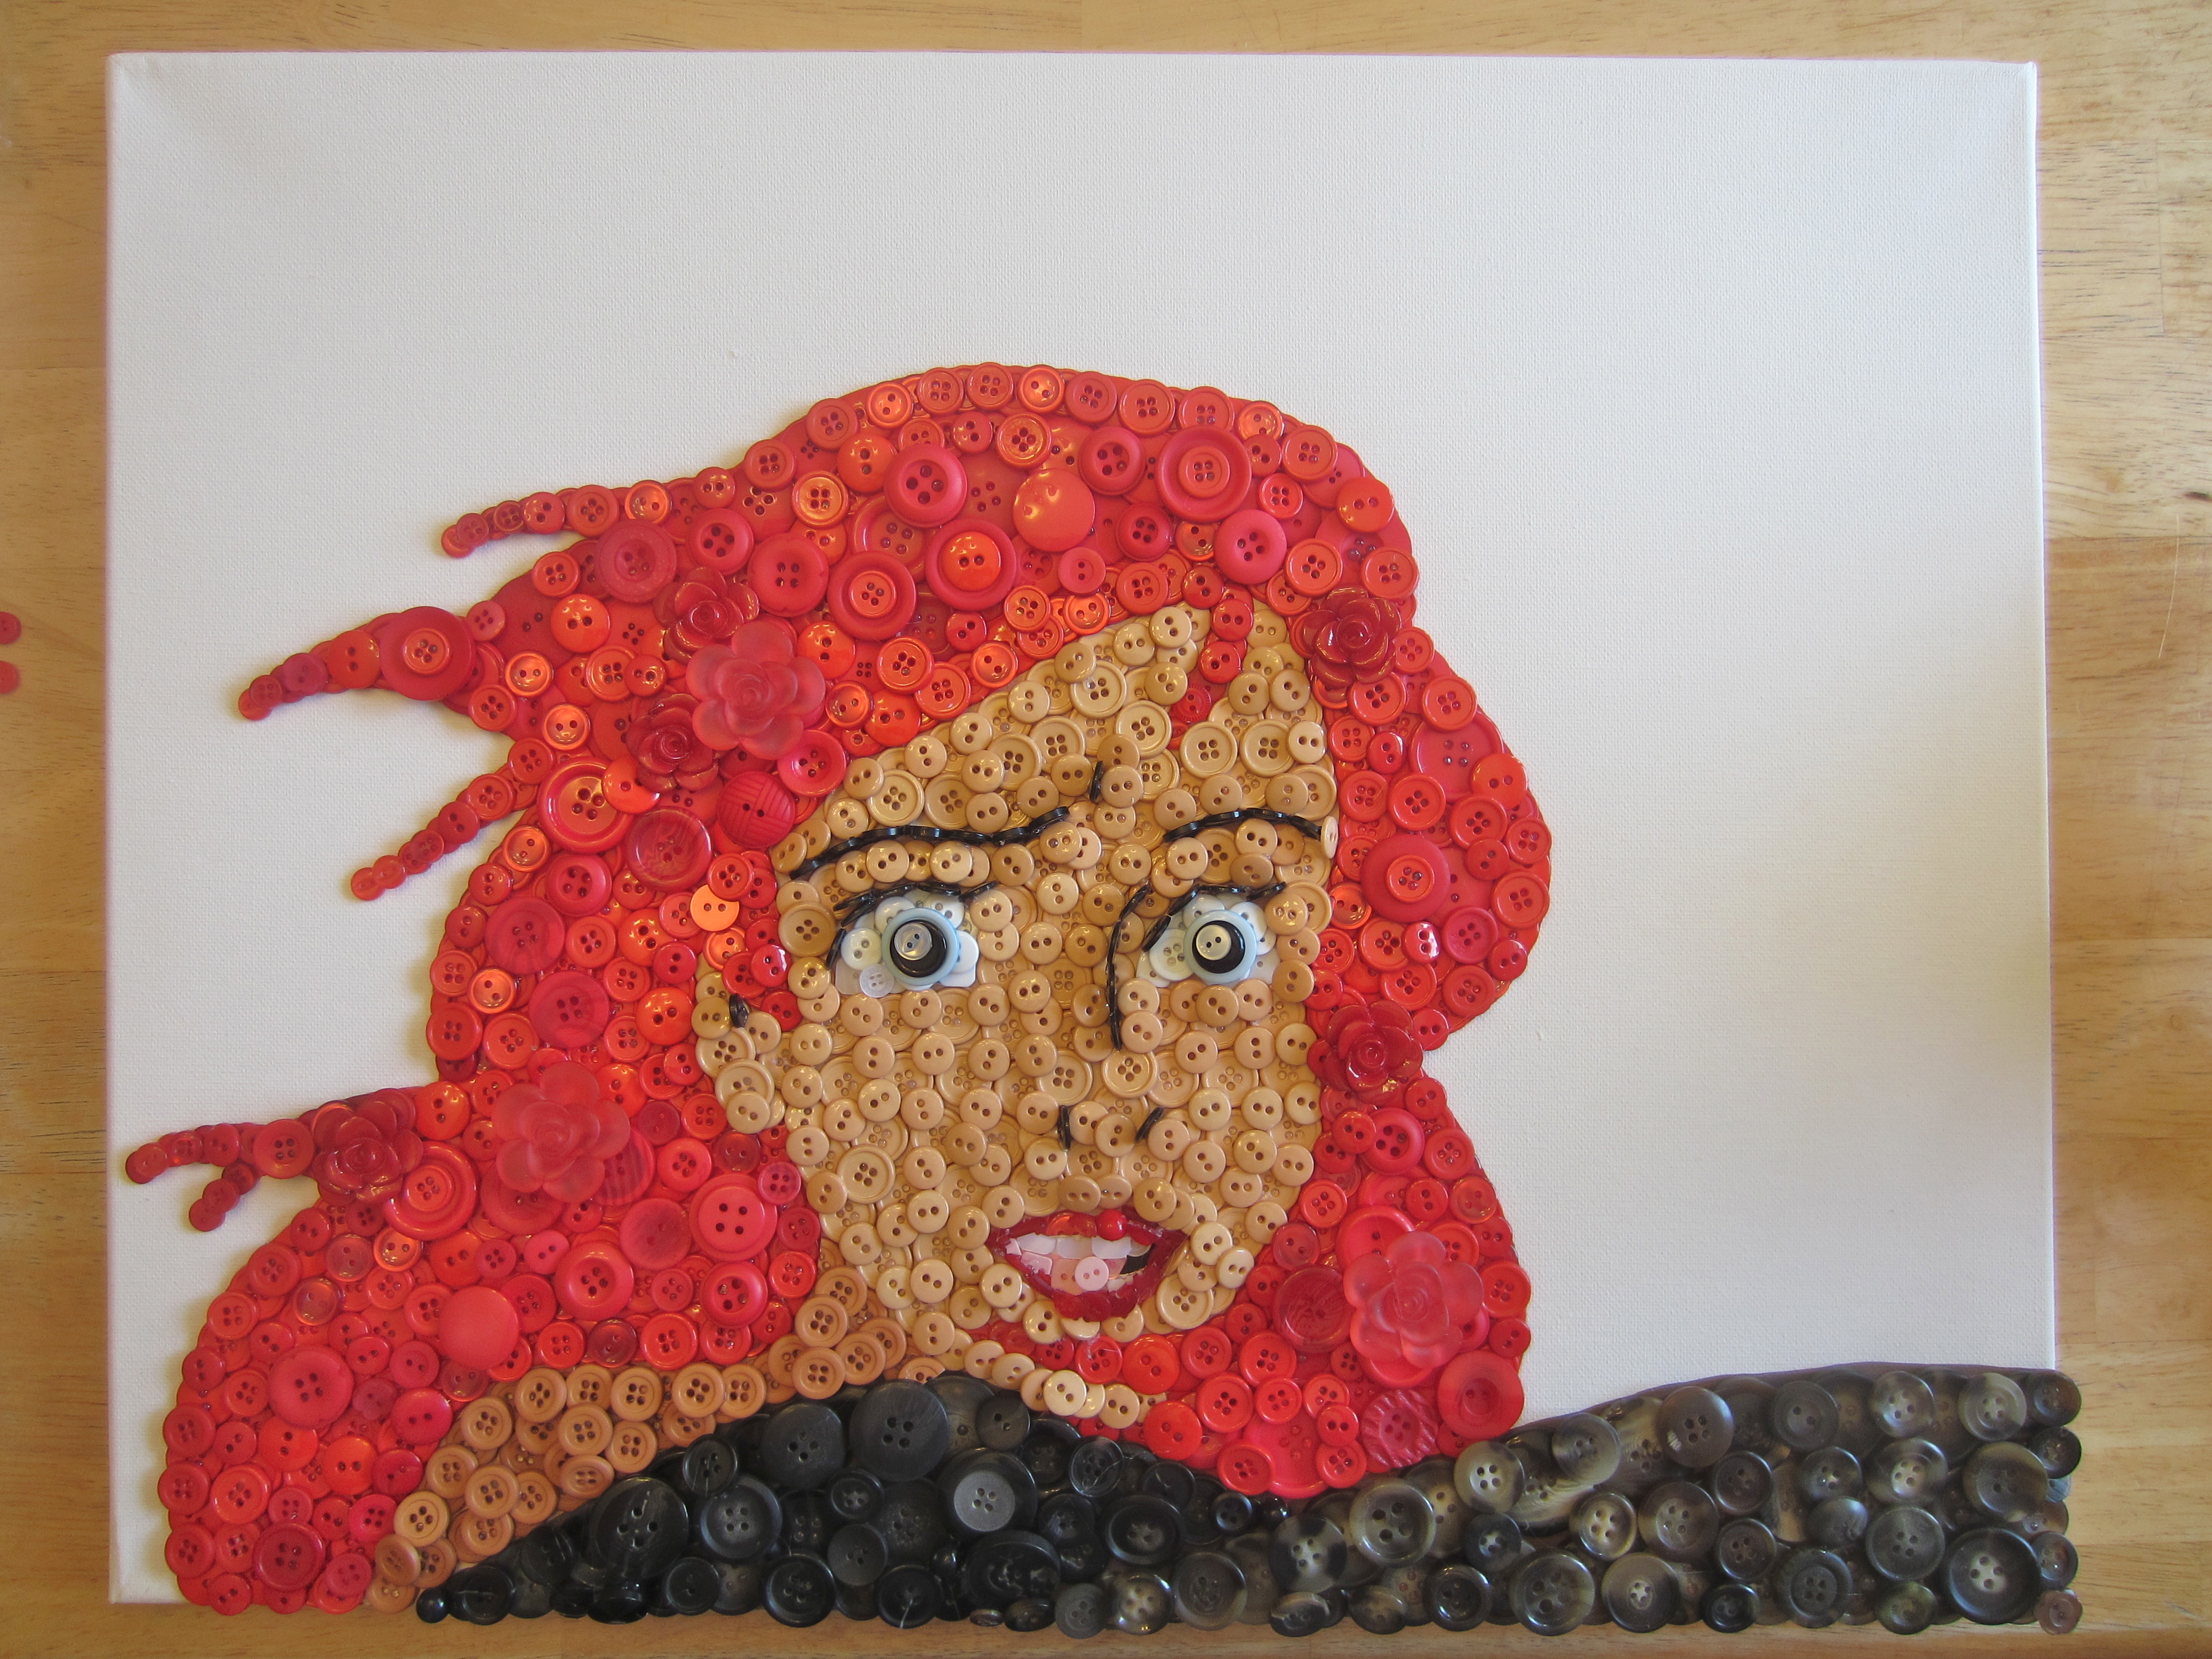
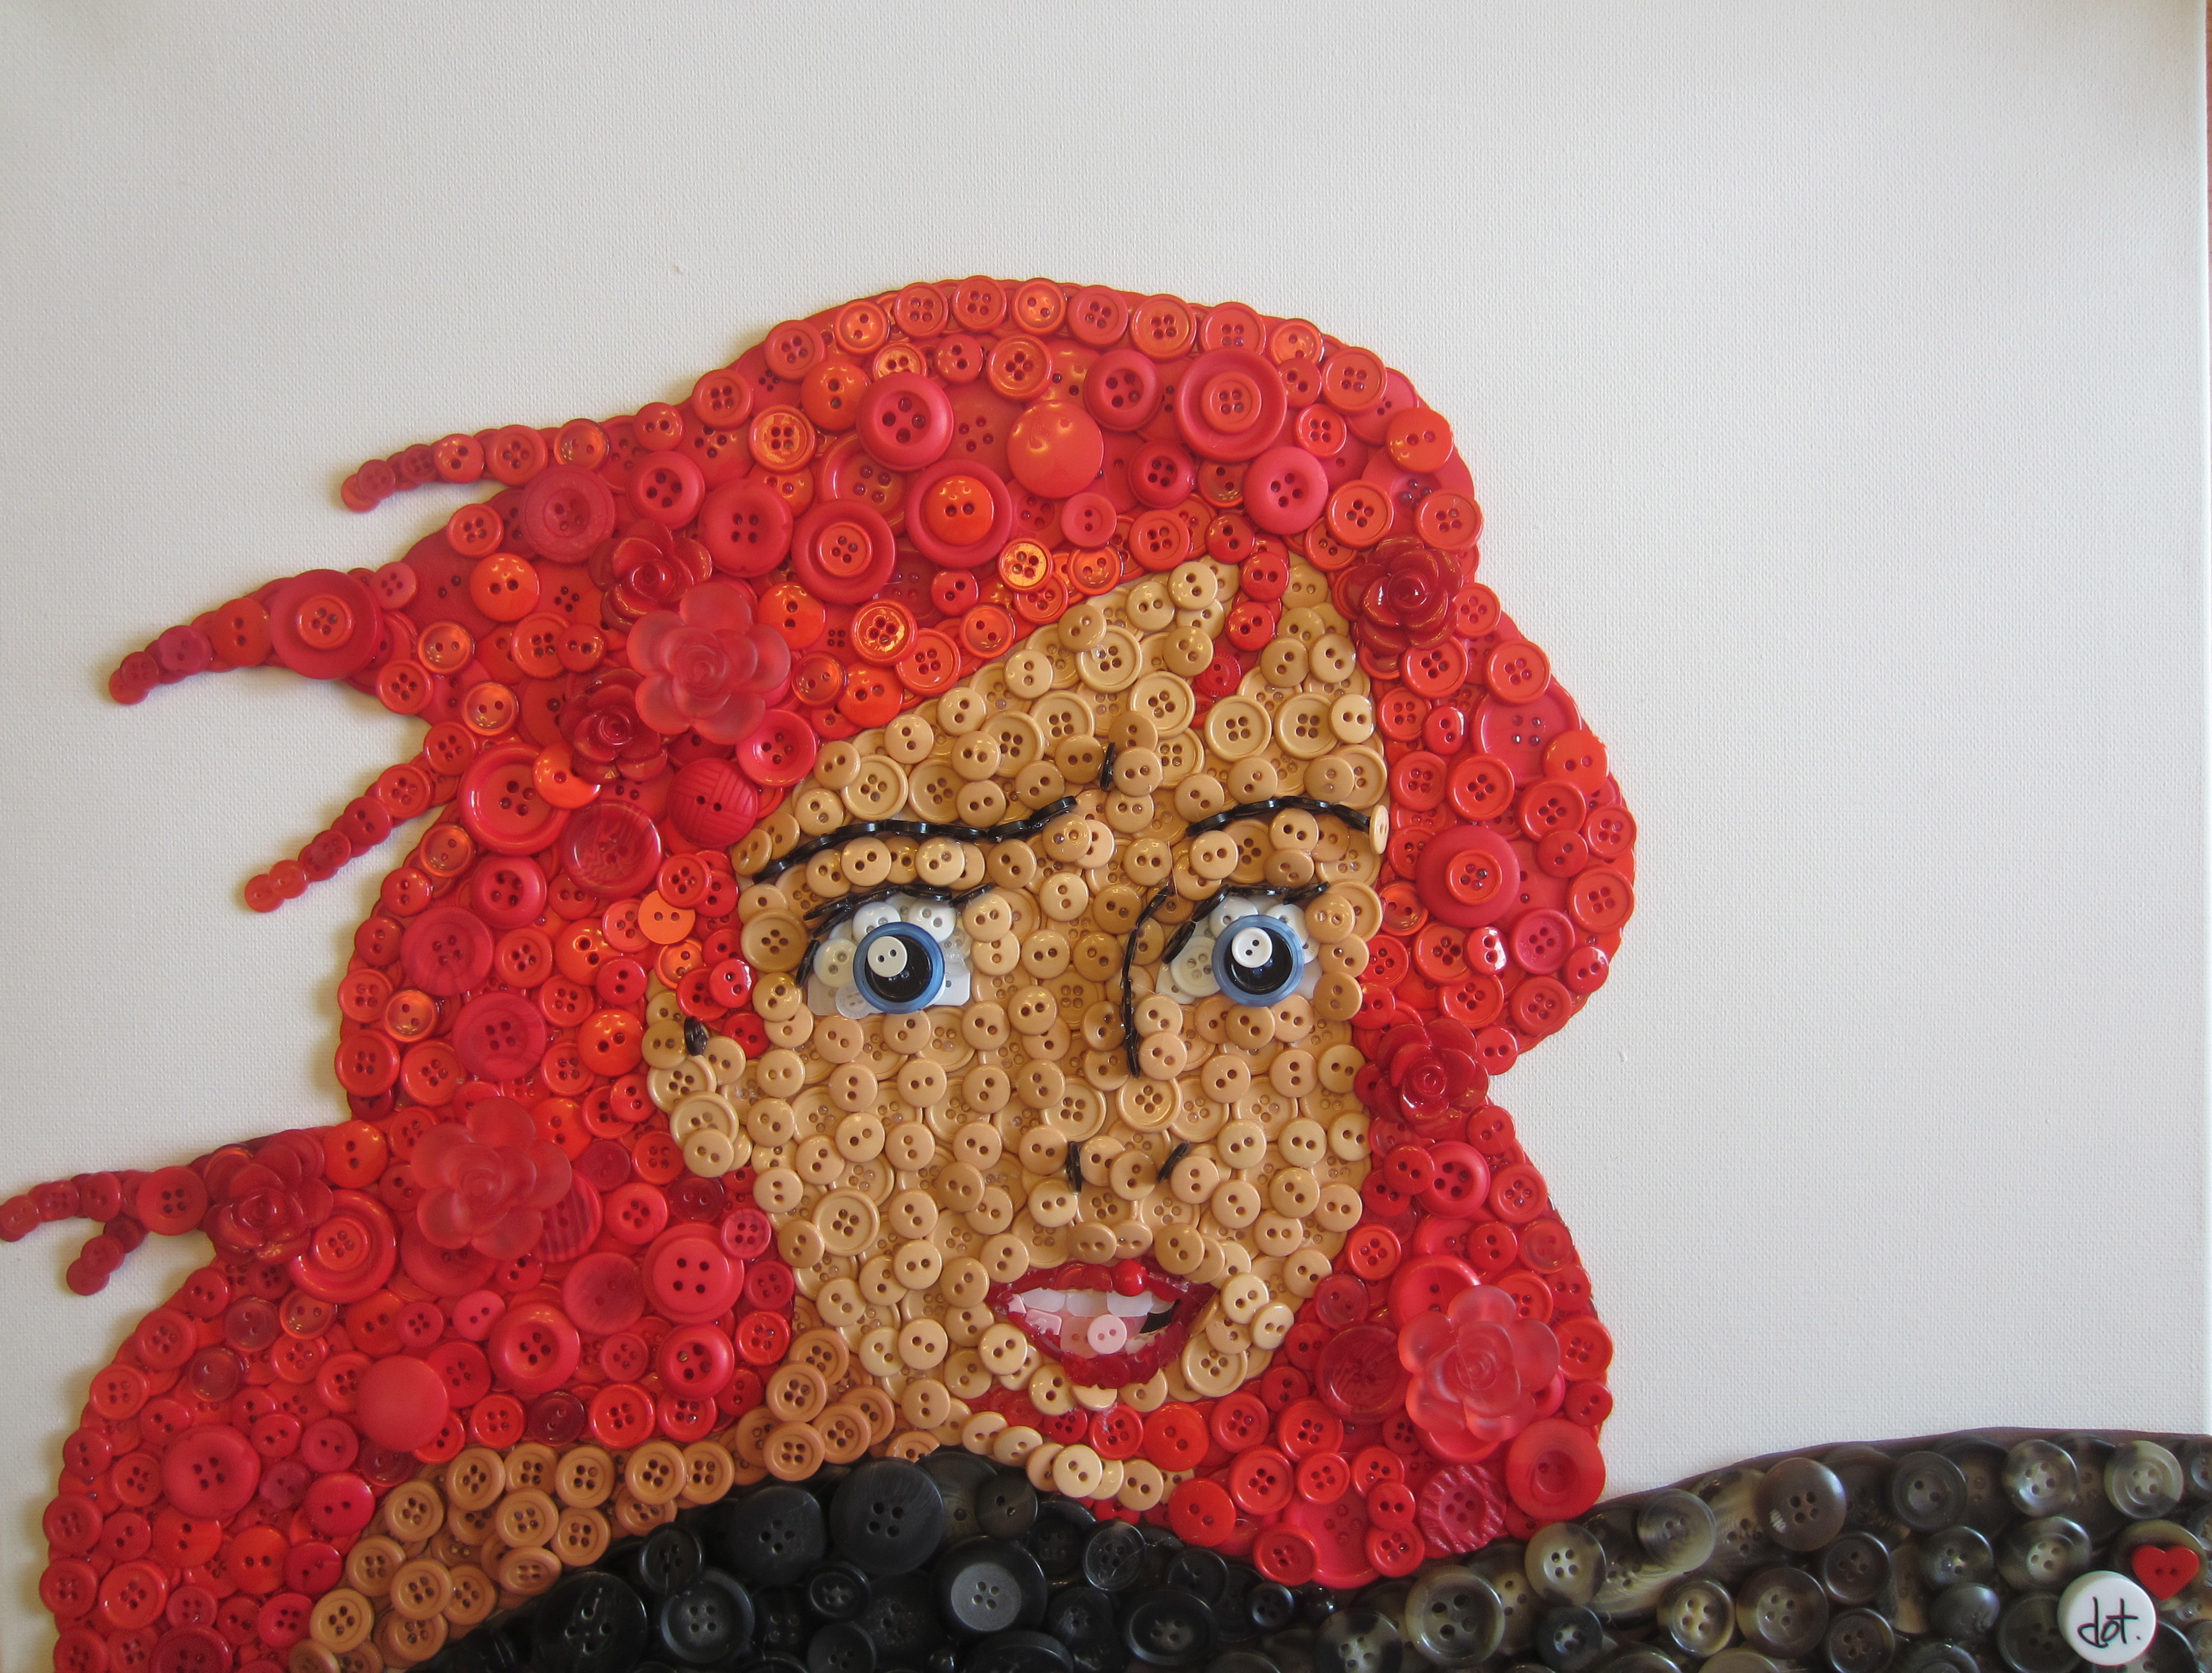
I used hot glue to glue the buttons in place, and I started with the eyes and mouth- I did use a couple of square buttons I had kicking around from my collection to make it easier to get the right shape, but you could definitely stick to the round buttons and get great results!

IMG_0841Since I was using a 16″x20″ canvas, some of the details of the mouth were pretty small, and even with my awesome button selection, I still needed to bust some buttons (hehe) to get it just right. I’ve been learning new tricks with each button picture I create!

*Important notice* Your button art will always go through an ugly phase- where you aren’t sure if it will turn out looking like crud or not- but keep going, don’t get discouraged! You really can’t judge what it is going to look like until it is done 🙂

IMG_0845 I have to say again… this was so much fun. I was in heaven with all these buttons!

IMG_0849Here are some tips on how to get nice, clean lines with your buttons.

Firstly, button along your outline. (You can see how I did that over her shoulder.)

IMG_0852 Then fill in the spaces as best you can, using one layer of buttons. This doesn’t have to be perfect because you will be adding another layer over the spaces soon.) I loved using these big jars of different-sized buttons to do a lot of the filling in.

Let me interject with who I shared my workspace with while I was creating this project:

IMG_0859Once again, I am so thankful to the makers of Play Doh. They have made it a lot more possible for me to be creative at the same time as being a mom!

IMG_0860 After you have filled in one large area, start overlapping your buttons to cover up any spaces. Once again, start around the outline:

IMG_0865Such a clean line! Who knew you could get such a straight line out of circles?!?!

IMG_0861 I wanted to give her hair a bit of interest and texture, and I REALLY wanted to use these gorgeous flower buttons, so I built up a few sections, and inserted the nub of the flower button into that nice little cavern I created to house it.

IMG_0863 IMG_0864 Aren’t those beautiful?!?!? They are more like jewelry than buttons!

IMG_0870Is it weird that I am actually jealous of her hair??

Now- onto the eyebrow and facial details…

IMG_0873 For these skinny, and very important details, I actually turned buttons on their sides like this. Next time I do something like this I think I would cut the buttons in half, and glue the cut side onto the canvas. That way they would protrude less, but even so, it worked out just fine! See, I’m learning as I go too- I haven’t really found any super-detailed button tutorials around, so come along with me, dear buttoners, as we tread on new territory together! Let’s hug. Not that long. Ew, stop.

Aaand back to the ginger.

IMG_0875 Looks a bit freaky, right? Well, don’t you worry your glue-burned fingertips! Wait for it…

IMG_0877 Build up the skin-toned buttons around the side-lying black buttons. This creates some extra support!

IMG_0879 Carry on with the face detail, working in layers, like you did with the hair, until…

IMG_0880 Voila! But it was still missing something…

IMG_0890 There! A signature button with a lil heart ❤

IMG_0896

Done! Wow that sure was an undertaking- but it was really fun and I LOVED exploring the world of these awesome new buttons!!! I don’t think I will ever be the same again!

SO you know you want to try something like this, don’t ya? Like I said before, feel free to check out my more-simple button tutorials, like this elephant one:

Button Elephant - www.bustedbutton.com

Or you can check out an entire album of these crazy critters here. 

IMG_0905

Happy Buttoning, fellow button-lovers!

If you’d like to see more of me and my buttons/other nifty ideas (including interjections of craziness), check out my Facebook Page, follow me on Pinterest, take a look at my Etsy Shop, or come visit me in person- 1629 Ceda… nevermind. Thanks for reading!

~Dot

Posted in Button Art, Craft Tutorials, Showing Off! | Tagged , , , , , , , , , , , , , , | 32 Comments