
I am SO EXCITED to FINALLY reveal my super secret surprise! I have been planning this project for months! Birthing a human got in the way a bit- thanks a lot, Flora, but I finished it! It is the biggest piece I have ever done, and it used up almost 1000 buttons!!! Let me introduce you to…

 Some random fish-chick… who was composed entirely out of BUTTONS! CRAZY HUH?!?!!?! I was so excited when Christie from buttonlovers.com contacted me and asked if I’d be able to create something like this. Naturally, I said ‘heck yes’ even though I didn’t know if I could. Turns out I could. And if you follow these simple 63 steps, you can to!! Hahaa there aren’t quite 63 steps, but this is definitely a time-consuming project, and if you haven’t made a button picture yet, I’d recommend that you check out one of my more simple projects first, such as this cupcake tutorial.
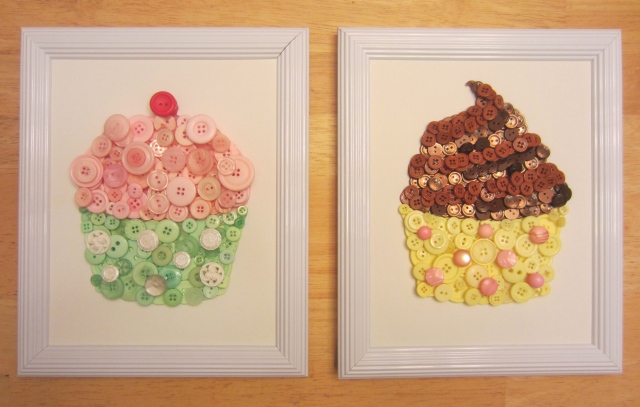 Aren’t those delicious looking? They aren’t delicious. They taste like glue.
Back to the mermaid:
 If you want to make an image of a famous cartoon (which is not my own design, I am purely a cartoon smuggler, all rights reserved for not me blah blah I don’t know what you are supposed to say yet, but I’m sure I will figure it out on the other side of a lofty law suit, just kidding- hopefully), you are going to need to transfer the image to your canvas, van, or whatever surface you want to button. In order to do the transfer, I printed out an image and a graph.

I drew the graph over top of the image like so, and then I drew a larger graph (with the same amount of squares) onto a large piece of paper, which was the same size as the canvas I would be using. For a more detailed tutorial on how to use this graph method click here. This might look complicated but with a bit of patience anyone can do it!
 Next, I slowly began to draw the details of Miss Mermaid onto my large graph, making sure to keep things looking similar. I started with the face details, because those are the most important thing to get right when you are wanting your end product to resemble a certain character, rather than a cheap Dollar Store knock-off. You know what I mean- dolls like those ‘Disneee Princess Girlies’ you can buy for a dollar that are even LESS anatomically correct than their $20 role models.


 There! When you have finished that step, you have to transfer the image onto your canvas. I learned a trick that helps with this step when I was a young one, and I will share it with you. This may not be the fanciest method, but it works (and it’s free!):
 Hold your image up to a window, flip it backwards, and scribble pencil over the entire outline like this.
 CREEPY! Let’s just call this homemade carbon paper!
 Next, place the template carbon-side down on your canvas, and begin to trace over the outlines with a pencil.


If you press hard enough, the image transfers nicely onto the canvas!


You might have to go over it again lightly with a pencil, but you get the idea.
Now, let’s add some color to this tutorial- it is starting to get gloomy!

 I used acrylic paint to quickly cover this gal in the proper colors. This step keeps any white from shining through your button holes, and it helps guide you along the straight and narrow button way. Whatever that means- you know what I mean. Post-partum brain hiccup.
NOW… the best. part. everrrrr.
 BUTTONS
But not just any buttons. Like I said before, I teamed up with Buttonlovers.com to create this masterpiece, and they provided the buttons! (Ummm THIS sounds like the best partnership EVER!! Be very, very excited.) These buttons are from the ‘Favorite Findings’ collection by Blumenthal Lansing. You can buy them at Joann.com. (At the time I am writing this- I see they are on sale for 50% off! Snatch em up, buttoners!)
These buttons are amazing. All buttons are amazing, but these ones are perfect for this kind of craft for a few reasons:
1. They have the most beautiful and specific color choices ever! I have had an impossible time finding skin-toned buttons. Because, let’s be honest, why would anyone try to find skin-toned buttons? Unless “Flesh-toned buttons for my creepy sweater-vest” has become a popular Google search item. Which it hasn’t. Although with hipsters these days, it probably has. Actually, let me just confirm that… Nope. I guess I beat them to it.
2. They are a lot flatter than most of my buttons from other random sources. This is a really important feature when it comes to making button mosaics! It is way easier to get fine details and straight lines without a bunch of bulk if your buttons are nice and flat.
3. They are really reasonably priced! You get so many buttons in one pack! They really went a long way and I had plenty left over for future endeavors!
Okay, now that I am done raving about my fave buttons, let’s get to work!
 I used hot glue to glue the buttons in place, and I started with the eyes and mouth- I did use a couple of square buttons I had kicking around from my collection to make it easier to get the right shape, but you could definitely stick to the round buttons and get great results!
 Since I was using a 16″x20″ canvas, some of the details of the mouth were pretty small, and even with my awesome button selection, I still needed to bust some buttons (hehe) to get it just right. I’ve been learning new tricks with each button picture I create!
*Important notice* Your button art will always go through an ugly phase- where you aren’t sure if it will turn out looking like crud or not- but keep going, don’t get discouraged! You really can’t judge what it is going to look like until it is done 🙂
 I have to say again… this was so much fun. I was in heaven with all these buttons!
 Here are some tips on how to get nice, clean lines with your buttons.
Firstly, button along your outline. (You can see how I did that over her shoulder.)
 Then fill in the spaces as best you can, using one layer of buttons. This doesn’t have to be perfect because you will be adding another layer over the spaces soon.) I loved using these big jars of different-sized buttons to do a lot of the filling in.
Let me interject with who I shared my workspace with while I was creating this project:
 Once again, I am so thankful to the makers of Play Doh. They have made it a lot more possible for me to be creative at the same time as being a mom!
 After you have filled in one large area, start overlapping your buttons to cover up any spaces. Once again, start around the outline:
 Such a clean line! Who knew you could get such a straight line out of circles?!?!
 I wanted to give her hair a bit of interest and texture, and I REALLY wanted to use these gorgeous flower buttons, so I built up a few sections, and inserted the nub of the flower button into that nice little cavern I created to house it.

 Aren’t those beautiful?!?!? They are more like jewelry than buttons!
 Is it weird that I am actually jealous of her hair??
Now- onto the eyebrow and facial details…
 For these skinny, and very important details, I actually turned buttons on their sides like this. Next time I do something like this I think I would cut the buttons in half, and glue the cut side onto the canvas. That way they would protrude less, but even so, it worked out just fine! See, I’m learning as I go too- I haven’t really found any super-detailed button tutorials around, so come along with me, dear buttoners, as we tread on new territory together! Let’s hug. Not that long. Ew, stop.
Aaand back to the ginger.
 Looks a bit freaky, right? Well, don’t you worry your glue-burned fingertips! Wait for it…
 Build up the skin-toned buttons around the side-lying black buttons. This creates some extra support!
 Carry on with the face detail, working in layers, like you did with the hair, until…
 Voila! But it was still missing something…
 There! A signature button with a lil heart ❤

Done! Wow that sure was an undertaking- but it was really fun and I LOVED exploring the world of these awesome new buttons!!! I don’t think I will ever be the same again!
SO you know you want to try something like this, don’t ya? Like I said before, feel free to check out my more-simple button tutorials, like this elephant one:

Or you can check out an entire album of these crazy critters here.

Happy Buttoning, fellow button-lovers!
If you’d like to see more of me and my buttons/other nifty ideas (including interjections of craziness), check out my Facebook Page, follow me on Pinterest, take a look at my Etsy Shop, or come visit me in person- 1629 Ceda… nevermind. Thanks for reading!
~Dot


Uhhh dot? Why? Why is this so amazing!! I am seriously impressed!
Not sure if my comment worked that I just posted. I just want to make sure you know that I think this is… Totally… Amazing! I am impressed!!
thanks carmen!
You- my dear – are an inspiration! The fish-chick is AMAZING!
aw thanks! look whos talkin missy- yer one of my fave creators!
Absolutely Stunning!! Great Work Dot!! Im inspired!! ❤
This is awesome thanks for sharing the idea =) Shes my favorite princess!
Not sure if my other post went through however i want to say ty for sharing this wonderful idea i LOVE it shes awesome. =) and my favorite princess!
Just beautiful. Love the buttons. U are very talented too. Enjoy that baby!
Sent from my iPhone
It would be really neat to see a whole “princess” line of button pictures. Belle is my favorite, so that’s a great place to start. Just saying 😉
gah! I wish I had your talent! I look forward to your next creation
Muchas Felicidades, me encanta tu trabajo, soy de Monterrey, Mexico, saludos, tu amiga Sylvia Morales
DOT! Best tutorial ever. You are the best. OK, button newbie- best place for cheap buttons for say, the elephant or cupcake?
Thanks kali! I’m so excited that you’re going to try this project! Sometimes the big green/yellow dollar stores have button bags (even sorted!) Walmart has some big bags of assorted buttons too. My fave place to get em is thriftstores, and the link I shared to the specific button shop online has really reasonably priced buttons, that work perfectly for this kind of project! have fun!
Wow! This is spectacular! I can honestly say I’ve never seen anything like this before! I have a lot of buttons my sis gave me and now thanks to you I have an idea of what can be done with them! ^~^
This is buttonriffic!! Man alive! I love love love your work! Inspiring!
PARABÉNS!!!Estou encantada!
BORING!!
Hahahah!
Hi there! I’m a fellow button art crafter:) Your Ariel looks amazing. I never would have thought to make the buttons stand on end like you did:) You can check out some of my projects here: http://unicorncrossing.wordpress.com/2013/04/10/the-magic-of-buttons/
I have been selling some online through various Facebook sites in my area, and also did my first craft fair last month:)
Happy crafting:)
Hi Kim! You look like a button master! Im glad you are getting out there!!! Love your peacock! 🙂
This is just awesome! Must have taken so much patience! Love it! 🙂
Pingback: Button Fire Truck | Busted Button
You are absolutely INCREDI-MAZING!! Seriously you are talented in the most miraculous way!!
Pingback: Button Christmas Tree Tutorial | Busted Button
WOW! WOW! That Mermaid is absolutely fabulous! I am JUST starting in button art and googled for some ideas and help. Came upon your page and was blown away. I had no idea something like this was possible. I’ve got ya bookmarked LOL!
Oh gosh! You’re nice! Please share what you create! Find me on FB, I’m much more active there 🙂
I’m following you on FB now 🙂 Thanks for letting me know you are there. Loved the Christmas videos and browsing the rest of your Timeline 🙂 I’ve really not done much of anything but a few ‘balloon bowls’. So far have done 5 and the last one looks decent – can’t say much for the first 4. Got really ambitious and made a balloon/button snowman. Still trying to rescue it LOL I had crocheted for 45+ years and developed an allergy a few years ago. It started as a rash which got continually worse and then turned to welts. When my tongue started ‘feeling funny’ I talked with a nurse who said I’m probably inhaling the fibers of the yarn and if I didn’t get all the yarn out of the house I could develop serious respiratory problems. That led me to searching for something else I could do to fill my time. And since I’m retired that is a LOT of time 🙂 Anyway, long story short I shipped about $2000 worth of yarn to my daughter in Louisiana and started searching. First was puzzles, nah… not that. Then painting trinket boxes. Got ok at that. Then larger boxes and on to button art etc etc. Joined Pinterest to get ideas and saw your Mermaid and here we are :)….. I’m on FB Barb Boggs and have a heart shaped red box with white flowers as my pic if you care to look at any of that stuff. Not much to see, as I said but I’m progressing….. Thanks for replying to my comment. You deserve recognition, your work is beautiful!! Barb On 12/24/2013 8:38 PM, Busted Butt
Pingback: 12 Button Art Tutorials | Busted Button
Pingback: 50+ Creative and Fun Button Craft Ideas - Artsy Craftsy Mom
Pingback: Поделки из пуговиц своими руками: картина по мотивам мультфильма «Русалочка» — http://julialand.ru/
Pingback: Nursery Wall Art Ideas Made With Button - Kids Art & Craft