Blending Tutorial (Butterflied Button Branch)

So, it turns out I won that button contest! I am in such a good mood that I’m going to devote my morning to all you lovely people and teach you something good 😉

Today I’m going to give you a detailed tutorial on how to make a pretty nifty background and a prettttty nifty button tree!

butterfly

Even if you have never painted before you should check this out and give it a whirl!! Practice makes perfect, but with this type of painting, imperfection is still awesome.

For this painting i used two 11×14″ canvi. I’m a big fan of rushing, and making as little mess as possible because I don’t clean so I can have more time to do the important things in life. So I’ve been starting my paintings by blobbing the acrylic paint right on the canvas like this. Feel free to use a plate or palate if your fancy. (I’d recommend using a plate if you don’t think you can complete the background quickly before the paint starts drying.) Pick a spot to be a focal light point and blob some white paint there. Put the darkest color you are using on the other side.

Now, I will share an analogy. We want these two colors to become one, if you know what I mean 😉 They are separated by a great expanse of open sea, and we need to push them together (and to the sides of the canvas). It’s like a couple who met online and are slowly becoming closer…

until at last they meet. As you are painting, remember to bring the paint down the sides of the canvas too.

Once the canvas is covered in paint, just take your paintbrush and go around and around the light spot- going outward to the ends of the canvas. If you see a spot you don’t like, add more paint and blend from there. Try to keep the light spot light- you might need to add some extra white paint as you are going.

Look at those two beauties. Lets turn em the other way and paint the beginning of a tree, shall we?

That’s better. Start with a really simple tree- we will add more branches later. Once again, don’t forget to paint the sides of the canvas.

Here is a close-up of some of my quick branches. They need some love.

To make the branches more crisp and clean, go over the first attempt with some slightly watered-down paint. Don’t forget to keep the ends of the branches nice and thin…some of these trees I see online are lookin prettttty stumpy!

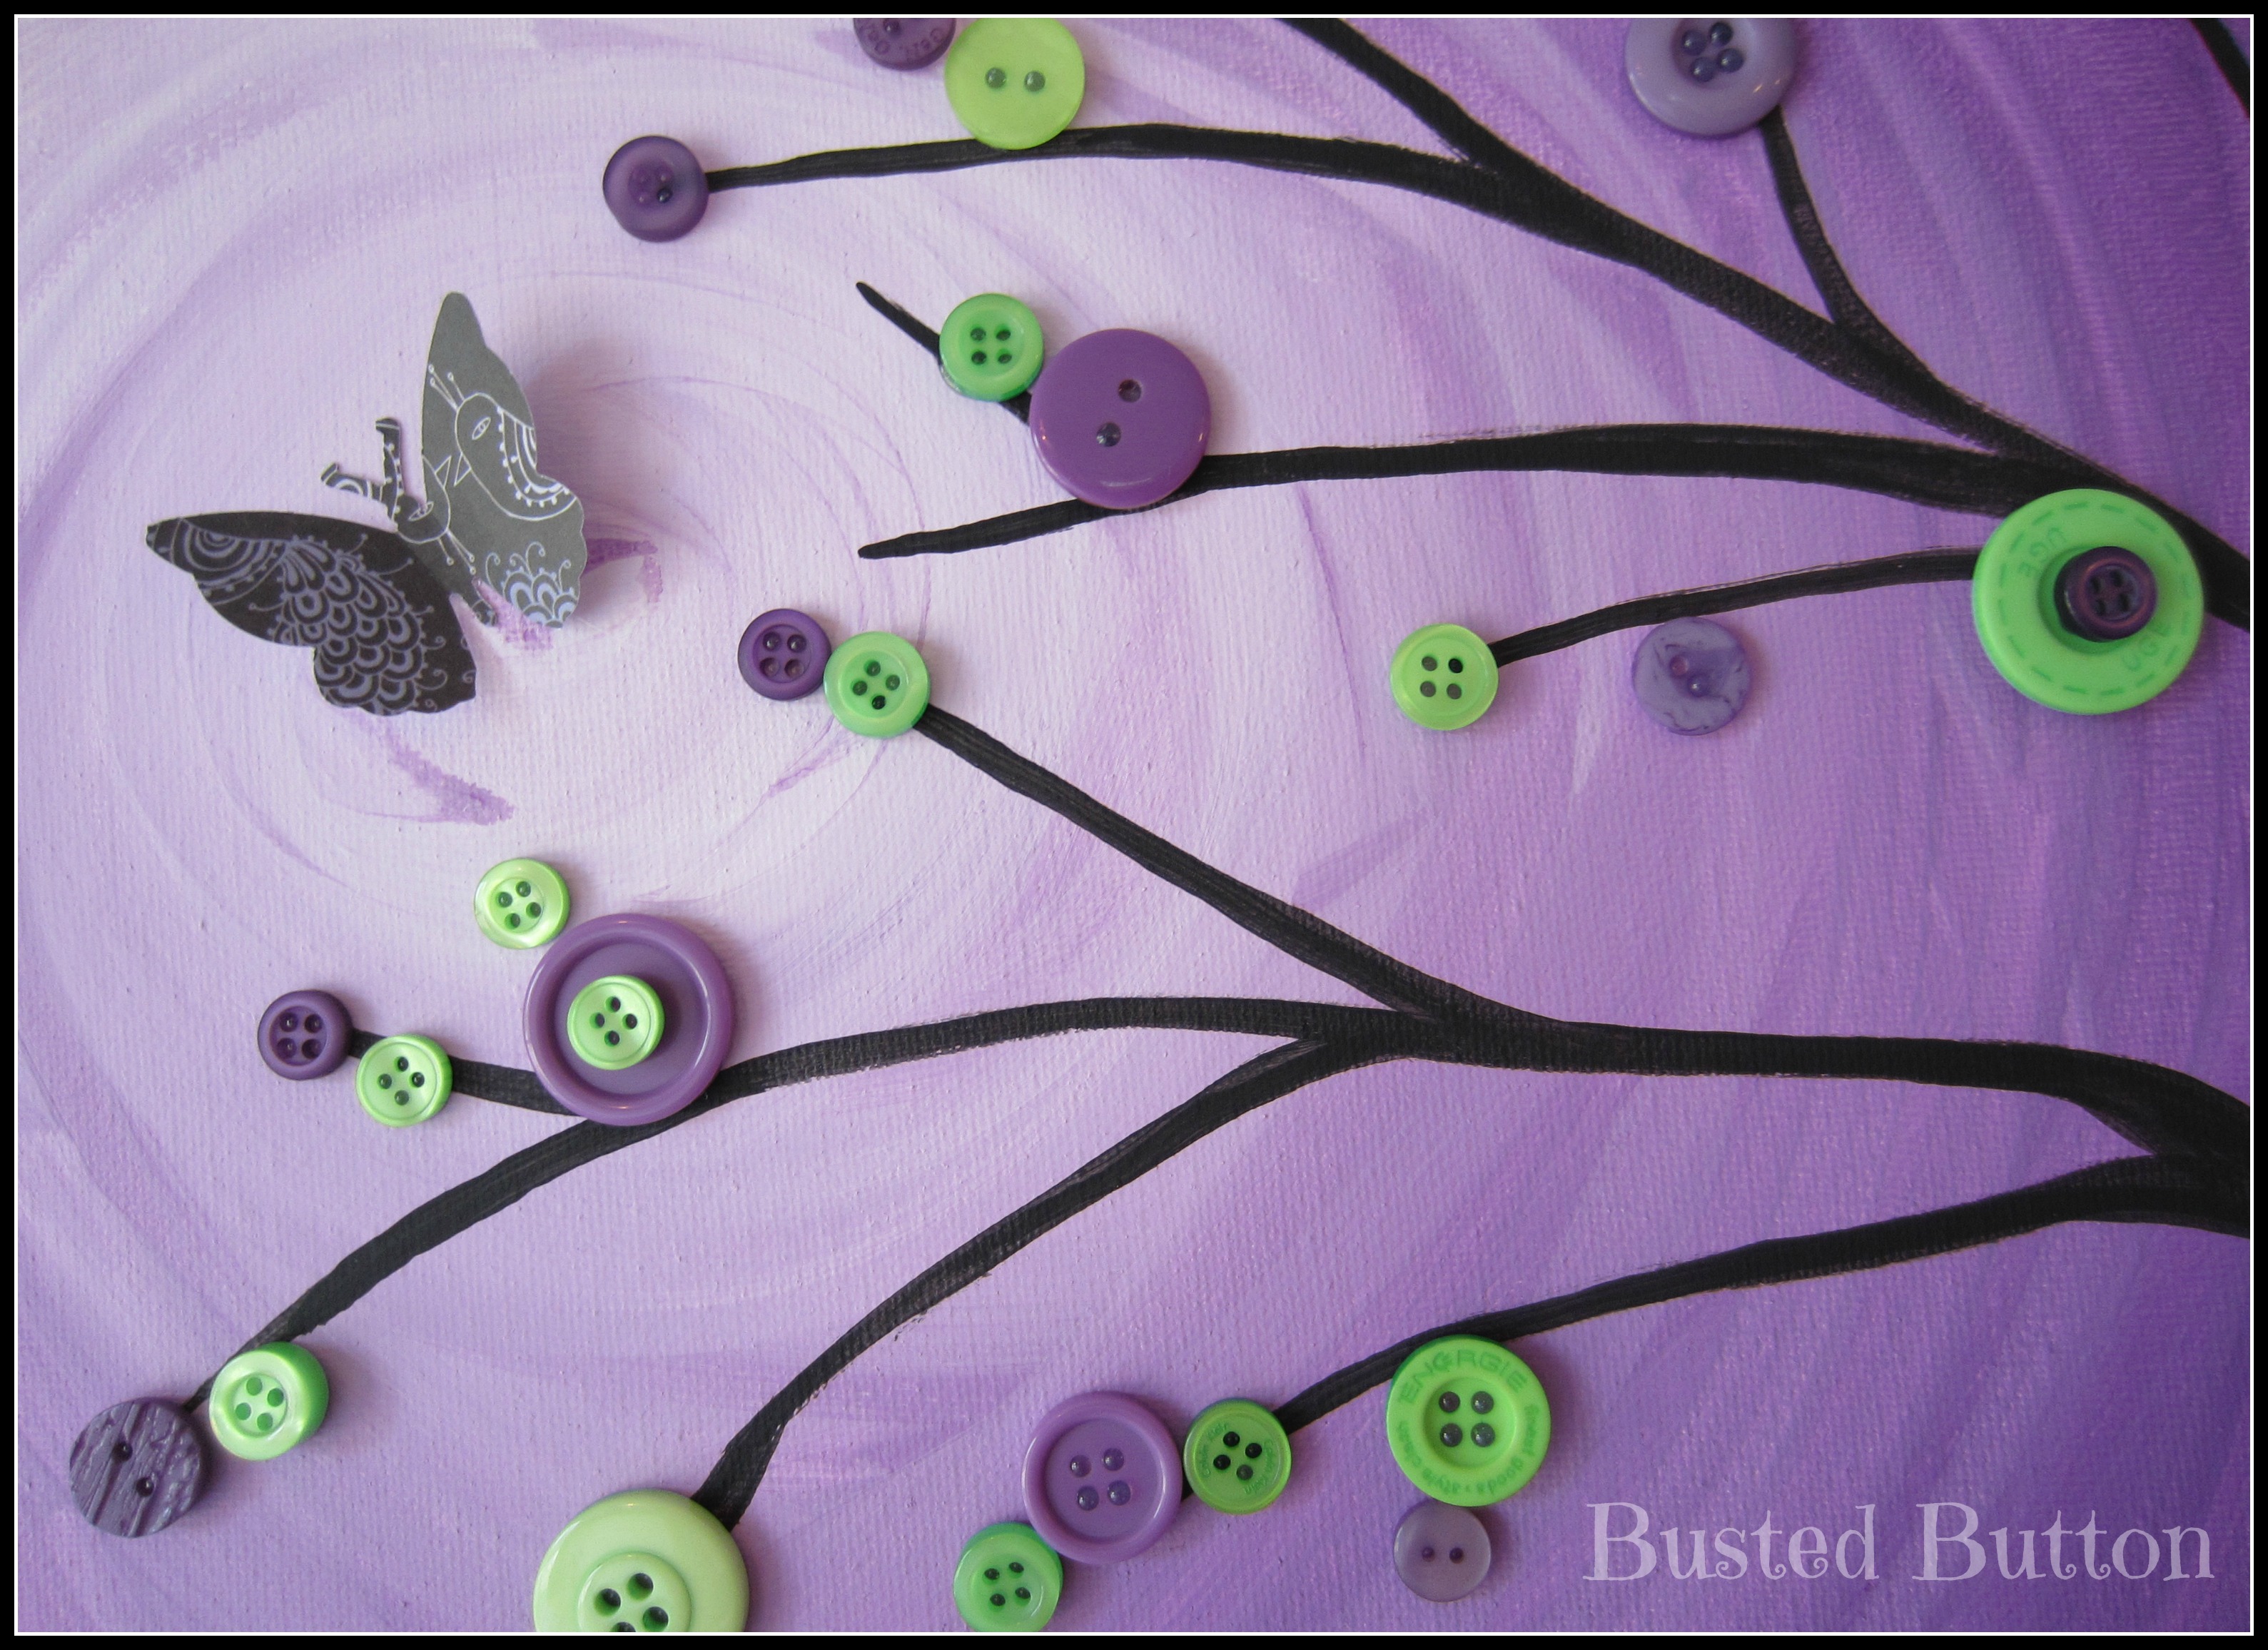
Now that the tree is done, we can get onto some fun details!

For this particular project, I punched some butterflies out of matching card stock, then folded their wings up to give them a 3-D look.

You can cut out a bird or even a nasty old sloth, it’s up to you- just place em in a perfect little spot, and they’ll be happy. I used hot glue here, but if I were using a flat cutout, I’d recommend spreading tacky glue all over the back.

And now for the fun part!!!  🙂

Buttons!!!!!

Happiness is a warm glue gun. It is so true.

And there it is!

I made this for a family who is sometimes apart so they could each have one. It looks pretty cool together too. There are so many ways you can get creative with these- use a few canvases, or just one, or some super skinny ones, or try it on a lampshade  or ANYTHING! I love doing a nifty blended background and then painting any kind of silhouette over top- It is a really basic and pretty quick style that is still eye-catching and impressive! Give it a try!

Some tips:

-If you have a hard time drawing a silhouette of what you want, check out google images for some inspiration- you could even trace something.

-If you are just beginning, don’t worry about using cheap craft acrylics from walmart or a craft store- they work just fine.

Happy buttonflying 🙂

*UPDATE! I am having an auction to benefit a great cause- Do you like this version of the button tree?

Check out the auction HERE. It ends on June 27th so hurry!

Posted in Button Art, Craft Tutorials, Painting Tutorials, Showing Off! | Tagged , , , , , , , , , , , | 32 Comments

Button Tree Lampshade

A few months ago, some friendos gave me three of their old lamps, knowing that I would be able to turn those nothings into somethings. And that I did! 😉

I am planning on doing a full tutorial on each of the three lamps before and after, but, as usual, I couldn’t wait to show you this one!

Here is revamped lamp(ed) number one:

LOOKS FAMILIAR DOESN’T IT? Wellll thats cuz it matches the first button tree painting I posted right here.

I’ll give you a sooper quick how-to cuz I have a few minutes. Actually I don’t but I’m procrastinating cleaning. I hate cleaning. In fact, this blog and the projects on it are actually just one huge excuse to procrastinate life’s mundane “necessary” stuff. ANYWAYS…

1- Get a free boring lamp from the Cris and Belinda. I’m sure they have tons- just ask em.

2- Paint the base and any random phalanges that are hanging around… such as the nob up top and the pully thingy…wow I am the queen of words right now (no.)

3- Paint the shade with the background color of your choice- if your lampshade is porous this might take up to 4 coats.

4- Paint a pretty lil branch.

5- Button it up with a glue gun whilst listening to this.

And there you have it! Button tree painting on a lampshade! I have many more ideas in store…just you wait! Now I have to go get the finch out of the oven. I’m serious. Interesting tutorial on THAT coming eventually 😉 Who knew taxidermy could be so fun?

Posted in Button Art, Craft Tutorials, Showing Off! | Tagged , , , , , , , , | 4 Comments

Button Bracelet

I GOT MY NEW COMPUTERRRRR!!!!! 😀

You know what this means? No more fits of violent rage whilst waiting for an ancient laptop to upload photos! Tutorial time!

Since this is a momentous occasion, we must celebrate with the best medium on the face of the planet:

BUTTONS!!! Oh my precious, lovely buttons :’) Let’s make a beautiful button bracelet. Blalliteration.

Pick out buttons that are a similar size and the recipient’s fave color… which in this case is purple.

I made this for a friend of mine who also has an autistic kiddo. Sometimes we need jewelry to cope. Heh. Heh.

This bracelet was made with stretchy elastic string. I got this from Walmart for a few dollars-, but you can get it at any craft store. Just make sure it doesn’t break when you pull it… so skip the dollar store on this one, folks.

Use a lil clippy to keep the buttons from falling off the string.

You can definitely haphazardly juts string the buttons on and still get a pretty awesome bracelet, but I liked the look of it being a bit more organized. I kind of stacked them like so as I went along in a ‘down up, down up’ type of manner.

If you want to throw on a couple of nubby buttons (AKA the kind with a nub rather than holes… can’t really think of a better word to use hahah) then just slide it on through. I used two nubbers for this bracelet, but I think one would be a perfect lil focal point.

Now you have to figure out how many buttons you need to wrap around your friend’s wrist. You may have to subversively attack them with a measuring tape when they aren’t looking. They will most likely be shocked, at which point you can pull out the old “Oh, I’m just really self- conscious about the circumference of my wrists and I want a good goal size…” excuse. That one comes in handy ALL the time. Trust me.  😉

Once you have strung on the right amount of buttons, tie it off, using a series of square knots… check out this video if you want to hear a random sci-fi sounding intro and a strange accent see how it’s done.

Fast forward to the 2 minute mark. I totally didn’t do the glue part. Oops… don’t forget to do that… unless you want a BUSTED button bracelet… hahhahahaha mom joke, sorry!

And there it is- how cute?!?!?! Easy, quick and lovely- just the way I like my creative endeavors to be! This divine bracelet is being modeled by a creepy brass clown who jumped into my purse when I was  at a thrift store. I love that lil creeper. Look at him! You can tell he’s so untrustworthy watching over my buttons, but something about that face/stance draws me, and I just give in.

Here is another bracelet I made using fire colors! It’s just chillin on a rabbit pelt. No big deal. The possiblities and color combos are endless! As I’m typing this I just got inspired to use another one of those gold sand dollar buttons like I used on the purple bracelet to make a beach-themed one! Ooooh with colors of the ocean and sand!

Hope you have fun creating your own special bracelet!

Thanks fer reading- happppy buttoning 😉

Posted in Jewelry Tutorials | Tagged , , , , , , , , , , , , | 3 Comments